Berry-and-Blue Birthday 3D Decoupage Quilt Card

A quick decoupage birthday card I created before bedtime.

Last night I attempted to go to bed a little earlier, but I still had some time to kill before actually turning in (the brain was still restless, looking for something to amuse itself with).

I had wandered into the craft room for something else and ended up stumbling upon this Log Cabin quilt paper remnant on the desk while putting some things away. And oddly enough, there was matching SU designer series paper and cardstock right beside it in a heap intended for quilt cards for the local gift shop. Not for the particular card they ended up creating, but at least they’re being used, right?

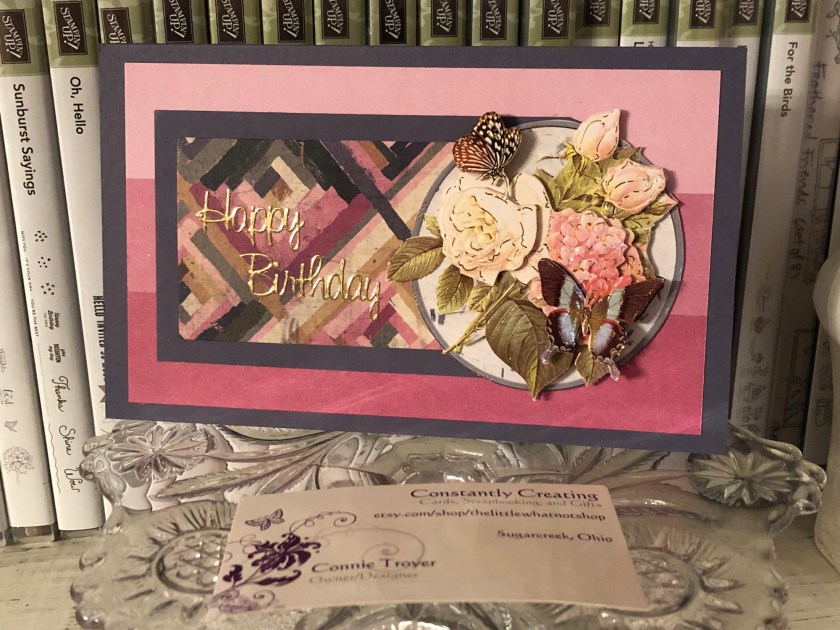
I’ve also started keeping a new organizational system for pieces I can grab and adhere to cards quickly, trying to speed up my creative process. So before I stacked any layers together, I turned to my “Card Toppers to Use” drawer and this 3D flowered circle was the first one I pulled out. And it even mostly matches. 🙂 Just had to decide how to utilize the card front’s space.

This was the arrangement that seemed most pleasing to me – and I even ended up using a very retired color of SU cardstock for the base and middle layer as a plus! (No idea what color it is…it was an In-Color back 10-15 years ago! I haven’t researched it.)

The 3D pieces are some of my favorite ones to make. It’s so relaxing to sit there and fiddle while talking or listening to something else. And they’re pretty impressive up close.

I had a pack of gold Dazzles sentiments on my desk in the heap as well, so I cut apart a “Happy Birthday” one to make it fit better, and it went on easily. I refrained from adding any Wink of Stella or bling bits, as the card front is busy enough already.

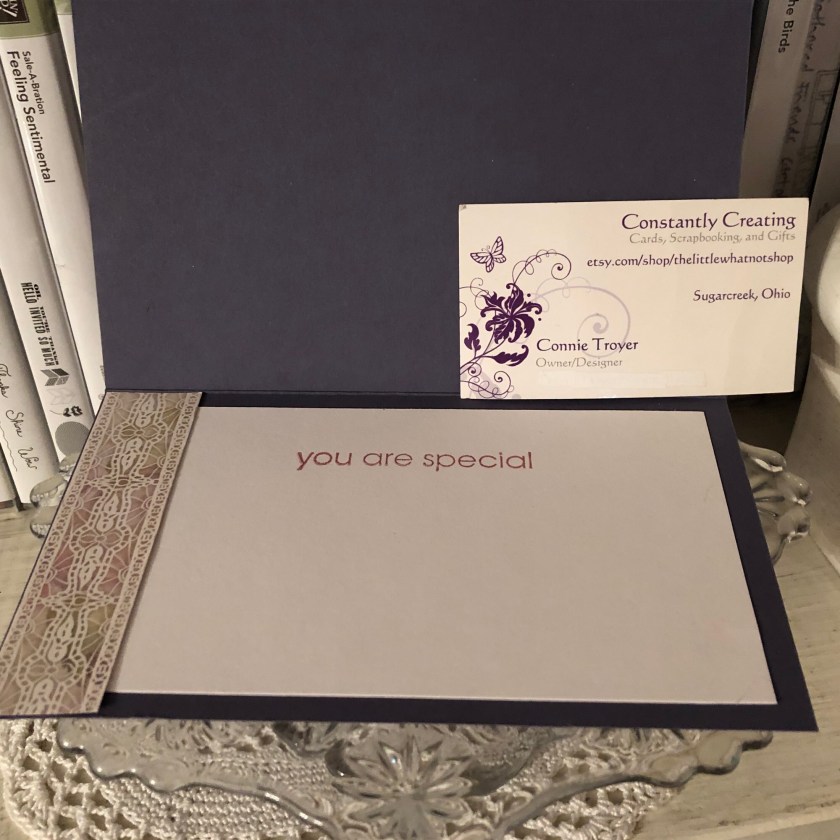
The inside of the card is simply a scrap of border paper from a UK magazine (love those!) and a sentiment from a Studio 112 clear stamp set on top of a remnant of white. I used Stampin’ Up’s Sweet Sugarplum ink for the saying.

This card feels supremely satisfying to me. It didn’t take me long at all to create it from start to finish – maybe 20-30 minutes? – and even though I was just throwing bits of random things together, it turned out to be something pretty. I think that method is actually my favorite way of creating and also turns out my most creative works, making something out of nothing missing any semblance of sense at the start. 🙂

I’m not sure who is going to end up with this card, so it’s currently for sale if someone wants it. It may end up at the gift shop otherwise, if they like it enough. 🙂

Dreaming of Butterflies

I know it’s been awhile since I’ve written. Still trying to get into a rhythm of making, photoing, and then posting. Thanks to technology and a busy schedule, there is usually a breakdown before the “posting” part. I’m working on it. 

It seems the thing I do best is blog when I’ve woken up in the middle of the night. But I’m often most creative at night or when I should be sleeping, so I suppose it all works out. Tonight was yet another one of those. Three hours of sleep after three hours of editing and, boom, I’m awake again. So I got up and made a card. (And now I’m posting because the picture is still on my phone.)

I had some free time last week, so I took a few minutes to do some rearranging and organizing in my craft room. My poor pegboard spinner is someday going to come crashing down from all the weight hanging off it. To alleviate a bit of its suffering, I decided to move my dry decoupage and peel-offs to a new three-drawer Sterilite storage container I got this summer. And, as usual, when I start organizing stuff, I find things to play with and get all distracted. I was good about setting them aside this time, so they were waiting for me on my desk when I woke up early and wandered in. 

What I found then were some strangely colored butterflies, a page of white grid peel-offs, and a gold sheet of beautiful butterfly and flower peel-offs from StickerKing. I have way too many butterflies, so I’m always looking for a way to use them up. On my desk, unrelated to this card forming in my head, was a piece of orange, flowery paper that I hadn’t put away. This morning they all fell into the same card, which turned out about halfway like I’d imagined. Designs always morph into something I haven’t intended. 

I pulled the light green color in the butterflies into my card base by using Stampin’ Up’s Certainly Celery cardstock (very retired). The orange flowery (maybe K and Co?) paper decided to become the background mat. I positioned three of the white grid peel-offs on top of it because they had reminded me of latticework initially. 

At this point everything was glued down. And then I couldn’t decide where to put the butterflies or how many to use. I thought I’d had it figured out, but then I didn’t like it. The three big ones felt too crowded and overwhelming on the paper (the card is only an A2 – 4.25 x 5.5), but we’re generally supposed to use the “rule of three” in triangles when we create so it’s more pleasing to the eye. I turned the base and the attached paper every other direction looking for something that felt right. I needed a place to put a sentiment too. I ended up tearing off the orange paper and grids (gently) so I could flip the direction of the card opening. Then I placed the punched sentiment piece onto the third grid and planned to add a smaller gold butterfly above it to use that “rule of three” technique. 

I really didn’t have a sentiment in mind when I first started mentally creating this card, but I have a custom order for thank-you cards to do soon, so I figured if she liked this one, I could add it to her pile; otherwise it’ll go on the Etsy shop unless I need to use it sooner than that. 🙂

I added a tiny rhinestone gem underneath the words “Thank You” because I didn’t like the white space. The rhinestone is from CTMH (“Bitty Sparkles”) and they are probably my all-time favorite gem. They’re just so delicate and pretty. The “Thank You” stamp is from the “What I Love” Sale-a-bration set from Stampin’ Up (now retired). And I used Certainly Celery ink that matched the card base. 

By the time I got to the inside, I was getting tired and lazy, so I didn’t feel like hunting down and cutting up a whole sheet of paper. I found a white scrap on my desk that was almost big enough to become the part you write your message on. Coupled with the leftover orange flowery paper from the front (which I’d intended for a different card front), the white scrap was now the perfect size. Then another sentiment popped into my head – “You raise kindness to an art” from SU’s “Vintage Vogue” set (retired) – and it didn’t take long to find it and stamp it on the inside. Certainly Celery ink again. Another gold butterfly on the inside and an identifying stamp on the back completed the card. 

Now that I’ve been creative AND blogged, it’s time to sleep again. Hope you like this little card offering for today. It’s just something quirky out of my own brain. Have a wonderful day!
Connie

Pat's Blog Site

One place to fit it all!

Stamp Dabbles

Donna Leonard | Independent Stampin’ Up! Demonstrator | Huntsville, AL

Niya Scrap

Démonstratrice indépendante Stampin' Up!®

From Pole to Pole

Adventures in the Land of the Pierogi

Stampin' in the Meadows

Akiko Sudano - Independent Stampin' Up! Demonstrator Downingtown, PA

Creative Stamping Designs

Karen Ksenzakovic, Independent Stampin' Up! Demonstrator in Somerville, NJ Let's make some cards!!

Stamp it up with Jaimie

Helping you find a stress free creative outlet through paper crafting.

Stamp With Amy K

Amy Koenders, Independent Stampin' Up! Demonstrator in Mendham, New Jersey...Let's make some cards!

The Daily Post

The Art and Craft of Blogging

WordPress.com News

The latest news on WordPress.com and the WordPress community.

%d bloggers like this: