“Cherish Every Moment” Card Using Stampin’ Up’s Forever Blossoms Stamp Set and Perennial Essence DSP and Vellum

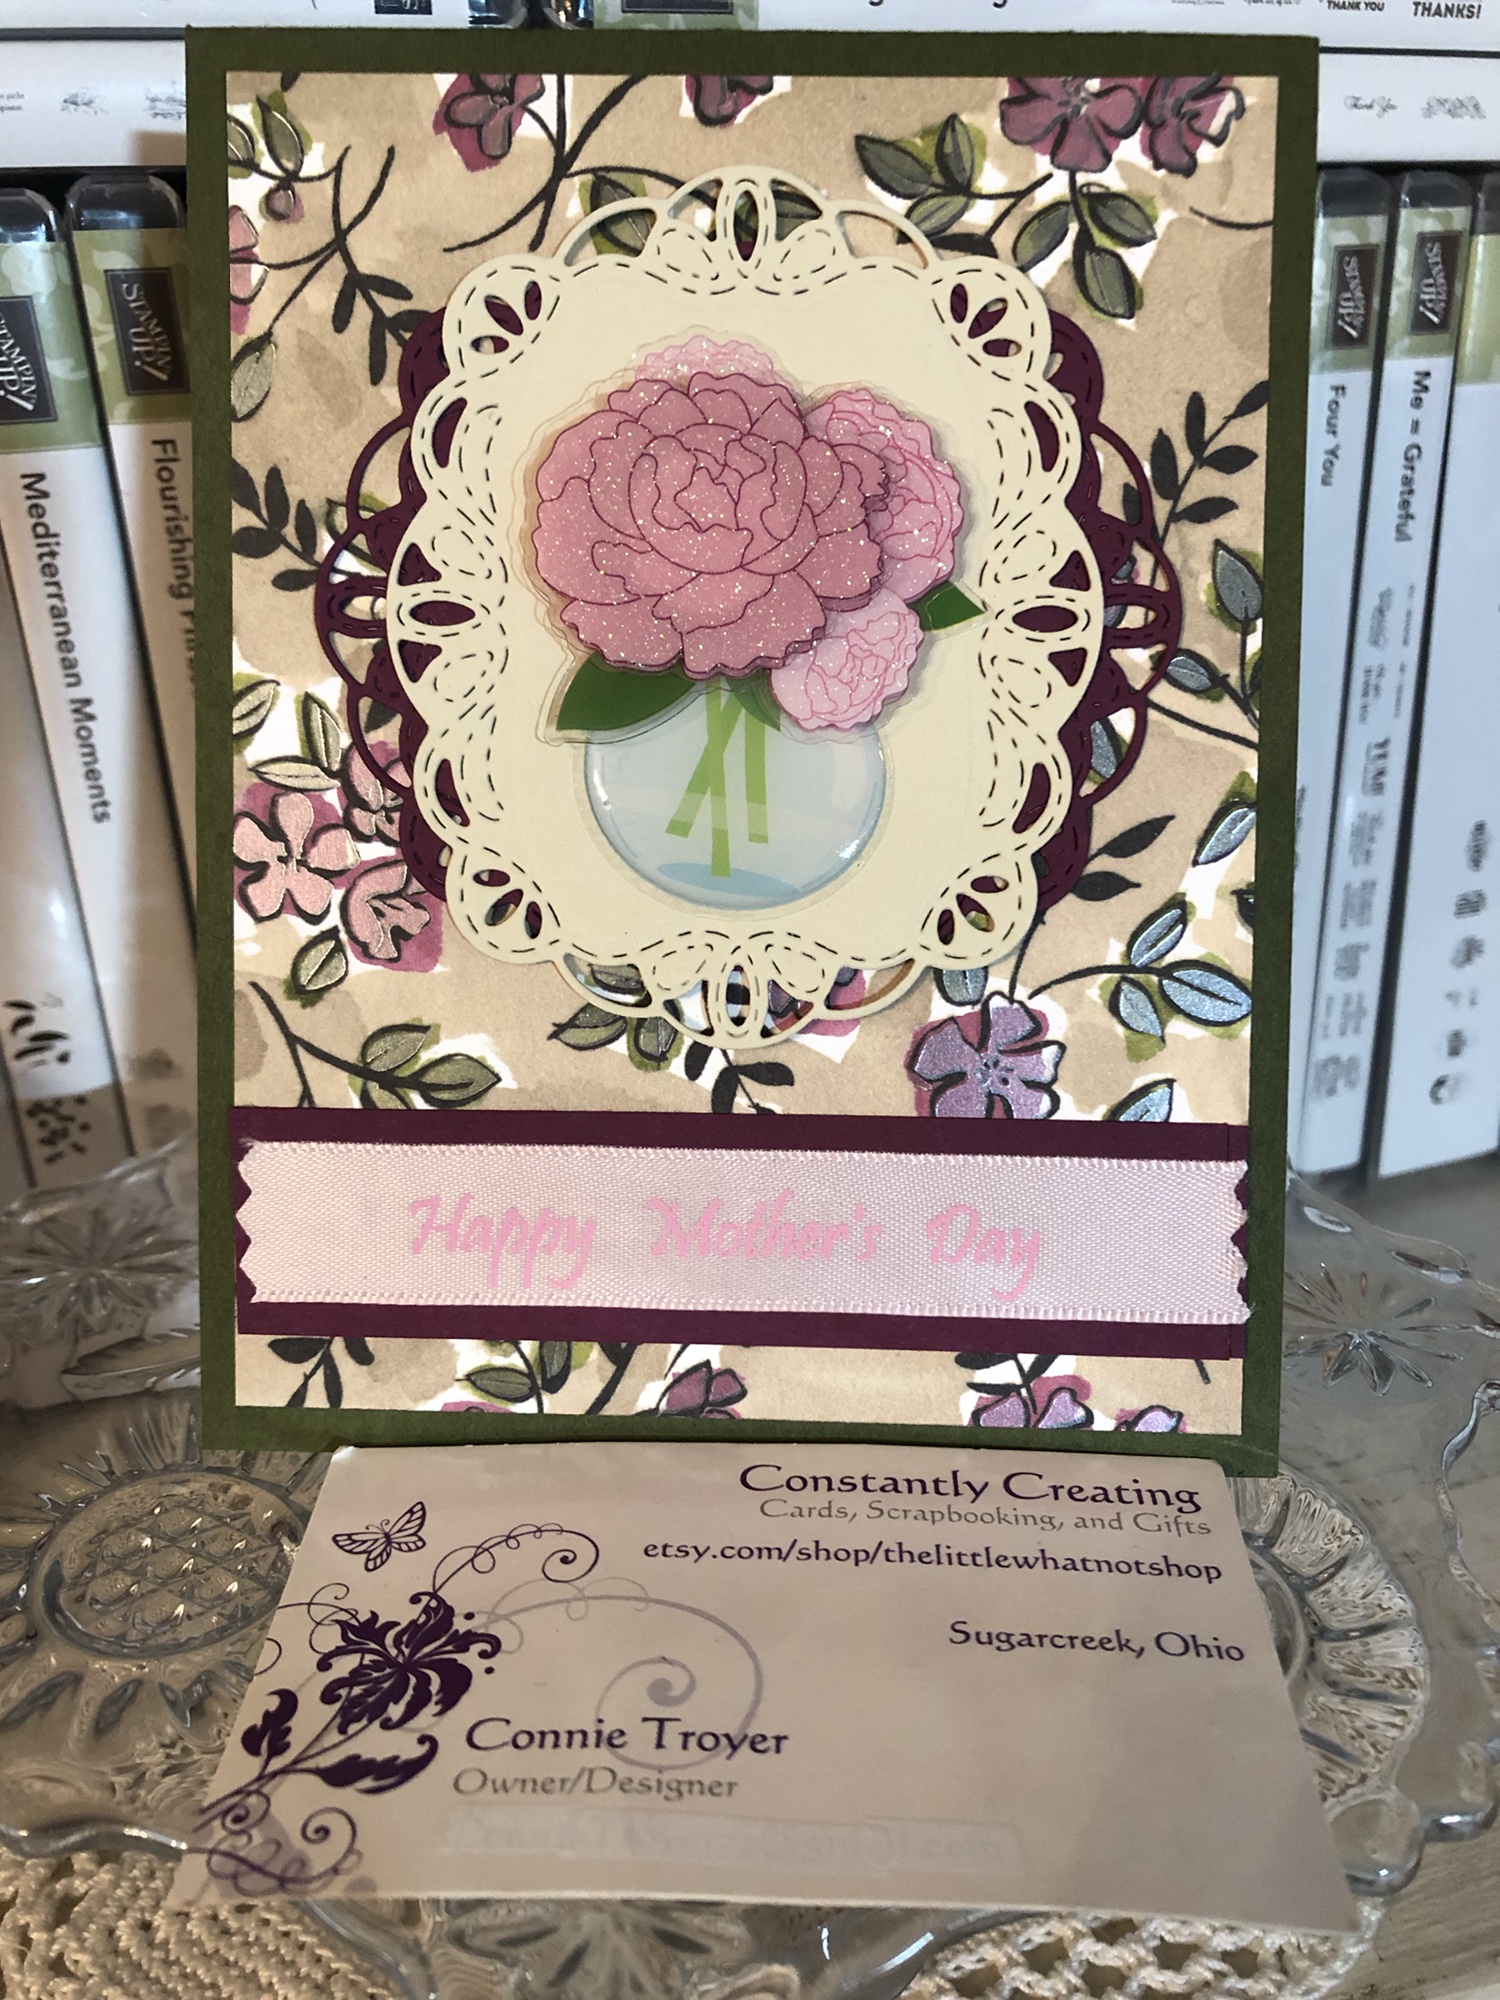
Hello there! Welcome back to my blog. I made this card last week when I spotted my remaining scrap (less than a 6×6) of this pattern of floral-patterned paper in the Perennial Essence Designer Series Paper pack, #149100 (which is currently on the last-chance list for $8.09! Go get one!). My scrap was just so pretty that I had to use it up. I looked up the colors in the pack (Balmy Blue, Blackberry Bliss, Blueberry Bushel, Calypso Coral, Crushed Curry, Flirty Flamingo, Mossy Meadow, Old Olive, Petal Pink, So Saffron, Whisper White) and picked Petal Pink for my card base. Then I reached for my matching vellum (Perennial Essence Vellum Cardstock, #149101) and picked the Old Olive color. (The vellum pack also has Petal Pink and So Saffron.)

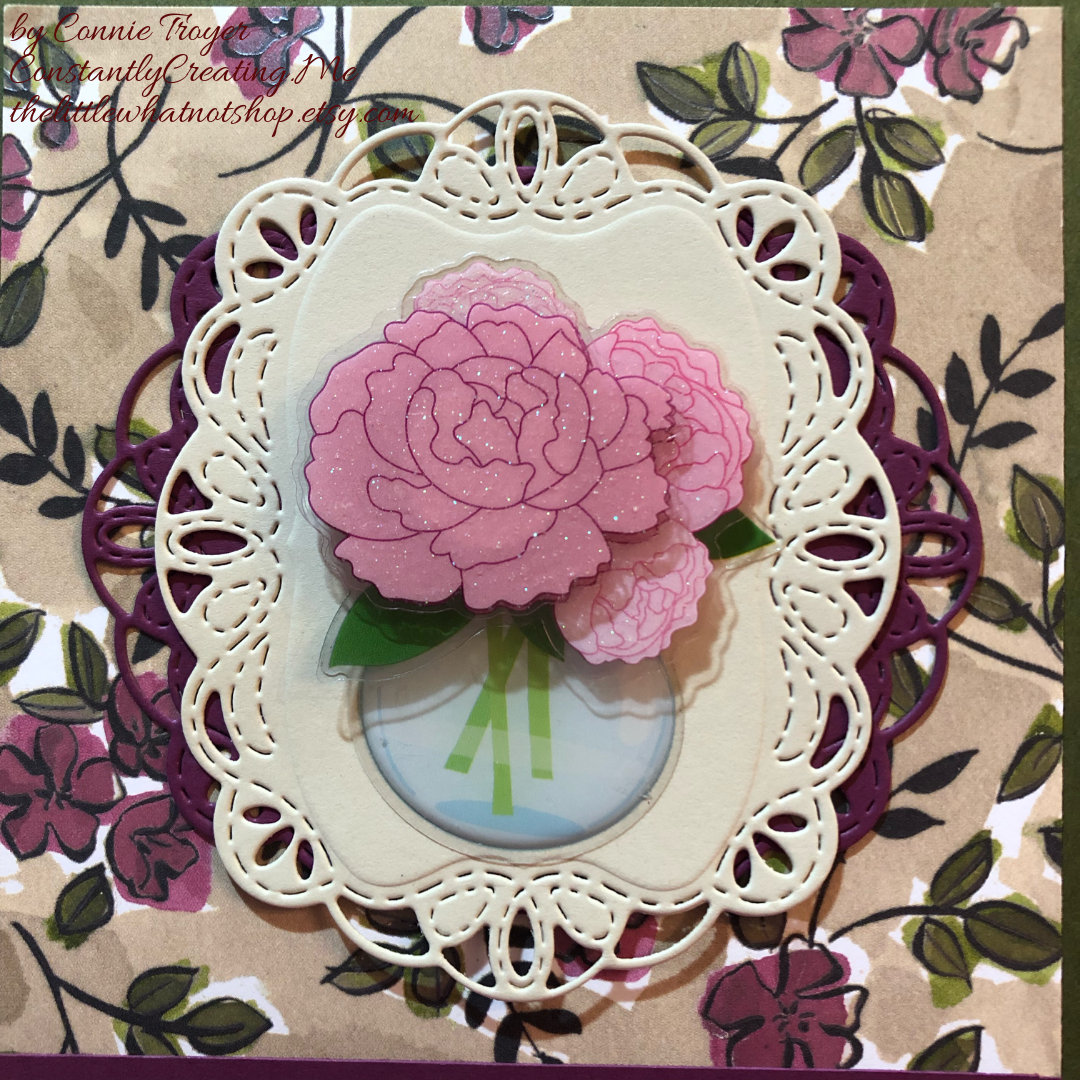
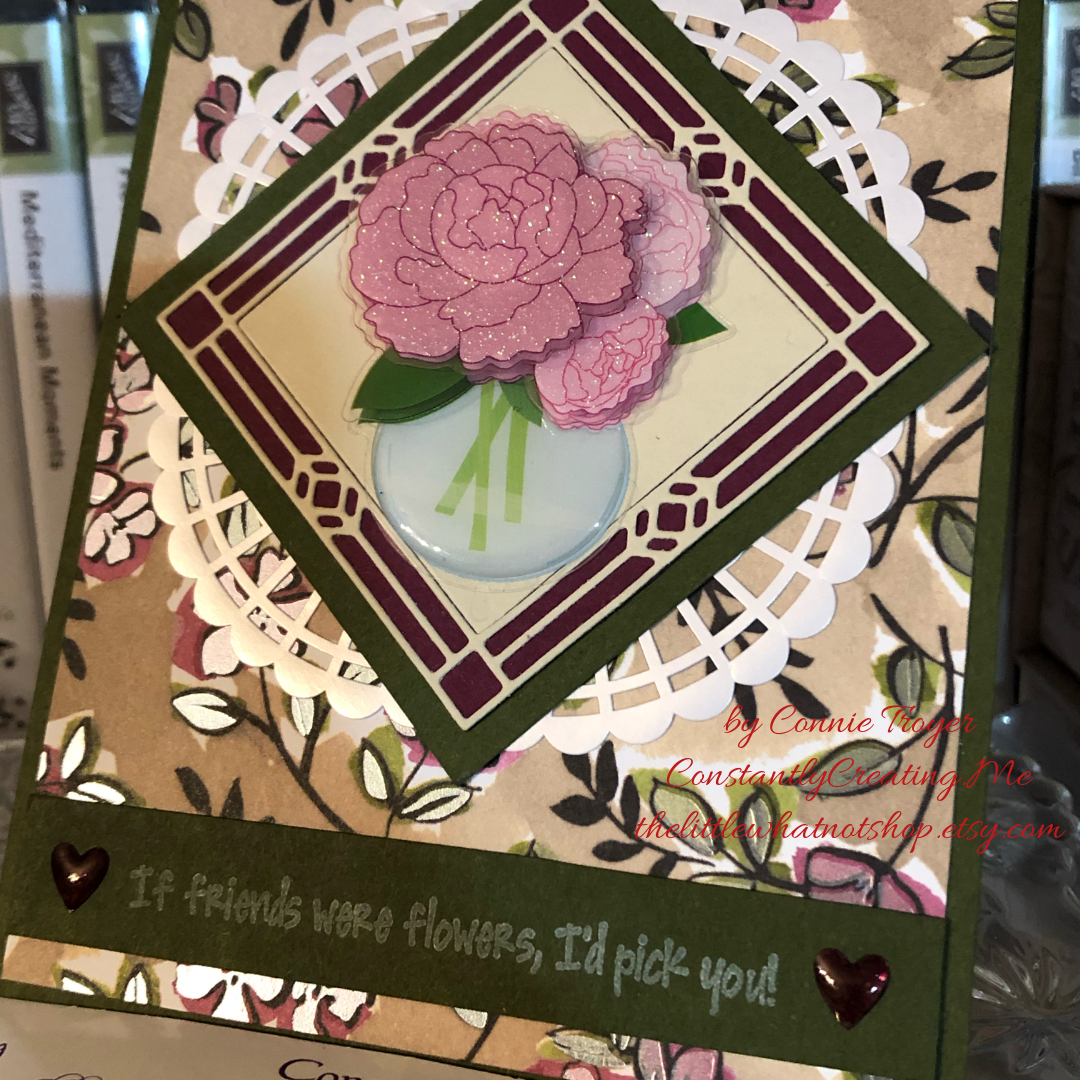
To decide how much of the scrap I wanted to use and where to cut it, I first stamped my sentiment (from the Floral Blossoms stamp set, #151457, which is carrying over) in Old Olive ink, #146090, so that I could narrow down the dimensions and have more exact placement. I knew I wanted to mat the floral image to give it distinction from the Petal Pink card base, since there is so much Petal Pink in this particular scrap of DSP. (Isn’t it pretty? I always love a good watercolor image.)

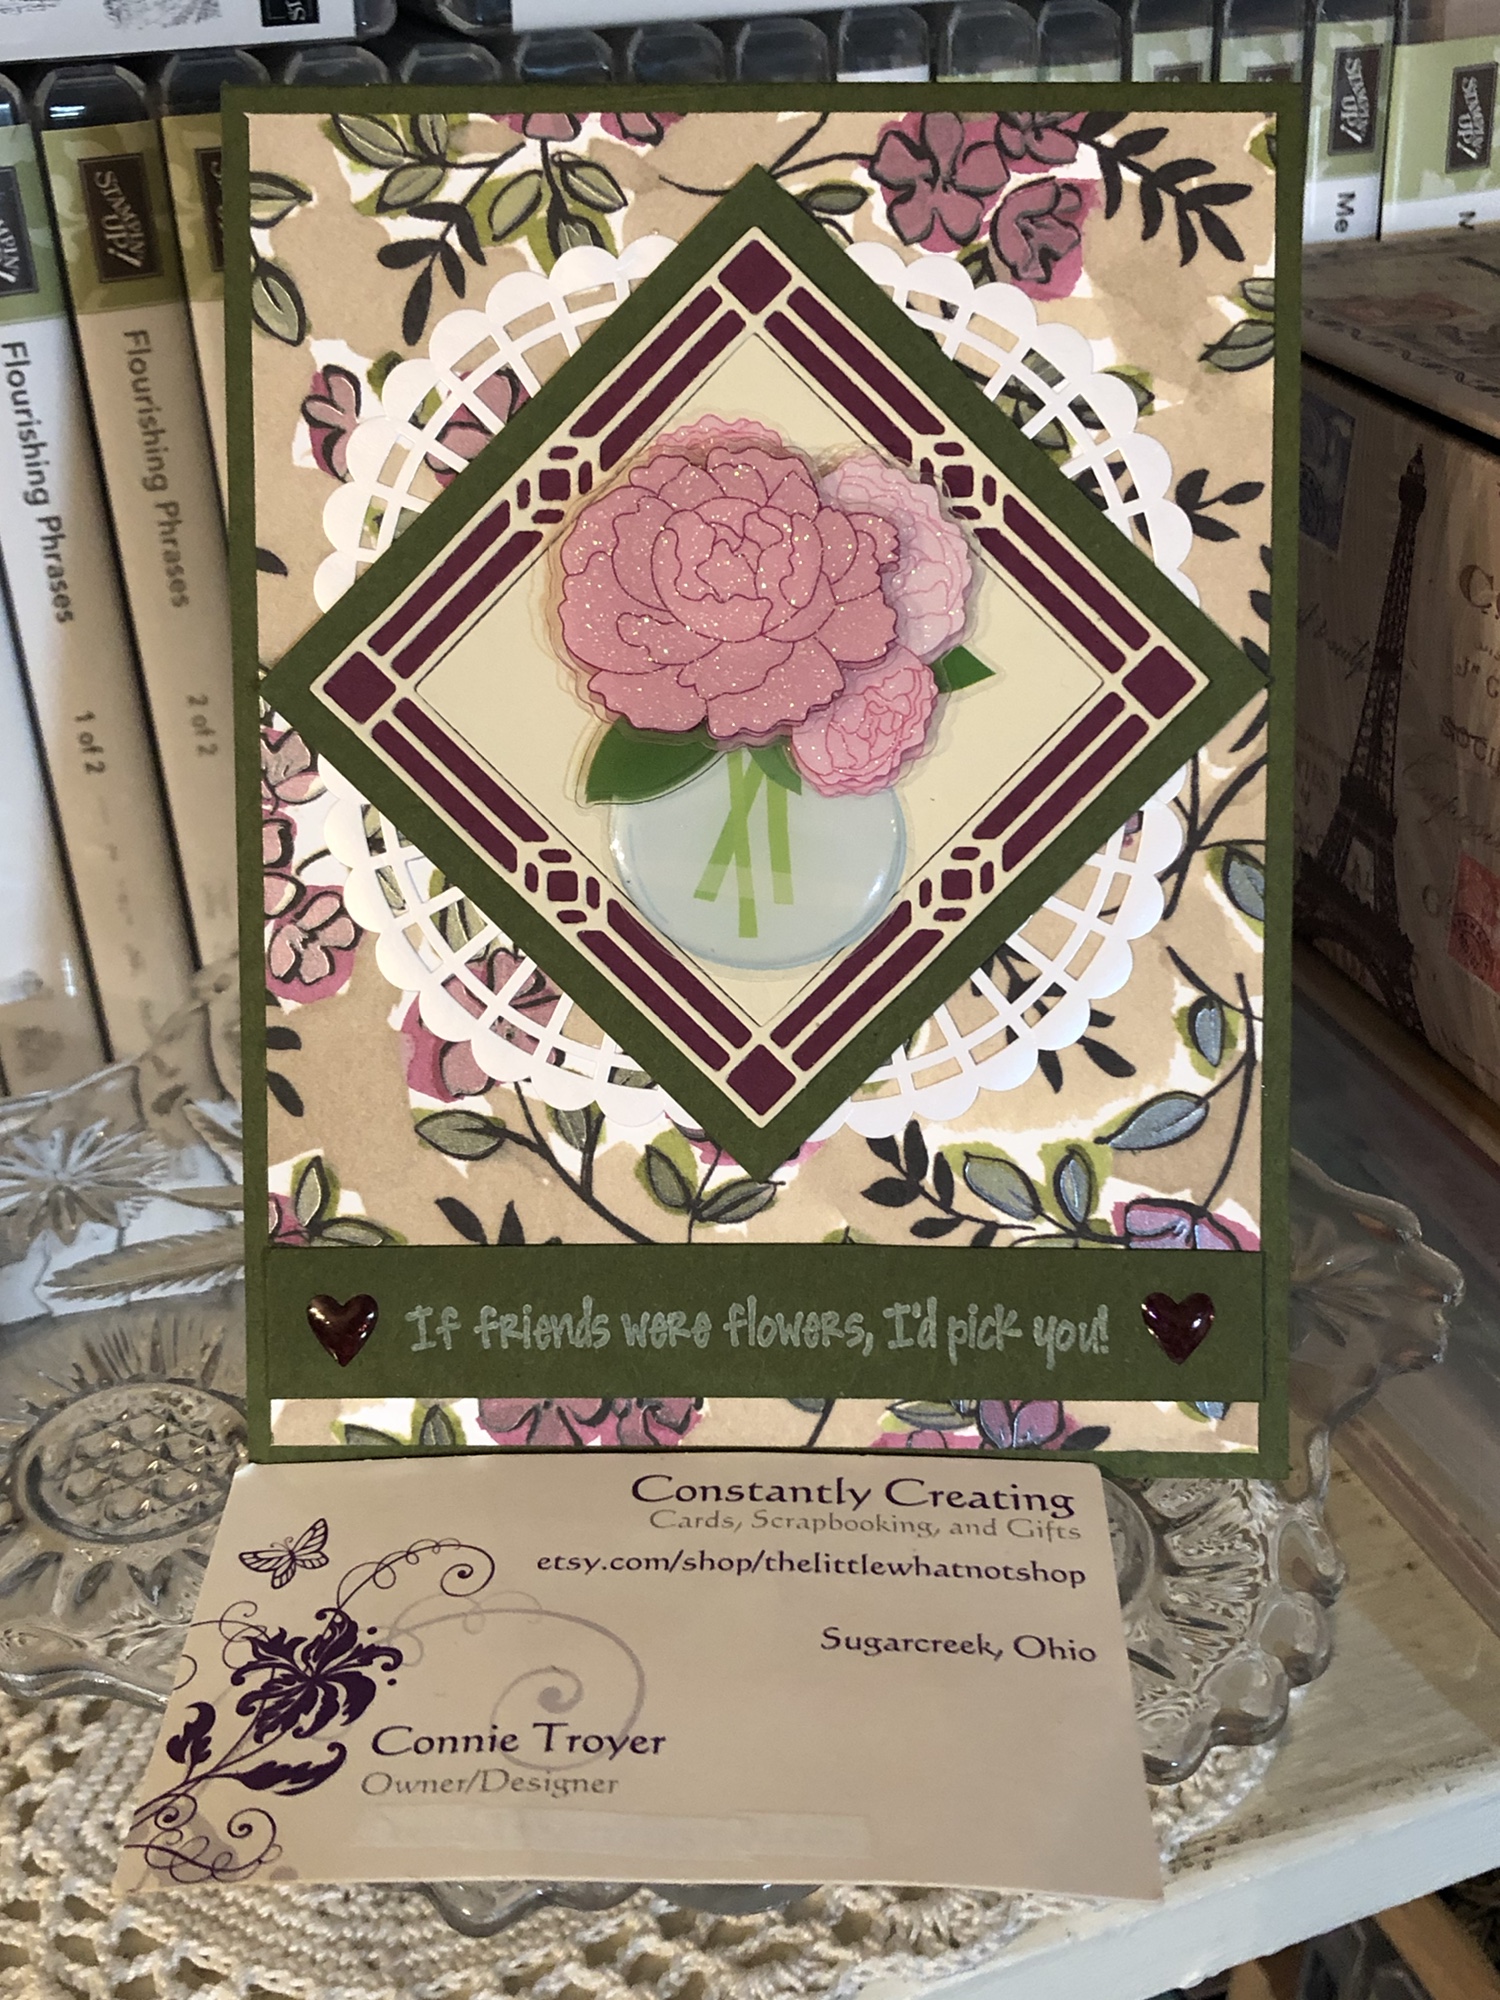
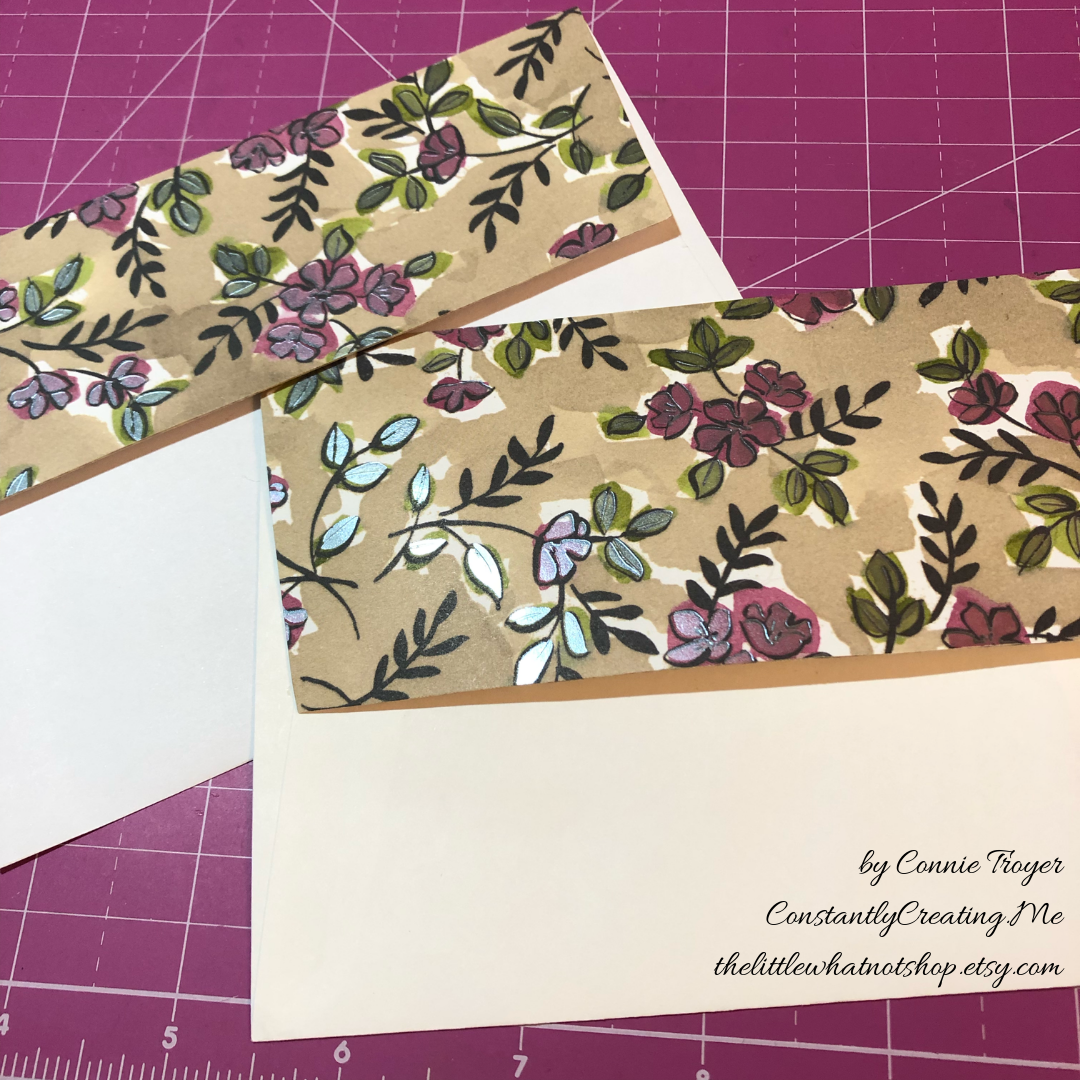
After cutting the vellum, I then decided to emboss the Old Olive with the Subtle Embossing Folder, #151775, to have a small pattern that would complement rather than draw attention away from the flowers. When I flipped over the vellum to put some adhesive on the back that would be behind the flowers, that’s when things changed. I stopped mid-glue because I suddenly realized how cool the back side looked. The embossing—or, rather, the debossing—made the vellum turn kind of white with the creasing! Well, then I was torn; I liked both. I decided to take pictures of each side to show you and also to be able to make a decision—sometimes I see things differently when I view a photo I’ve taken, even if I’m the same distance from the image and looking at it in real life. I’m curious to see which side you like best. Leave me a comment and let me know which side—or which card—you would have gone with. 🙂

untitled design
Green debossed “whiter” side
by connie troyer constantlycreating.me
Green embossed vellum, colored side up


untitled design-1
The way my original idea would have looked with the green vellum pointing up

I decided that I definitely liked the whiter side up and set about doing a double layer of matting to really hone in on the vellum (while still not taking away from the flowers). Pleased with my choice, I glued the now-white vellum to the larger unembossed Olive Olive vellum and the floral piece to the other smaller piece of Old Olive vellum, for two different mats. I think double matting just gives an elegant, intentional, thoughtful look to the thing being matted. I do this in my scrapbooking at times too, to help feature certain photos. When I look at the above picture now—the green-embossed side up, without the mats—it just feels so much plainer to me. (Of course, I would have added embellishments to it too.)

untitled design
Exterior of finished card
untitled design-2
Interior of card (so far)

So there you have it, readers! Let me know what you think about this card and what you would have chosen. Clickable links for the products I’ve used are below.

If you don’t already have a demonstrator and would like to receive a free catalog from me, submit your name and address in my contact form and I’ll send one right out to you (remember, the catalog goes live on June 3!). I’m also working on my first product share offering and will post details about that soon in case anyone wants to buy in. (If you’re not familiar with a product share, it’s a sampling of new product from the new catalog—though I’ll probably also have an “old product” version too, in case some want everything. That way you get a little bit of all the fun DSP, embellishments, and ribbon without the gigantic cost of buying it all individually. So stay tuned for details on that!)

Thanks again for stopping by today. Let me know if I can help you!

______________________________________________________________________________________________

My host code from now until the the end of June is GCXZKQT9, which you can add to your order before you check out. As a reminder, if you order $250 worth before tax and shipping are added in, don’t add the host code since you’ll be prompted to put in your own rewards—your own little party! And anyone who orders $50 before tax and shipping gets a free gift of up to $8 from me, along with a reward point toward a free $40 order from me to you. When you collect 8 reward points, you’ll just need to tell me what you want and I’ll have it shipped out to you, as my thanks for being my customer. 🙂 Contact me if you have any questions!

_____________________________________________________________________________________________


Product List

“Feminine” Blog Hop for Amy K’s Krew (If Friends Were Flowers…)

I’m part of Amy’s Inkin’ Krew Blog Hop with a “Feminine” theme for Tuesday, April 9. See what I created with some paper and dies for friendship and Mother’s Day!

img_9128

Hello, and welcome back to Constantly Creating/The Little Whatnot Shop! I’m blog hopping with Stamp with Amy K’s Inkin’ Krew today, and our topic is “feminine.” That gives a lot of options for card creation (men being much harder to design for)!

This is really the story of two cards. I’ve been traveling and freelancing again lately, so I haven’t had a lot of time in the craft room. But before I left the state, I started thinking about several different cards I need to send, and I decided to use a flowery piece of the Share What You Love Specialty Designer Series Paper (DSP) as a background for all of them. (I confess, I was also hoping to meet a 4-6-card “use it up” challenge on a Facebook group by doing so. Ambitious for someone who hasn’t been home!)

Last week I cut three card fronts out of one 12×12 sheet of the DSP and still have a couple of scraps leftover for another smaller notecard yet—maybe a thank-you. Of the cards with the bigger sections, one will be for a belated birthday, another became a Mother’s Day card, and the friendship card I’ve used for today’s blog title will likely go to the local gift shop upon my next delivery. I love how the same piece of paper works for each type of card.

I’ve acquired a few off-brand things recently as well, so these cards are not entirely made up of Stampin’ Up products (as my demo status would prefer). But the bulk of them are SU, and you could easily substitute SU’s vases or flower stamps or another sentiment where I’ve placed mine; the design works regardless. I grabbed the “other” products because they were near me (read: not yet put away) and I’m always trying to use up my consumables. (Plus, I needed to finish a card quickly to be able to blog!) In the products list at the end of the post, I’ll add some Stampin’ Up product suggestions you could use to change this card into one of “theirs” entirely, alongside what I did use from SU’s line. 🙂

So, diving into the cards I’ve finished…I have to confess first that I began a card for friendship, forgot what I was doing with it, and turned it into the aforementioned Mother’s Day card. I had the sketchiest of ideas when I started pulling things together—which is probably why I got distracted and it became something else—but sometimes one just has to go with the creative flow. After I finished the Mother’s Day card, it was easier to just emulate the structure for the actual friendship card, only tweaking the materials. As the two are similar, I’ll show the Mother’s Day one here as well. In the pictures, you can see how the flowers and leaves in the Specialty DSP have a pearlized, translucent finish.

For both the blog card and the Mother’s Day card, I began with a Mossy Meadow card base of 80-lb cardstock in an A2 (4.25″ x 5.2″ finished) size, and I cut down the Crumb Cake background with shimmery Rich Razzleberry/Mossy Meadow flowered piece from the Share What You Love Specialty DSP to mostly cover the card front, with a little Mossy Meadow border showing all the way around. The Mother’s Day border is slightly larger than 1/8″, whereas the friendship border is slightly smaller than 1/8″.

The other day, I sat down with my Cuttlebug, my Stained Glass Thinlits and Stitched Labels Framelits die sets, and pieces of Rich Razzleberry cardstock and a random cardstock I ended up with in an order that reminds me a little of Crumb Cake. It is just a shade lighter, so it matches the Share What You Love paper quite well (and it’s another consumable I can use up! Yay!). I made off several die-cuts out of the cardstock and put them on the desk with the rest of my card pieces until I had more time.

On Monday, I tried several of them (unglued) with different flower stickers to see what I liked best together. The Mother’s Day card uses two Stitched Framelits, one of each color, layered together perpendicularly so that the lighter cardstock has a bit more weight to it on the busy background. The additional Rich Razzleberry die-cut seemed to ground the top one and give a fuller look even though I also liked the simplicity of only one Framelit.

For the friendship (“If friends were flowers, I’d pick you”) card, I had originally chosen the vase idea (before I forgot what I was doing) because I saw the sentiment and the vase/flower stickers about the same time, and they made sense to use together. Since I had used the Stitched Framelits on the first card, I used one of the Stained Glass Thinlits Dies for the second. I adhered some sticky adhesive to the back of the die-cut and replaced the square that comes loose when first cut, and then I backed both the “stained glass” piece and the solid square onto some Rich Razzleberry cardstock, using my micro-tip scissors to cut around the edges once they were stuck.

Note: Keep track of how the solid square comes out of the die; it’s not completely symmetrical, and there is a spacing difference when it’s turned the “other” way.

When I positioned the flower/vase sticker and temporarily placed the diagonal onto the DSP, I then felt it was too simple (story of my crafting life), so I cut down a couple of the gorgeous Pearlized Doilies and glued them to the back of the sides of the diagonal, which fluffed out the center in a similar style to the Mother’s Day card. I got three out of one doily the way I cut them, and the center circle is still able to be used for something else.

I wanted to make sure I left room for a sentiment across the bottom on both cards, so I tested the placement and figured out how big the border strip at the bottom would need to be. For the Mother’s Day card, I added 1/8″ above and below the sentiment ribbon I planned on using to darken the ribbon a bit and make it look more finished; then I cut some vellum adhesive to fit inside the ribbon and carefully merged the two. Ribbon is tricky to glue, the way it’s so flexible. It’s not my favorite way of doing it. I was going to wrap the edges behind the DSP, but because of where I’d trimmed the ribbon around the words on the next repetition, I didn’t end up having enough room to tuck it around. So I took pinking shears to the ends instead since regular scissors and a straight cut would cause it to fray.

The solid Mossy Meadow border for the sentiment on the friendship card is about 3/8″, though I didn’t measure. Because the letters are close together on the stamp, I was leery of using embossing powder or getting things too juicy in case they would blur or blend together. I fell back on some old Craft White pigment ink to stamp it, and then I heat embossed it, hoping it would turn slightly puffy but still be readable (I remember doing that once somehow, but since heating it this time did nothing except dry it, I’ll have to figure out the “puffy” process again). And then because I had room at the sides of the sentiment for geegaws, I trotted out my new Heart Epoxy Droplets and colored them with my Light Blackberry Bliss Stampin’ Blends alcohol marker, the way I’ve heard others have done. It actually works!

I’ve made the inside of both cards the same—white paper to stamp and write on, an old random wooden stamp sentiment that fits both types of cards, a little writing room, and a strip of Specialty DSP running along the bottom. And I used some retired heart epoxy sticker gems on the inside of the Mother’s Day card as well. Both cards flip up to open rather than right to left.

I also added DSP to the envelope flaps since the cards are the nicer sort.

Now that both are done, I might like the simpler Mother’s Day card better, though I do love the Stained Glass die. But I’m thinking I should have kept the doilies closer to the diagonal on the friendship card so the overall look wouldn’t spread out so much. Well, next time, I guess. The sentiment may be my favorite thing about them anyway, the way it uplifts and encourages the recipients. The older I get, the more I see how important it is to do that for others. Whose day can you brighten this week?

Thanks again for stopping by to read and say hello! The products I used or suggested will be at the very bottom of the post, after the linked list of hop participants. Clicking on any of the thumbnails will take you right to my online store if you see something you’d like to purchase.

We have a great group with much talent hopping with us today! Be sure to go to the other blogs and see what my team members have created too. 🙂 You can follow the linking list through each person on each blog you visit.

To see what Terry Lynn Bright made this week, click the Previous button. To jump to Sue Prather’s blog, click Next.

inkin-krew-blog-hop-previous2inkin-krew-blog-hop-next2

  1. Karen Ksenzakovic: https://wp.me/paaNf4-wU
  2. Mary Deatherage: https://wp.me/p5snyt-7OG
  3. Jaimie Babarczy: https://wp.me/p79UhD-2E8
  4. Julie Johnston: https://wp.me/p8SzmQ-2db

Product List

Pat's Blog Site

One place to fit it all!

Stamp Dabbles

Donna Leonard | Independent Stampin’ Up! Demonstrator | Huntsville, AL

Niya Scrap

Démonstratrice indépendante Stampin' Up!®

From Pole to Pole

Adventures in the Land of the Pierogi

Stampin' in the Meadows

Akiko Sudano - Independent Stampin' Up! Demonstrator Downingtown, PA

Creative Stamping Designs

Karen Ksenzakovic, Independent Stampin' Up! Demonstrator in Somerville, NJ Let's make some cards!!

Stamp it up with Jaimie

Helping you find a stress free creative outlet through paper crafting.

Stamp With Amy K

Amy Koenders, Independent Stampin' Up! Demonstrator in Mendham, New Jersey...Let's make some cards!

The Daily Post

The Art and Craft of Blogging

WordPress.com News

The latest news on WordPress.com and the WordPress community.

%d bloggers like this: