A Polar Bear Christmas

Playing along with a Stamps, Ink, Paper Challenge (128) with a Snowy Polar Bear Christmas card and matching thank-you note.

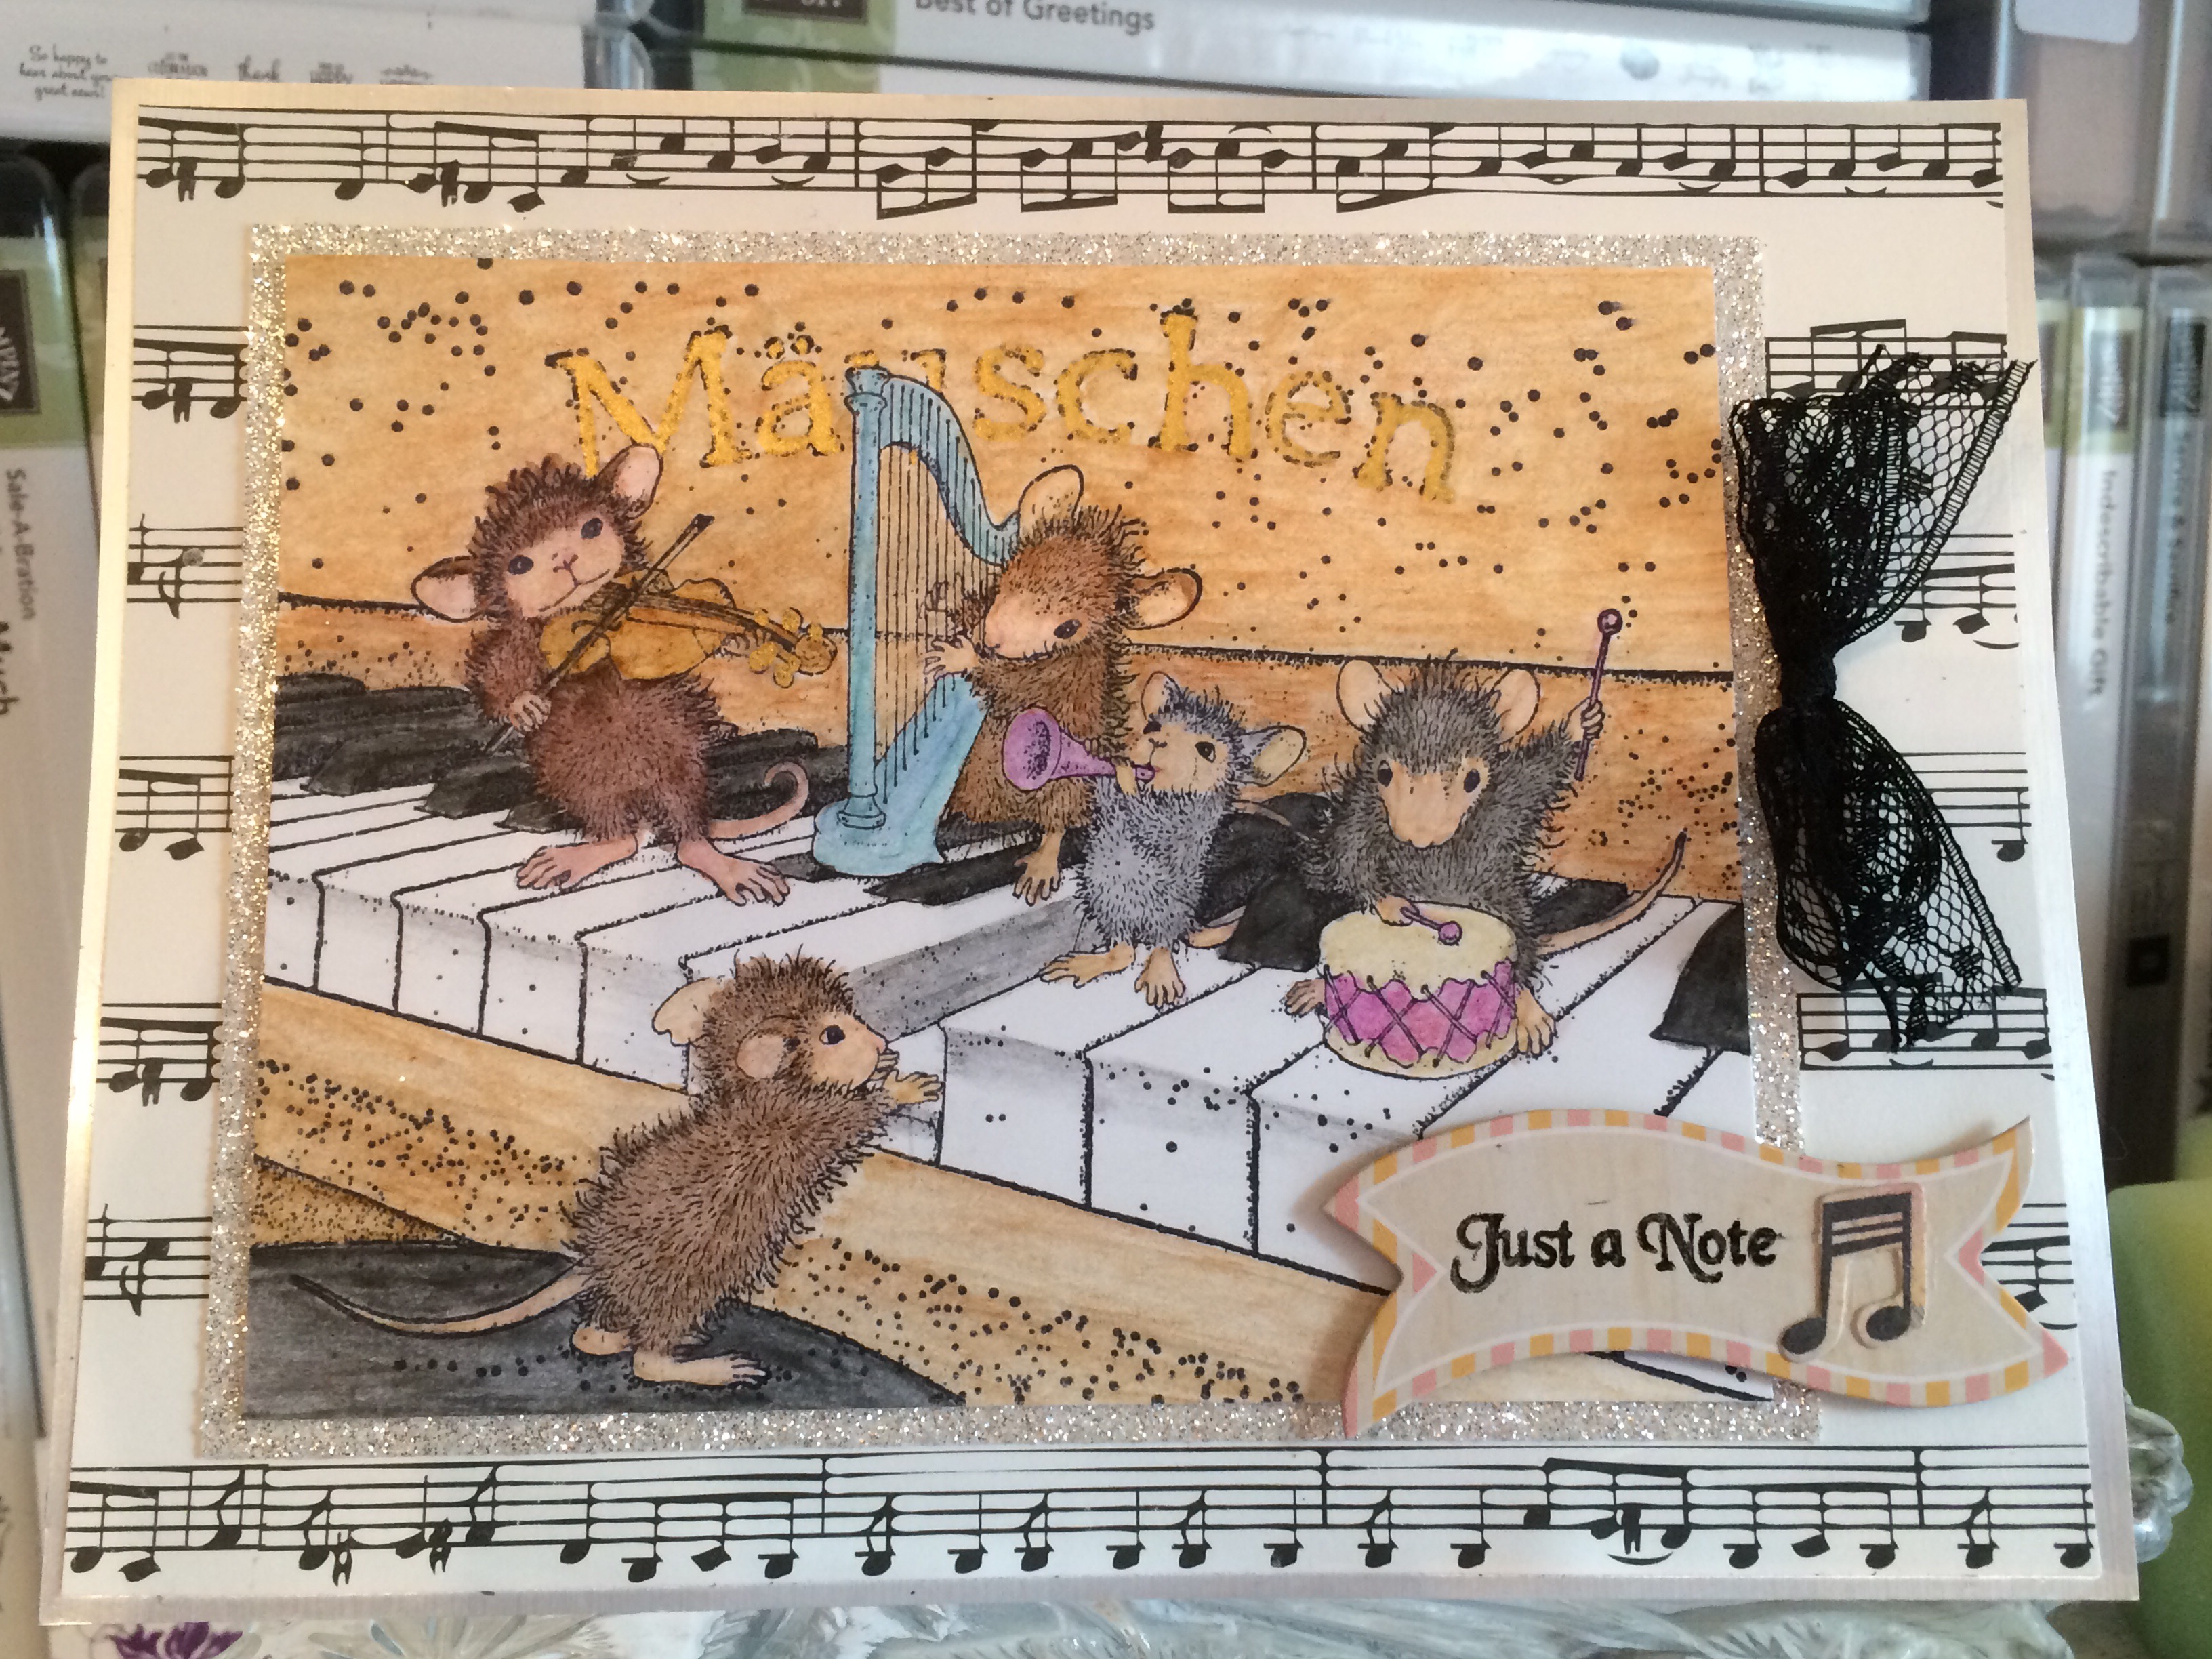
Here’s another adorable card with matching thank-you note that I created for a custom card order needing to be mailed soon. I think it fits the Stamp Ink Paper 128 challenge, shown below:

http://stampinkpaper.com/wp-content/uploads/2017/12/SIP-Challenge-128-Let-it-Snow-NEW-800.jpg

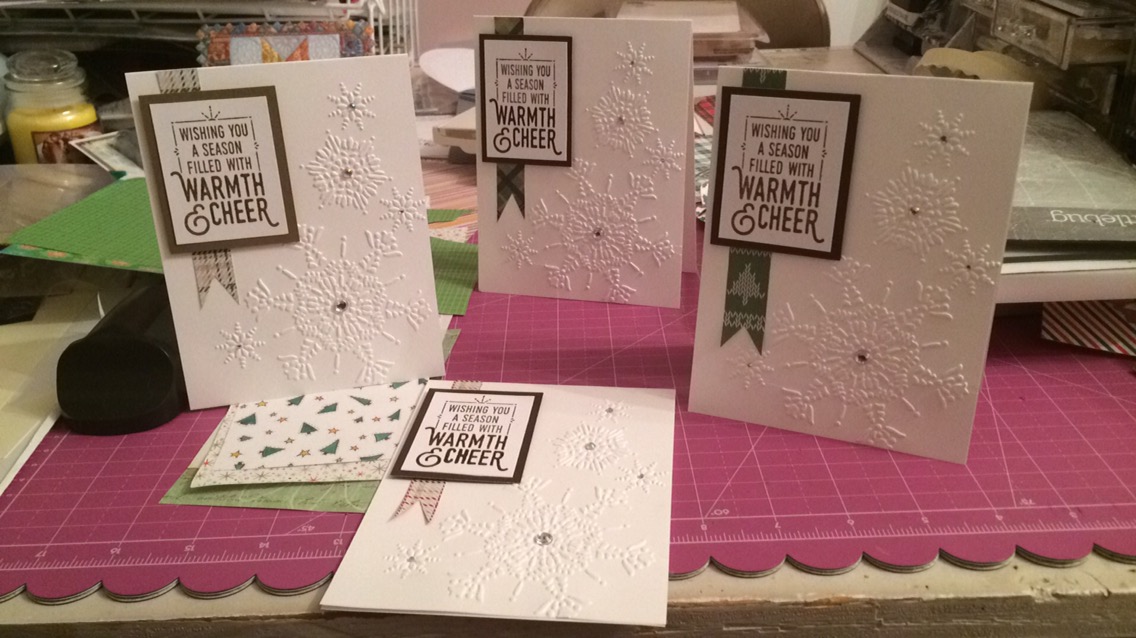
So here are my matching cards.


I’ll tackle the main Christmas card first. The embossed snowy background was given to me by a crafty friend, and I flipped it over so that the debossed side was showing. I matted it with some current SU Emerald Envy plain cardstock on a Thick Whisper White card base. The paper-pieced polar bears and trees are 3D stickers from a “Holiday Time” series – I think they might be from Walmart. They’re actually pretty cool, using poms for the tails and the ends of scarves, and the tree is glittered. 

I was having trouble fitting all three on the A2 card base, so I thought if I had one peeking over a snowbank as if he were watching the scene, I could put them a little closer together. My “snowbank” is made out of two strips of shimmery translucent vellum paper, which I cut by tracing a Card Creator Spellbinders die and then cutting it out by hand (hubby was sleeping and I was trying to minimize the noise, plus I wasn’t exactly sure where I wanted the mounds to go, so I traced/cut it especially long and then positioned them where I wanted them). I popped up the vellum in parts for effect and to fit the back polar bear in without squishing him (trying to reduce that whole “translucent” thing). 

I had thought of using white handmade mulberry paper instead of vellum, but I didn’t feel like making a bunch of noise and rooting around in my “specialty paper” drawer since it was late and I was only supposed to be “fiddling” (i.e., going to bed soon) as opposed to outright intentionally creating. 

The “Happy Holidays” sentiment above the scene is from a 2016 Hampton Art stamp and die set (SC0718). It bugs me a little that the font sizes of the two words is not the same, but as the set is either photopolymer or acrylic (read: see-through), it was easier to line up than others. I inked the stamps with Stampin’ Up’s Emerald Envy ink overtop a strip of polka-dotted paper from American Crafts/Dear Lizzy “5th and Frolic.”


I kept the inside of the main card simple with a “Warm Wishes This Holiday Season” sentiment from Close to My Heart’s “Scandinavian Wishes Stamp of the Month,” (SU Emerald Envy ink), punched it out with my retired SU Scallop Oval punch, and matted it with my SU Decorative Label punch in Emerald Envy cardstock. 

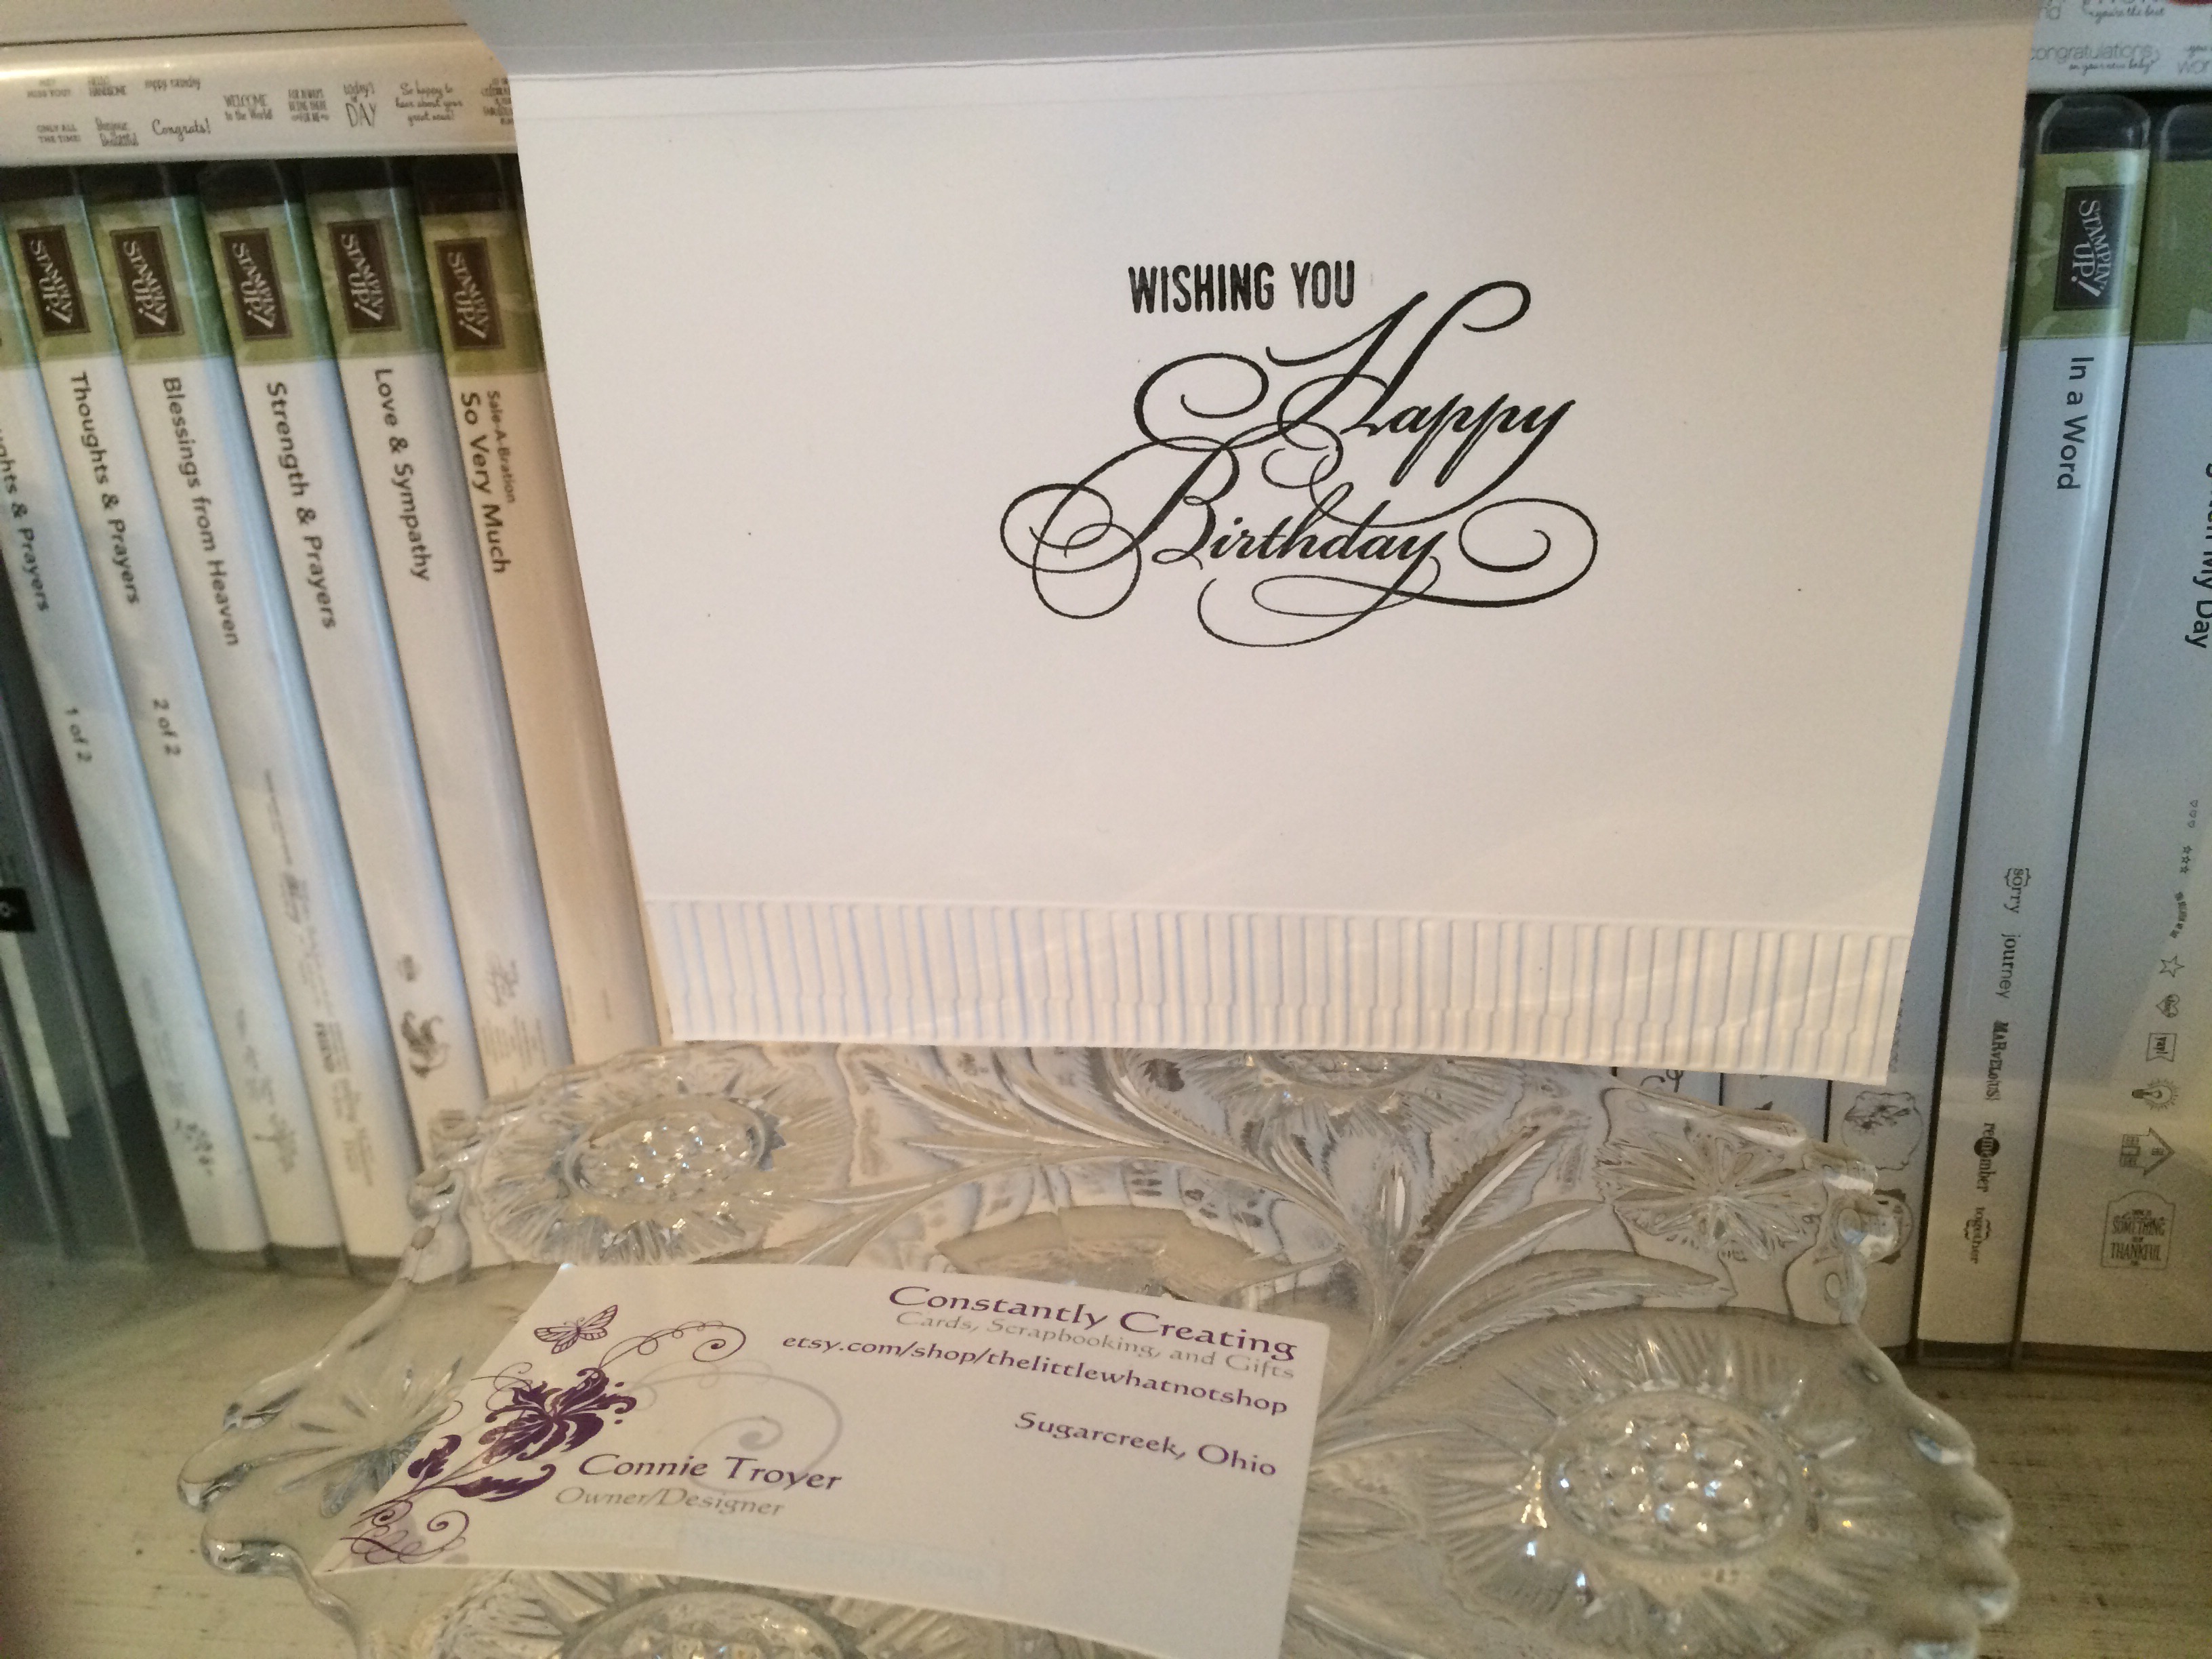
The thank-you note, on the other hand, is simply a SU Whisper White notecard size (3.5×4 7/8) with a background of gold snowflakes on vellum from SU’s “Winter Wonderland” Designer Vellum Stack. I laid an Emerald Envy cardstock piece embossed with  the “Thanks Words” Cuttlebug folder (371134) on top (putting the glue for the vellum underneath where the cardstock layer would hide the adhesive) and then cut another “snowbank” out of the gold snowflakes before finally adding the last sticker in the Holiday Time set. (Yay, another thing used up in my stash! I really am trying, hubby dear.)

These cards were ones that were simple, thought-provoking, and yet fun to create – my favorite kind. It was my first time trying to create “snowbanks” even though I’ve seen them used with regularity this season. And I’m fairly pleased with how it all turned out. Unfortunately, they’re another two cards I can’t duplicate unless I find another pack of stickers (thus then adding to my stash). 🙂

Hope you’ve enjoyed this offering! Thanks for stopping in. 

House Mouse “Musical Mice” Birthday Card

A musical birthday card for a musician celebrating a milestone year.

I took a break from Christmas cards to do up a few birthday cards that I needed to deliver or mail. One of them went to my aunt, who is a supremely talented pianist. I had thought of using this focal image for her ever since I first got my hands on this cute House Mouse stamp. 

I grabbed a premade base that was of a larger size, since the stamp itself is basically the size of an A2 card front. No room for the music note paper I wanted to use behind it. But this larger card size worked well for the idea. 


First I put down a layer of silver foil cardstock (cutting out the inner portion with snowflake and winter-themed word dies that I can use on other projects). The music paper I placed on top is from Echo Park’s “Be Mine” line. I then stamped, colored, and cut the House Mouse image so I would know what size to cut the Silver Glimmer Paper (glittered cardstock) from Stampin’ Up, which I placed behind the image as a mat. 


I think I might need to work on my coloring skills, or at the very least shading, but I’m pleased enough with my creation. 🙂 I used three sets of watercolor pencils, an AquaPainter, and Ranger’s Jet Black Archival Ink to stamp and color the image. I topped it off with some gold Smooch Paint for the knobs on the violin and the lettering of “Mauschen,” the name of the piano. I had looked up the stamp online and found the colored image from House Mouse, so I tried to imitate those color choices. (Each of the mice are named and has their own coloring specifications.) I think next time I might try a black piano, however. 

I had the most trouble finding and placing a sentiment on the card due to limitations in space and supplies. I had to revise my initial idea several times, and the more I hurried to finish it (since I needed to be leaving the house), the worse it got. Isn’t that always the way of it? Eventually something worked, although I realized an hour later that I’d forgotten to include the milestone number she was turning, as I’d intended. But maybe she doesn’t need that advertised. 😉 

So, the tag is from the American Crafts “Everyday” line, the “Just a Note” sentiment is from Rubber Cottage, and I couldn’t read my handwriting on the back of the tiny music notes I added to the tag, so I can’t say who made that. The black lace ribbon is from Stampin’ Up. I stamped the sentiment with Jet Black Staz-On ink because the tag was chipboard with a shiny top and water-based dye inks just wipe right off of those. I used my heat gun to speed up the drying process as well.


The inside of the card finished the thought begun on the front (“Just a Note”) with “Wishing You Happy Birthday.” Again not quite what I’d intended to say, but time really was of the essence, so I made do with the first couple things I found rather than creating a custom sentiment. And I’m the only one who overthinks these things, so it probably doesn’t matter. 🙂 The stamp sets I used for the inside are from Stampin’ Up (“Wrapped in Warmth”) and Close to My Heart (“Gracious Greetings”). I also embossed piano keys for the bottom border. The embossing folder I used is 5×7 and entitled “Keyboard,” from Cuttlebug. 

Coloring always takes a bit of time, and I really do need to perfect some shading skills (here’s wishing I could go back to art class), but I’m generally pleased with the images once I’m done. I always enjoy seeing how the lines swirl and blend together when I’m watercoloring. Perhaps I’m really a Renoir at heart. 😉 

That’s all for this birthday card. The others I created were simpler, of course. But details are my specialty. 🙂 Thanks for reading!

Warmth and Cheer with Northern Flurry

It’s time to start making Christmas cards! Okay, it’s probably past time, and I’ve been creating them for a couple of weeks, but here’s my first blog post about one.


It may be October, but for crafters, it’s Christmas card season!

The other day, hubs and I figured out a new way to keep each other company while I remained productive with crafting. The result was the outside of four winter/Christmas cards finished. They’re pretty simple, but simple can be elegant sometimes. Our wedding, for example. (Or at least that’s what I was trying for back then.)

Pardon the mess behind my desk, but this is the only shot of the four together so far.

I have two custom Christmas card orders right now along with the niggle of something bigger in the works (we’ll see if it goes anywhere), so I figured all four would go one place or the other, or I could split them up.

I used all Stampin’ Up materials for these except for the bling – Whisper White cardstock, the retired Northern Flurry embossing folder, paper strips cut into banners from one of their retired 6×6 Christmas paper packs (I didn’t write down which one), Soft Suede and Early Espresso inks with matching cardstock, and the “Wishing you a season filled with warmth and cheer” sentiment from the set “Wrapped in Warmth.” The rhinestone bling is from Michael’s, SU, and CTMH.

I’m still stamping the insides of three of them. So far I have “Merry Christmas to You and Yours” (from SU’s “To You and Yours Too” set) on the inside of the Soft Suede version, shown below.


I love how the embossing just pops off the card. I had originally wanted the snowflakes to come cascading from the upper-left corner but realized after I cut the cardstock that that wasn’t going to be possible because of the direction I’d cut it. And I had thought to only have a smaller 1/4″ strip extending from top to bottom but didn’t like how that interrupted the little snowflake down there…so after some brainstorming with hubby, since he was in the room, this is what we decided looked best. And I’m pleased with it. I think it like it better than my original idea. (Not that I won’t try that original idea again some year. 🙂 )

Thanks for reading! If I can make Christmas cards for you sometime, send me a note or visit thelittlewhatnotshop.etsy.com. 🙂

Hope You’re Feline Better (“Cozy Cat Occasions” CTMH)

I decided to show you a card I made for my mother-in-law several years ago when she was feeling poorly. It was my first time using any of these supplies and I was sort of just throwing things together and making it up as I went along, since I was still a relatively new cardmaker, but I liked (and still like) the end result. Hope you do too. The banner that sticks out off the card wasn’t a problem because I handed her the card instead of mailing it. 🙂

I used retired Stampin’ Up Lucky Limeade cardstock for my card base. I try to make all my card bases with SU cardstock, which is 80-lb weight paper. I like the variation of the older textured papers too. Sometimes a girl just needs a little texture in life. Also, Lucky Limeade is one of my favorite colors that Stampin’ Up has ever made. I wasn’t buying from them when it was a current In-Color; I came upon it after it had recently retired. But it has proven to be one of my go-to colors ever since. I even like it instead of Old Olive most of the time.

I also have a thing for square cards. This tends to be a problem because they cost more to mail, as they are considered an unusual or irregular size. (Yeah, don’t ask me how a square card can be irregular, but there it is.) They have trouble going through the mail machines, apparently. So because I love square cards but don’t generally want to mail them, I give them away in person a lot or I make them for people who will be doing the same. This particular card happens to be a 5×5.5 size.

012c6f5175b69fb49c87f22498798e20

The cat paper I glued on top of the Lucky Limeade card base is from KI Memories (“Pet Shop Here Kitty,” 2022, (c) 2008), and it is awesome. It has this great pearlized, creamy metallic sheen to it. (And I apparently got it on clearance for $.10, now that I dig it out so I can write up the brand name. Which is even more awesome.) I distressed the edges of the paper a little bit before gluing it down because I also have a thing for distressing stuff.

At this point I left the back part of the card and went to the front. I stamped the large cat stamp from Close to My Heart (“Cozy Cat Occasions” A1140) in Stampin’ Up Craft White ink (yep, just plain old “White,” from a long time ago) on a textured tan piece, and I think I heat-set it. They dry faster and better that way. Then, being a new cardmaker and not having things like watercolor pencils, shading techniques, any shading knowledge at all, etc. (my, how things have changed!), I just colored it with a couple of Stampin’ Up Markers and then used Waterfall Stickles and Gold Smooch Paint on the collar.

I matted the tan piece with a miscellaneous light blue/turquoise color before stamping the “Hope you’re feline better” sentiment and doodad lines on white cardstock in SU Tempting Turquoise ink and hand-cutting it into a banner. I then hand-stitched the banner onto the tan/blue pieces with embroidery floss (because I’m also a cross-sticher and have scads of it around here). If I remember correctly, I was having trouble figuring out where to place the sentiment on the card. I didn’t like any way I tried it until I just decided it would have to branch out, literally.

I took a Lucky Limeade cardstock remnant and placed it behind the horizontal mats for some height variation and visual interest. Finally, I grabbed a remnant of the hand-punched border piece I’d done for the inside of the card–I hate to waste anything, and this was what I had cut off–and I pinned it to the top of the center pieces with a WRMK glitter brad. That little section reminded me of a flower, and I just couldn’t throw it away. 🙂 I did not glue it down, so it swings a little bit as the card moves.

That’s it! Pretty simple–just a bunch of rectangular papers and a few details. Just like a mini scrapbook page. 🙂 Happy to report that she loved it. But then, she was a cat owner. 😉 Thanks for stopping by!

Pat's Blog Site

One place to fit it all!

Stamp Dabbles

Donna Leonard | Independent Stampin’ Up! Demonstrator | Huntsville, AL

Niya Scrap

Démonstratrice indépendante Stampin' Up!®

From Pole to Pole

Adventures in the Land of the Pierogi

Stampin' in the Meadows

Akiko Sudano - Independent Stampin' Up! Demonstrator Downingtown, PA

Creative Stamping Designs

Karen Ksenzakovic, Independent Stampin' Up! Demonstrator in Somerville, NJ Let's make some cards!!

Stamp it up with Jaimie

Helping you find a stress free creative outlet through paper crafting.

Stamp With Amy K

Amy Koenders, Independent Stampin' Up! Demonstrator in Mendham, New Jersey...Let's make some cards!

The Daily Post

The Art and Craft of Blogging

WordPress.com News

The latest news on WordPress.com and the WordPress community.

%d bloggers like this: