While it seems like all I am making right now, when I have time to get into my craft room, is wedding, baby, bee, and lemon cards (for the gift shop and a custom order), I’ve been needing to do up another sympathy card as well. I rarely have a chance to make anything for my friends and family besides birthday and sympathy, to be honest, and those never stop coming. And although it was in the back of my mind to make a sympathy sooner rather than later, this card sort of fell together by accident.
The gorgeous sage green/peach/vanilla/white matted rose piece was in the last RAK I received from a crafty friend. I think it is a piece that came from a mass-produced card and was upcycled, because the leaves are even made of gold embossed foil. It really is beautiful. I had laid it aside because the mat was coming up and looked a tad larger on one side. One night I fixed it and absentmindedly put adhesive on the back before I realized I hadn’t prepared anything for it to go on…so I kept shuffling it around my desk for a few days, upside down so it wouldn’t stick to things. 🙂
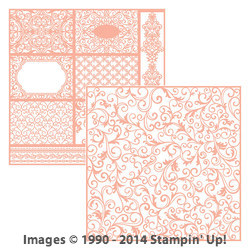
I was actually searching for papers for another wedding card when I spotted my new pack of Petal Pink and white Beautifully Detailed Laser-Cut Specialty Paper” (148812, $14) that is in the new 2019 Occasions catalog (orderable as of January 3)–and it matched perfectly with the rose piece I had just moved…again. (The specialty paper pack includes eight sheets, four each of two design types. One type is a full 12×12 sheet that looks like filigree swirls, and the other type is full of elegant sections that can be cut into card fronts, borders, or accents.)
Once I confirmed that the pieces matched, I carefully cut away one of the card front pieces that looked the best when I placed the rose on top of them to test them (on top of the plastic bag holding the specialty paper, since I already had adhesive in my way). Then I found a piece of Thick Very Vanilla cardstock, cut it in half, and scored both, using one as my card base. And then I laid more adhesive on the back of the rose piece, just in case, before adhering it first to the laser-cut paper and then to the card base. The laser-cut paper I chose has a large opening in the middle, which the edges of the green mat just barely covered on the sides, so the adhesive went right through to the base.
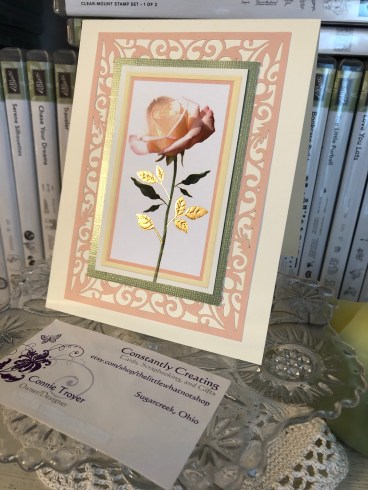
I almost left the borders of the specialty paper free without gluing them, but I was afraid they would get creased since they’re so delicate, even though they’re a good weight. So I did take a bit of my Art Glitter fine-tip glue to tack down the corners in the thickest part and occasionally on the sides just to keep it from catching on something.
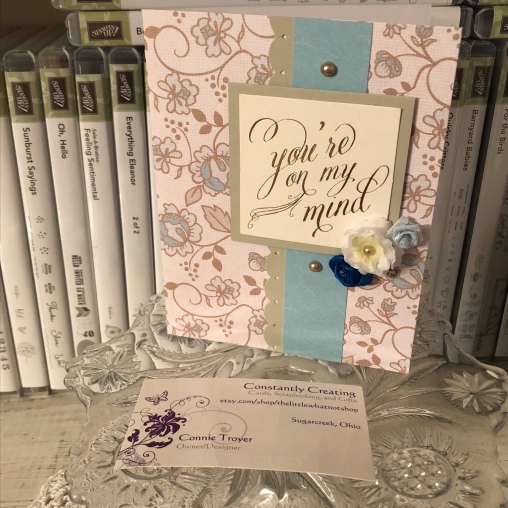
I kept the inside simple with a stamp from the retired Thoughts and Prayers stamp set from SU, and I used Grapefruit Grove ink because I thought the paper was the same color until I checked it tonight (oops!). I may go back and add one of the border pieces of the specialty paper on the bottom, but I haven’t decided how much room we will need for the handwritten message of the card.

Be sure and pick up a pack of this laser-cut specialty paper when the Occasions catalog goes live on January 3. There are so many options for creating with it, and it’s simply lovely. Here are other current items I used for this card:


I’m happy to help you order if you need a Stampin’ Up demonstrator. 🙂 You can use the code PNWVCZEU to order through my store (http://www.stampinup.com/ECWeb/default.aspx?dbwsdemoid=2202334) through January 5. (If it is after January 5, feel free to contact me for a new code!)
Thanks for stopping by my blog today!