Hello there and thanks for stopping by my blog! I’m sorry I’ve been quiet lately; I’ve had too many projects and people to please recently. (You all knows how that goes, right? Maybe I’m not the only one? 😂)
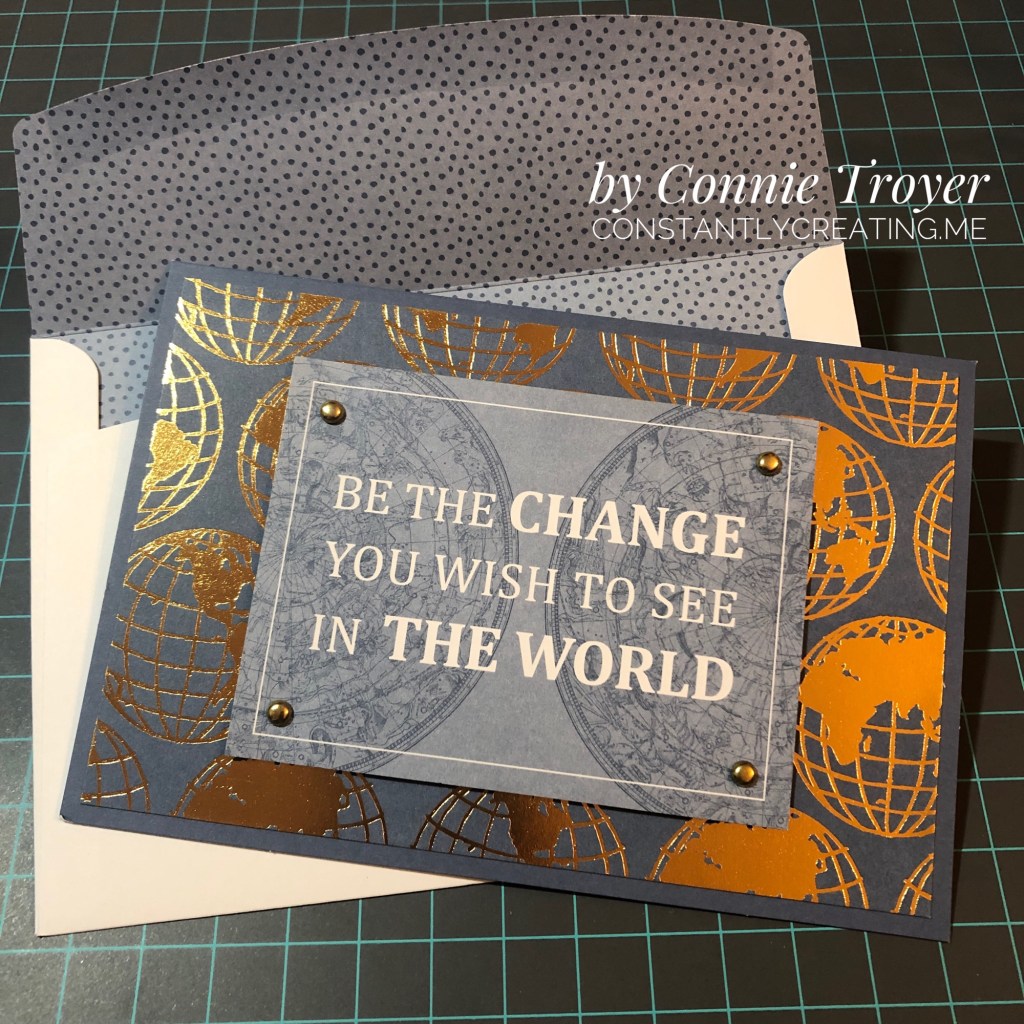
I haven’t had a lot of time in the craft room this month but I did sneak in there a couple of evenings recently to try to finish a batch for my local gift shop/employer. I’ve done a few grad cards and some easy cards. Here’s an easy one you can duplicate if you have or can find the World of Good Memories and More Card Pack and the Flowers for Every Season Cards and Envelopes.
I used a piece of Misty Moonlight cardstock for my A6-sized base first and then picked the large foiled globe card and the smaller 3×4 “Be the Change” card out of the card pack. I adhered the largest card with my preferred glue, and then I measured (yes, I actually measured!) and punched 3/16” holes in the corners for some 3/16” gold brads. Once I had the brads fastened, I popped up the card on foam dimensionals. And that was it! I used a Misty-Moonlight-lined envelope from the Flowers for Every Season Cards and Envelopes and called it done. 😂 I guess simple and easy really is the best. (The next post about a fancy grad card I did this week will be the opposite!) Most of all, I liked the sentiment on this card. I think it could even be used as a grad card, a masculine card, or one of encouragement. Thanks again for visiting, and stay tuned for more when I get time!
Birthday and Thinking of You cards made with the Kerchief Card Kit available for free only during Sale-a-Bration with Stampin’ Up!
Thanks for joining me on my blog today! I have to start off with an apology and a correction; this blog post is for Amy’s Tuesday Blog Hop, not Sunday’s. I was thinking of the day I had to post the link! And now I can’t change it…. More proof that I’m not perfect, I suppose. 🙂
So, for the Tuesday Blog Hop, which is going with a birthday theme this month, I decided to make up the Kerchief Card Kit, which is available as a Sale-a-Bration reward for spending $50 before tax and shipping. It had been backordered, but I got it in on Saturday and sat right down to put them together. I’m still making cards for sale for my local gift shop in Amish Country, so this set is perfect to do up for them. I plan on ordering a second kit and selling them in sets of five and some singles, using our Acetate Boxes and some card jackets.
I decided to go with this kit for the birthday blog hop because of the included “Celebrate Today” sentiments, planned for the Coastal Cabana rose cards. (The Poppy Parade kerchief cards have “Thinking of You” sentiments.) I adore the blue cards (and its gold foil-dotted vellum!) because of the colors and style, and the red cards were simple and fun to put together as well (also with vellum, but plain). I also really liked the thicker twine included in the kit, and I hope I see more of it in the future. I was pleasantly surprised and pleased to note that there is no stamp or ink spot in the set; the sentiments are already printed and included as die-cuts, ready to be added to the cards. It made the work go much faster—and yet still allows me creativity to add whichever sentiments I see fit for the insides of the cards.
The picture above only shows four of the eight cards in the A2-sized kit because I made two of each of the cards shown. On the blue Coastal Cabana cards, I popped up the rose and sentiment on two of them and left the other two roses flat; I also put two bows up and away at the right and two at the lower left bottom, for variation.
I changed the placement of the gold leaves on the Poppy Parade cards, two being centered and two being placed at a diagonal the way the kit shows. I also changed the location of the bow, not placing them under the tag as in the instructions. I actually even put the bow on top of one of the tags, which is not reflected here.
I finished the cards by adding sequins from the retired Love Blossoms Kit, as I thought the gold, white, and Blushing Bride colors matched well.
When I considered sentiments for the insides of the cards and looked through my current stamp sets, I found four that will work nicely for wedding or anniversary, general celebrations, or celebrating a special person or a special day that may or may not be love-related. Though they’re not stamped on the cards yet, I plan on using “Be strong, be happy, be you” from Rooted in Nature; “Wishing you the best on your special day” from the Perennial Birthday set; “Hoping you experience love and joy today, tomorrow, and always” from the Last a Lifetime set in the Mini catalog; and “Here’s to always finding joy in one another’s laughter, warmth in one another’s embrace, and love in one another’s lives” from Path of Petals. I think the “celebrate today” cards could also be used as graduation, retirement or promotion, even the birth of a baby or baby shower, and more occasions as well, if you didn’t feel the need to use the standard icons of the event. They would work fine as blank cards too—celebrating life or spring or no reason whatsoever!
Free with your purchase, the kit is a good investment. Quick to make up and easy to have a few cards on hand or to give as gifts, it’s one that will appeal to many (if for convenience’s sake if nothing else!), and the cards are lovely to boot. They’re also very easy to adapt to other styles or make into alternate designs. The envelopes are all lined with either Balmy Blue or Petal Pink and make a nice “wow” moment when they’re opened as well.
I’ll leave you with a close-up of my favorite card in the stack. 🙂 Please be sure to scroll down and “hop” through the rest of our list of participants so you can see the special birthday cards they created. We have a fantastic, creative team! If you are needing Stampin’ Up supplies, catalogs, or a consultant, I’m happy to help you out with any. You can use host code WAA2PGYR until February 16 when you check out. Thanks again for stopping by!
Some cards from the Designer Tin of Cards Project Kit – quick and easy cards with a bit of variation.
Hello again. 🙂 I’ve had interest in a blog post about one of my birthday cards, so I thought I’d do up a quick blog post about it and a couple of others I made from the same kit.
The kit in question is the now-retired Designer Tin of Cards Project Kit from Stampin’ Up. When I was on vacation this past summer, I took an evening and mainly made up the cards the way the kit suggested, with little variations to the cards here and there. I didn’t add the sentiments at the time because I wasn’t sure what I would need them for and I didn’t have all my options in front of me anyway. So little by little I’ve been picking out of the batch and finishing them to send as needed, with some still waiting.
All my blue-and-white-and-gold ones have gone to the local gift shop for sale, and they had different sentiments. I used one of the masculine looks for my dad’s birthday. I used the banners/garlands base for another relative’s birthday and added some llama and cactus paper elements from a UK magazine I had with me. (I still have two of those bases to create with, actually.) I sent at least one of the coral hibiscus cards to the gift shop, and one went for a friend’s birthday. I used the “Celebrate Your Day” and “Sending Love” sentiments from the coordinating stamp set. I still have two coral and one masculine card to sentiment yet.
I didn’t used to be very fond of the kit idea in general because they’re usually too simple for my preferred style of details. But as I get busier, I have seen how useful they can be for when I want to send a handmade card but haven’t had extra time. Also, now that I’m constantly making cards for the gift shop, it’s been nice to fall back on ones that are faster and easier to make without taxing my design skills. I’m beginning to let go of the need to have everything perfectly perfect and just the way I like it. I simply don’t have enough time to keep up with all I’d like to do in this life. They need cards, so I must make them and not fuss around. Besides, some people really prefer the simpler, “to the point” cards rather than all the detail and fluff I like, so this way I hope to reach a bigger audience in interest. 🙂 For ones I send personally, I like to create cards with the recipient in mind. But for the shop, I don’t know who is buying them or who they are for. So the kits are beginning to work for me there. (And if any of the kits make it to the clearance rack, they’re even cheaper, which I also like.)
The kit coordinates with the Designer Tin of Cards stamp set, which I used for a few of the cards but not all. It was supposed to be used to make a filing system of cards on tabs, with the tin to hold everything, but I chose to use the sentiments rather than the tabs.
I’ve added in some of the finished cards as examples for you to see what the kit was like. Evidently I didn’t take all the pictures I should have. 🤦♀️ But if I find other pics, I’ll update the post with them.
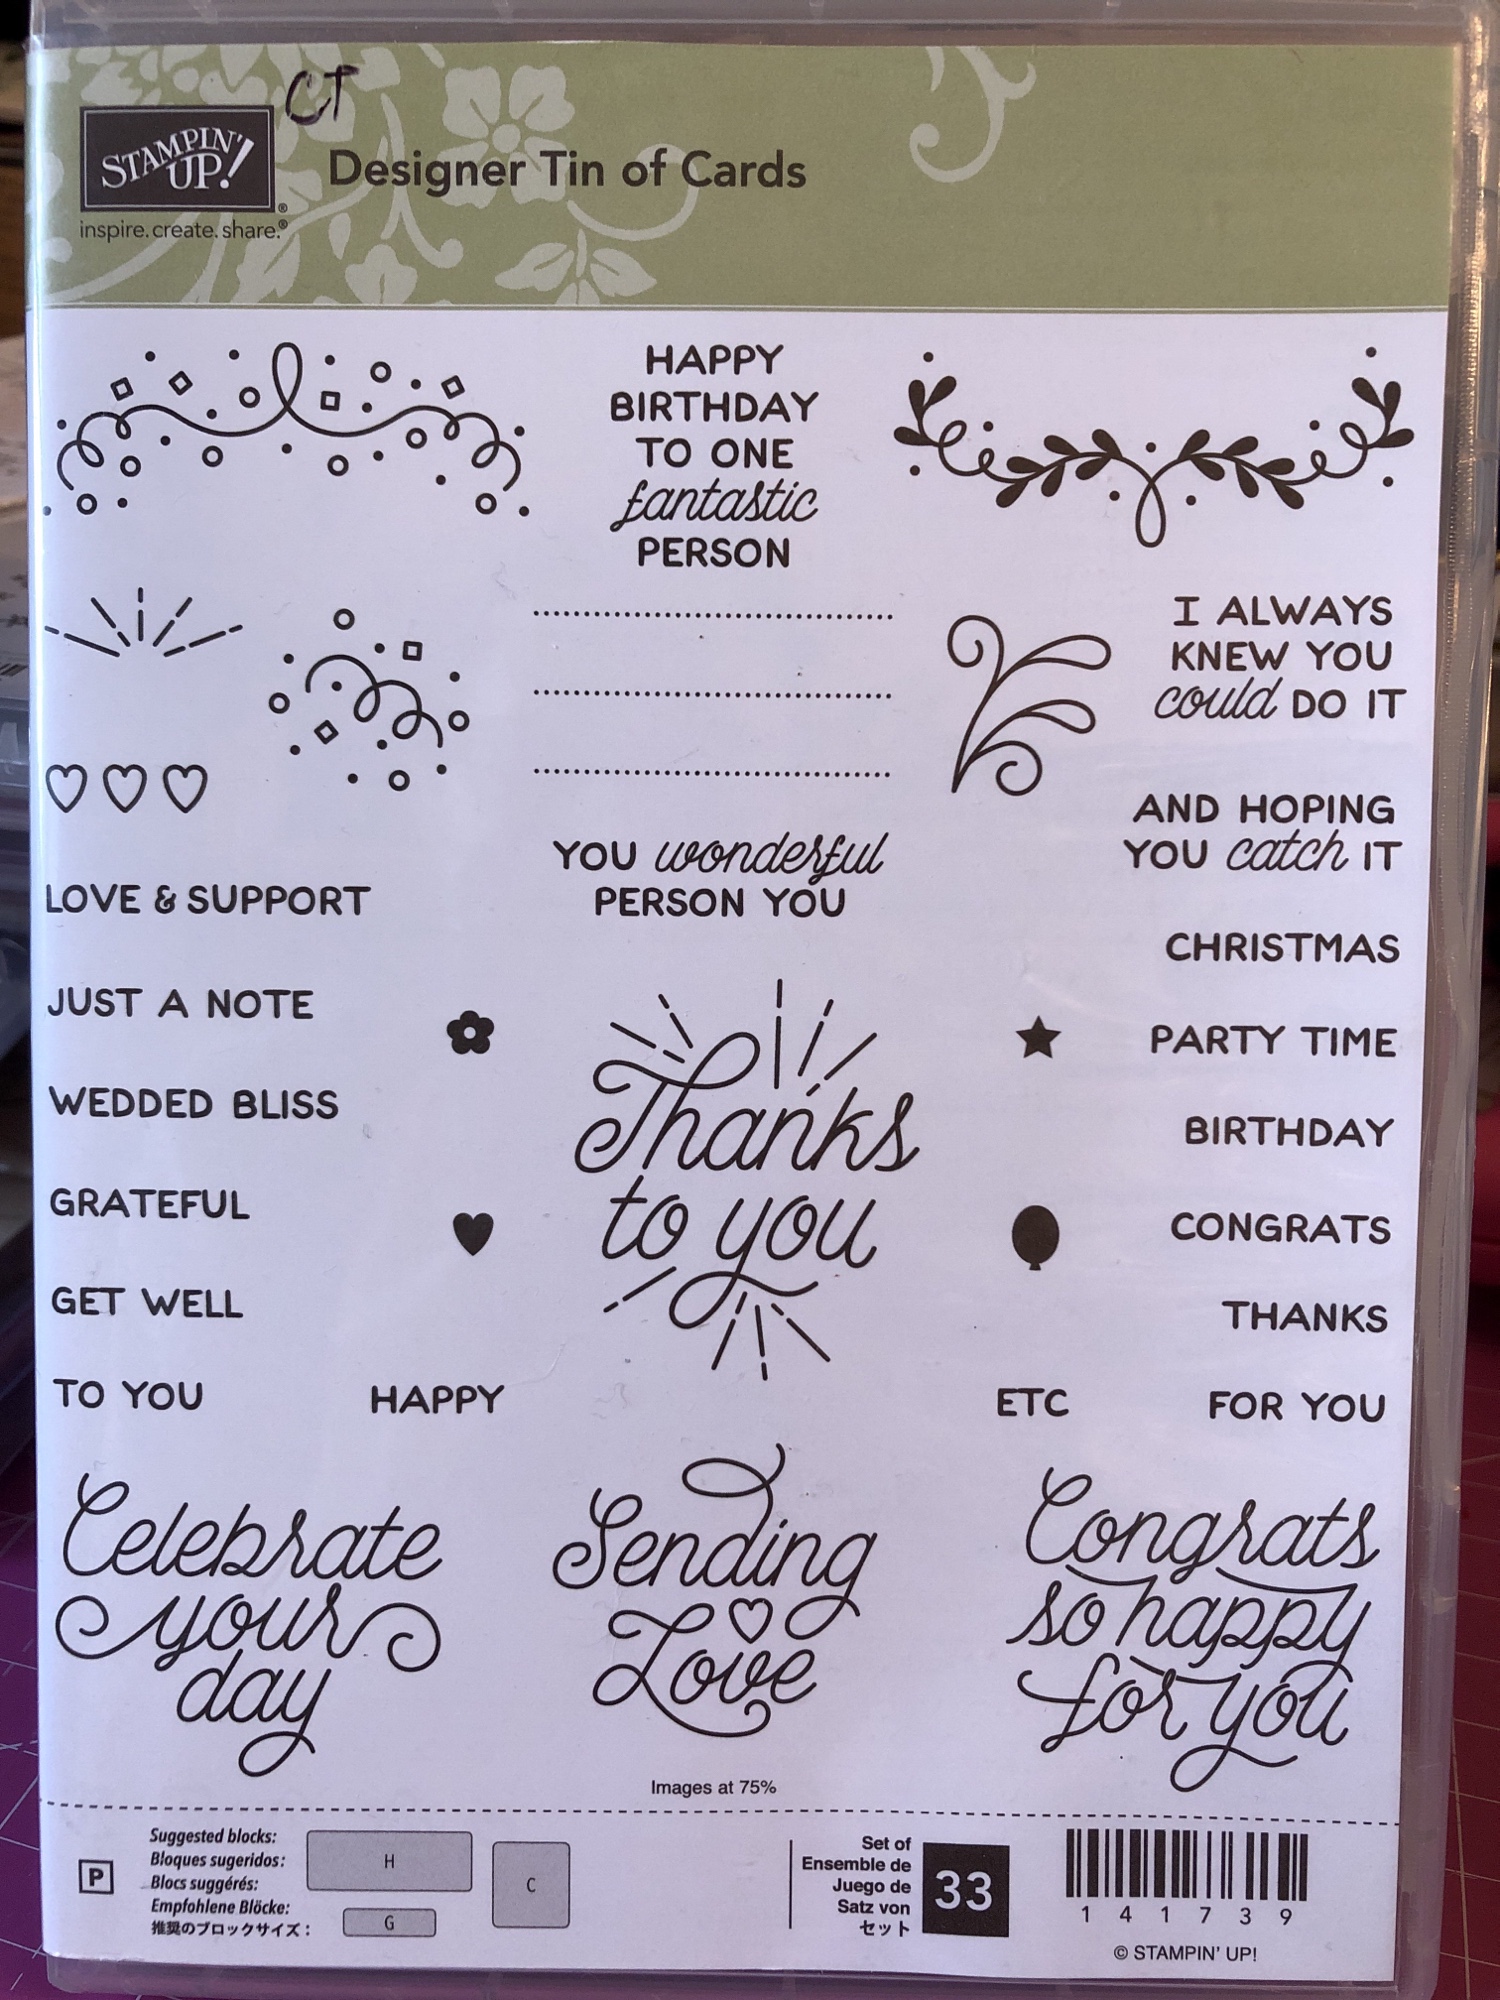
The Designer Tin of Cards stamp set.
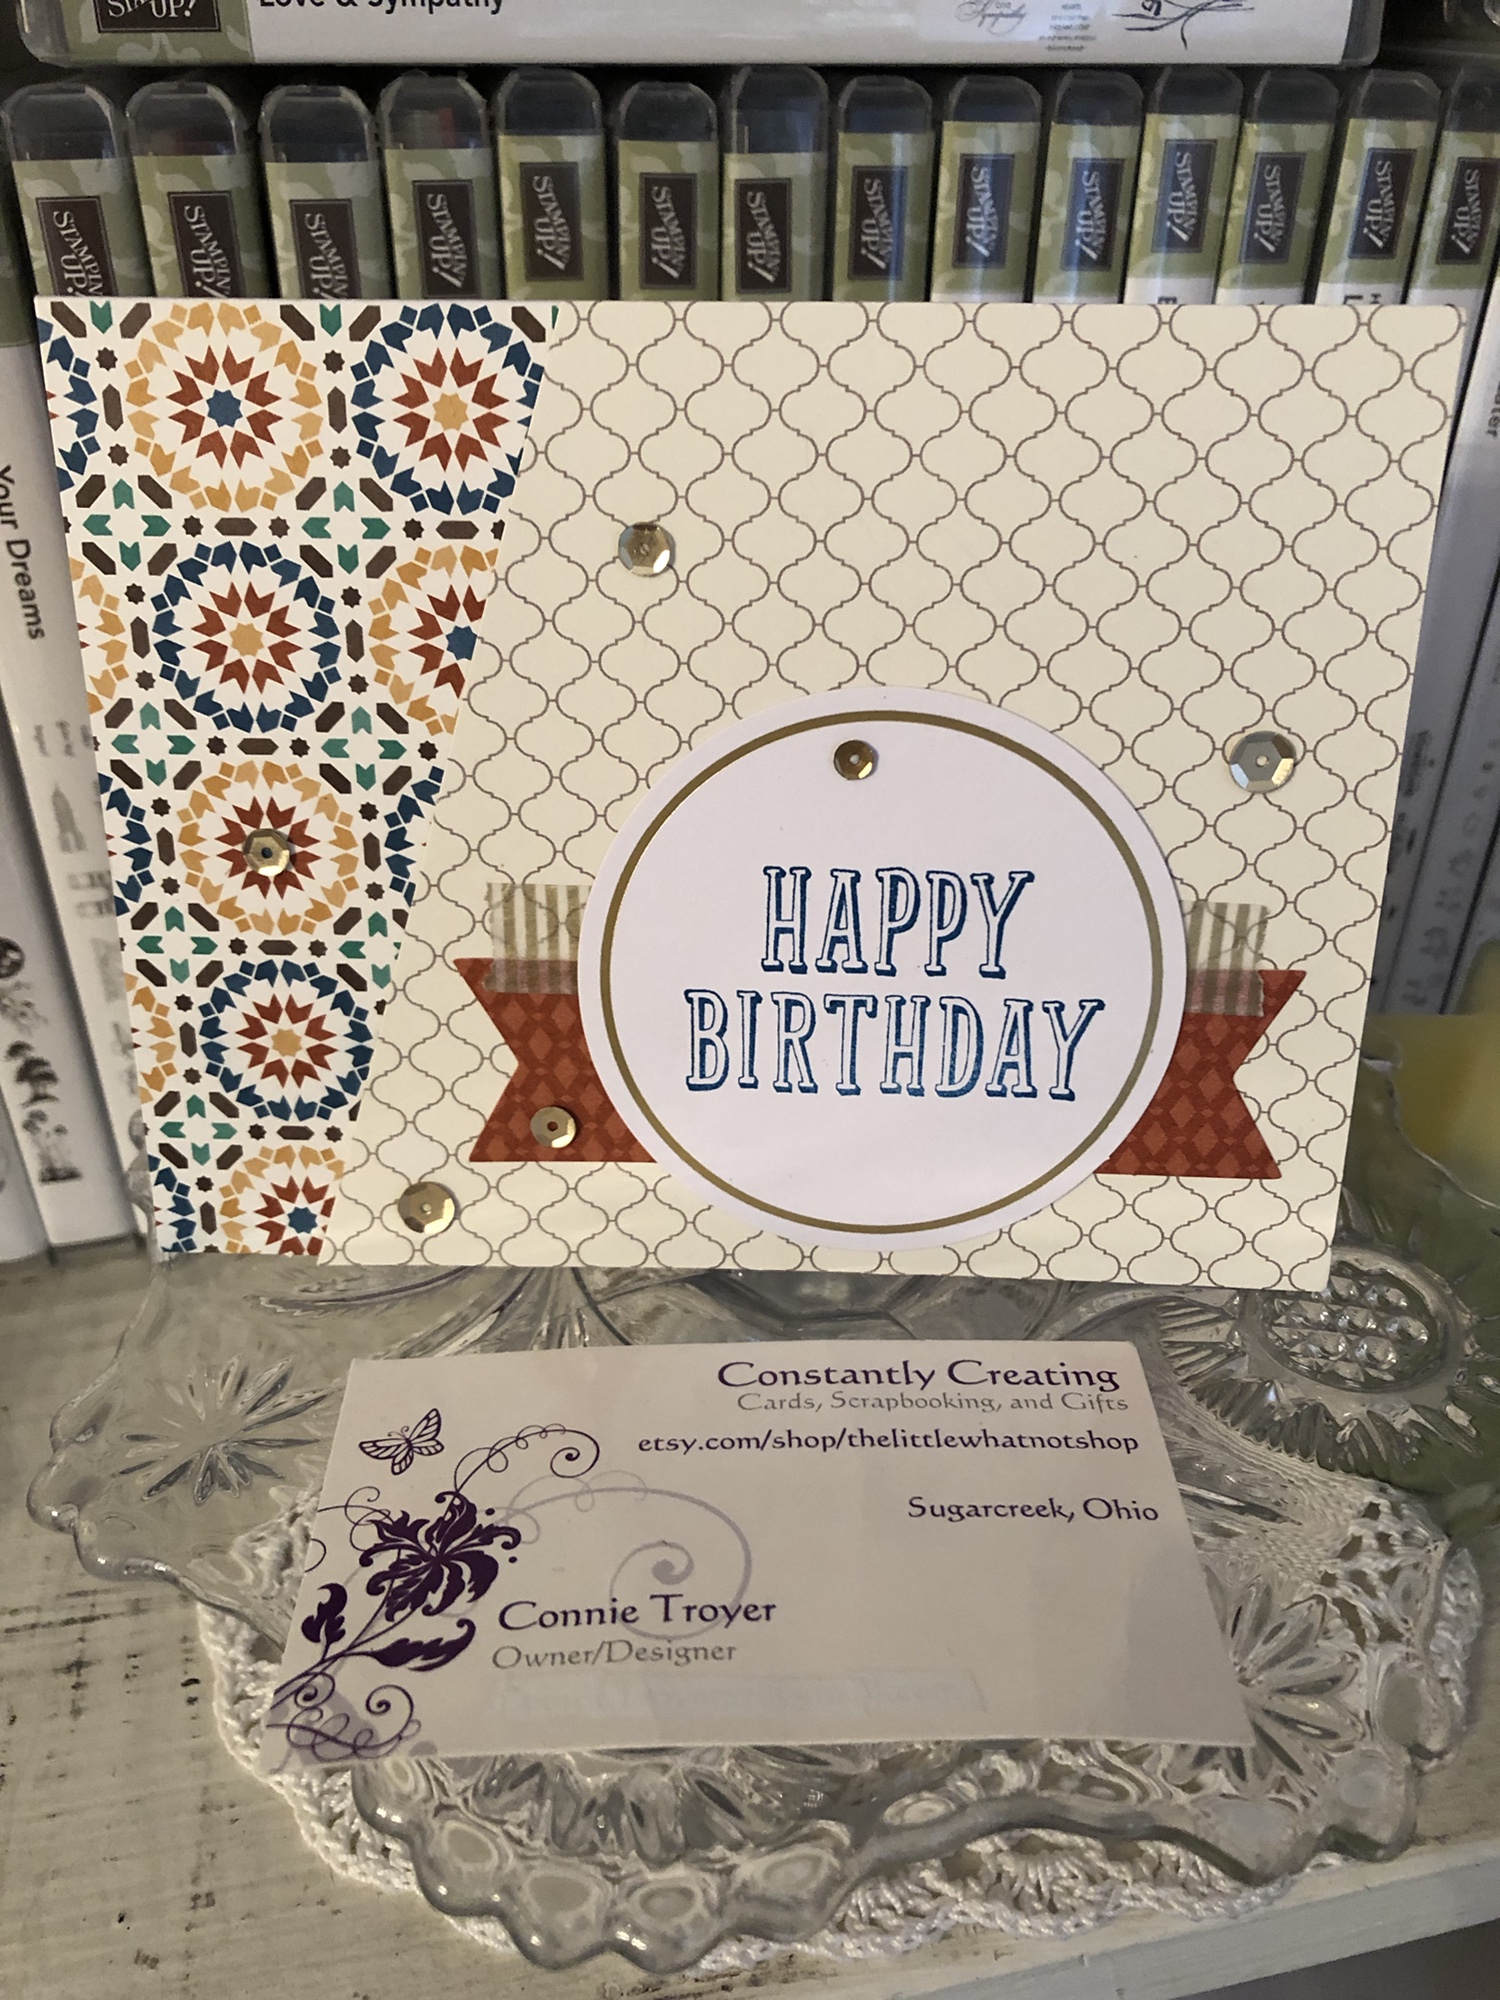
Sentiment from the “Birthday Wit” stamp set, with Pacific Point ink, gold sequins, and gold washi tape.
Sentiment from Blended Seasons stamp set, with Night of Navy ink.
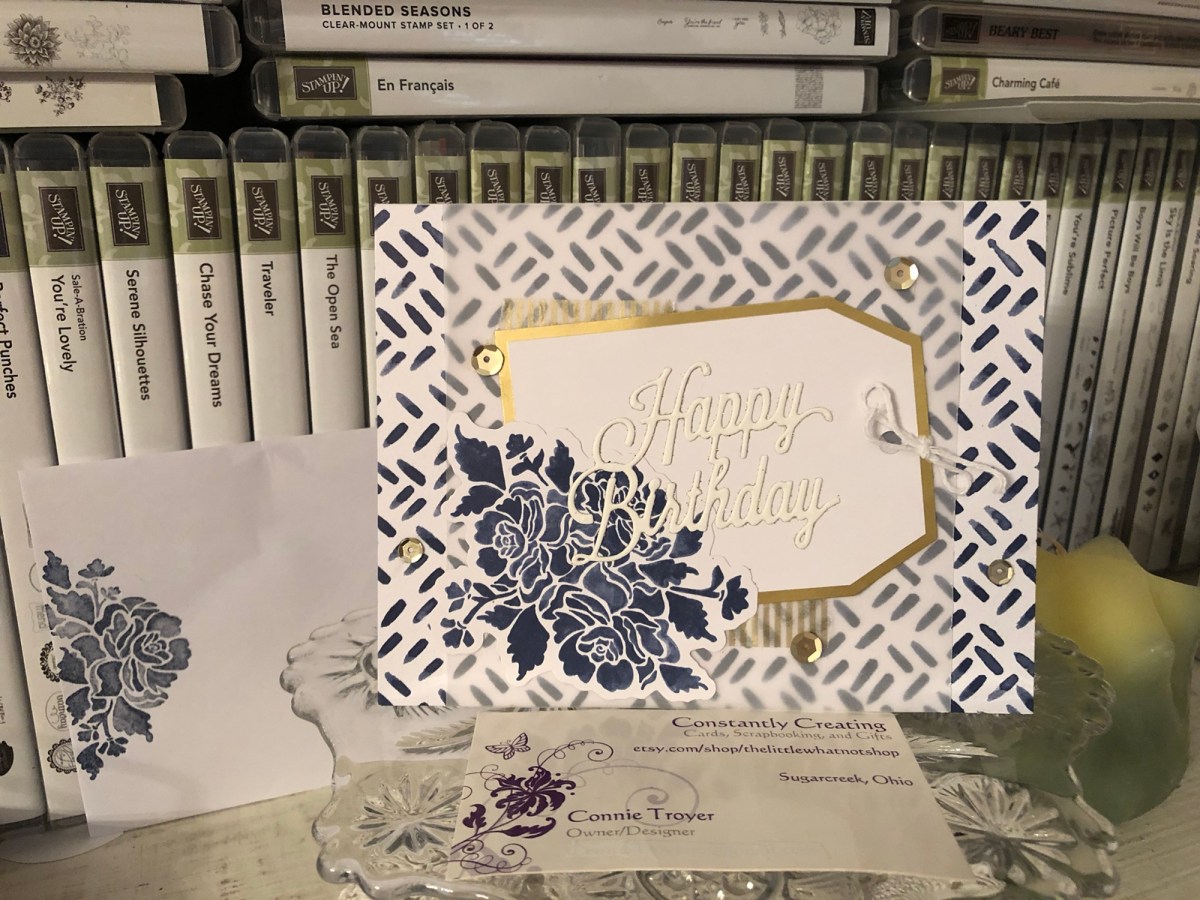
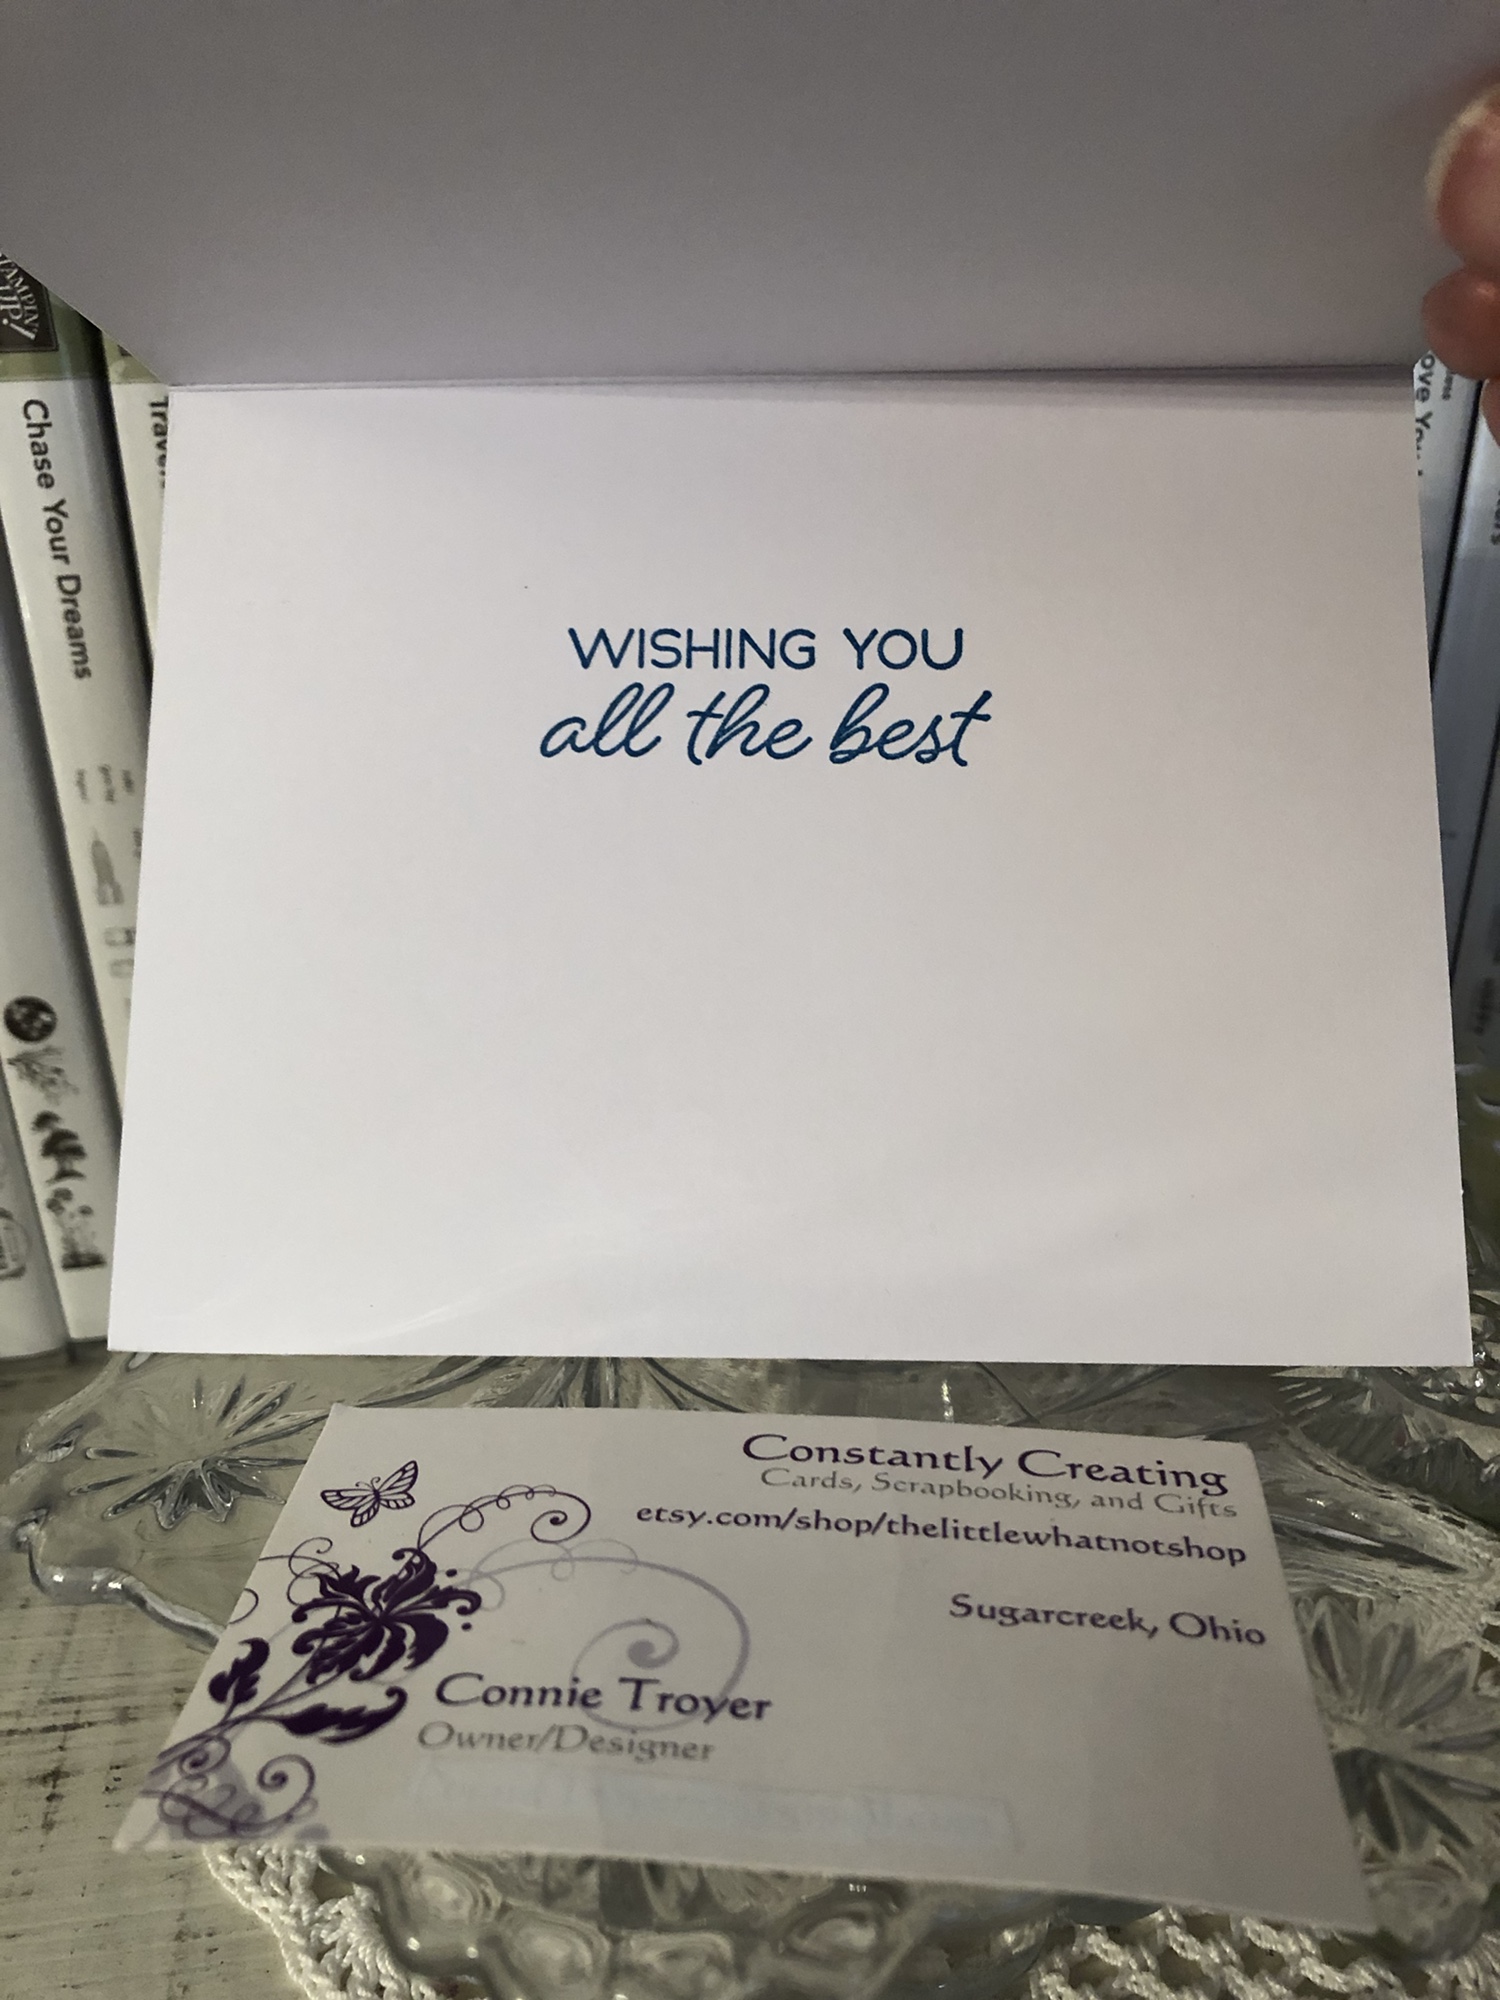
Unbranded happy birthday die with blue-and-white card base, vellum, gold-edged tag, gold sequins, gold washi, white twine, and a blue flowered die-cut all from the kit. I stamped the flower on the envelope with the coordinating Floral Phrases stamp set in Night of Navy ink.
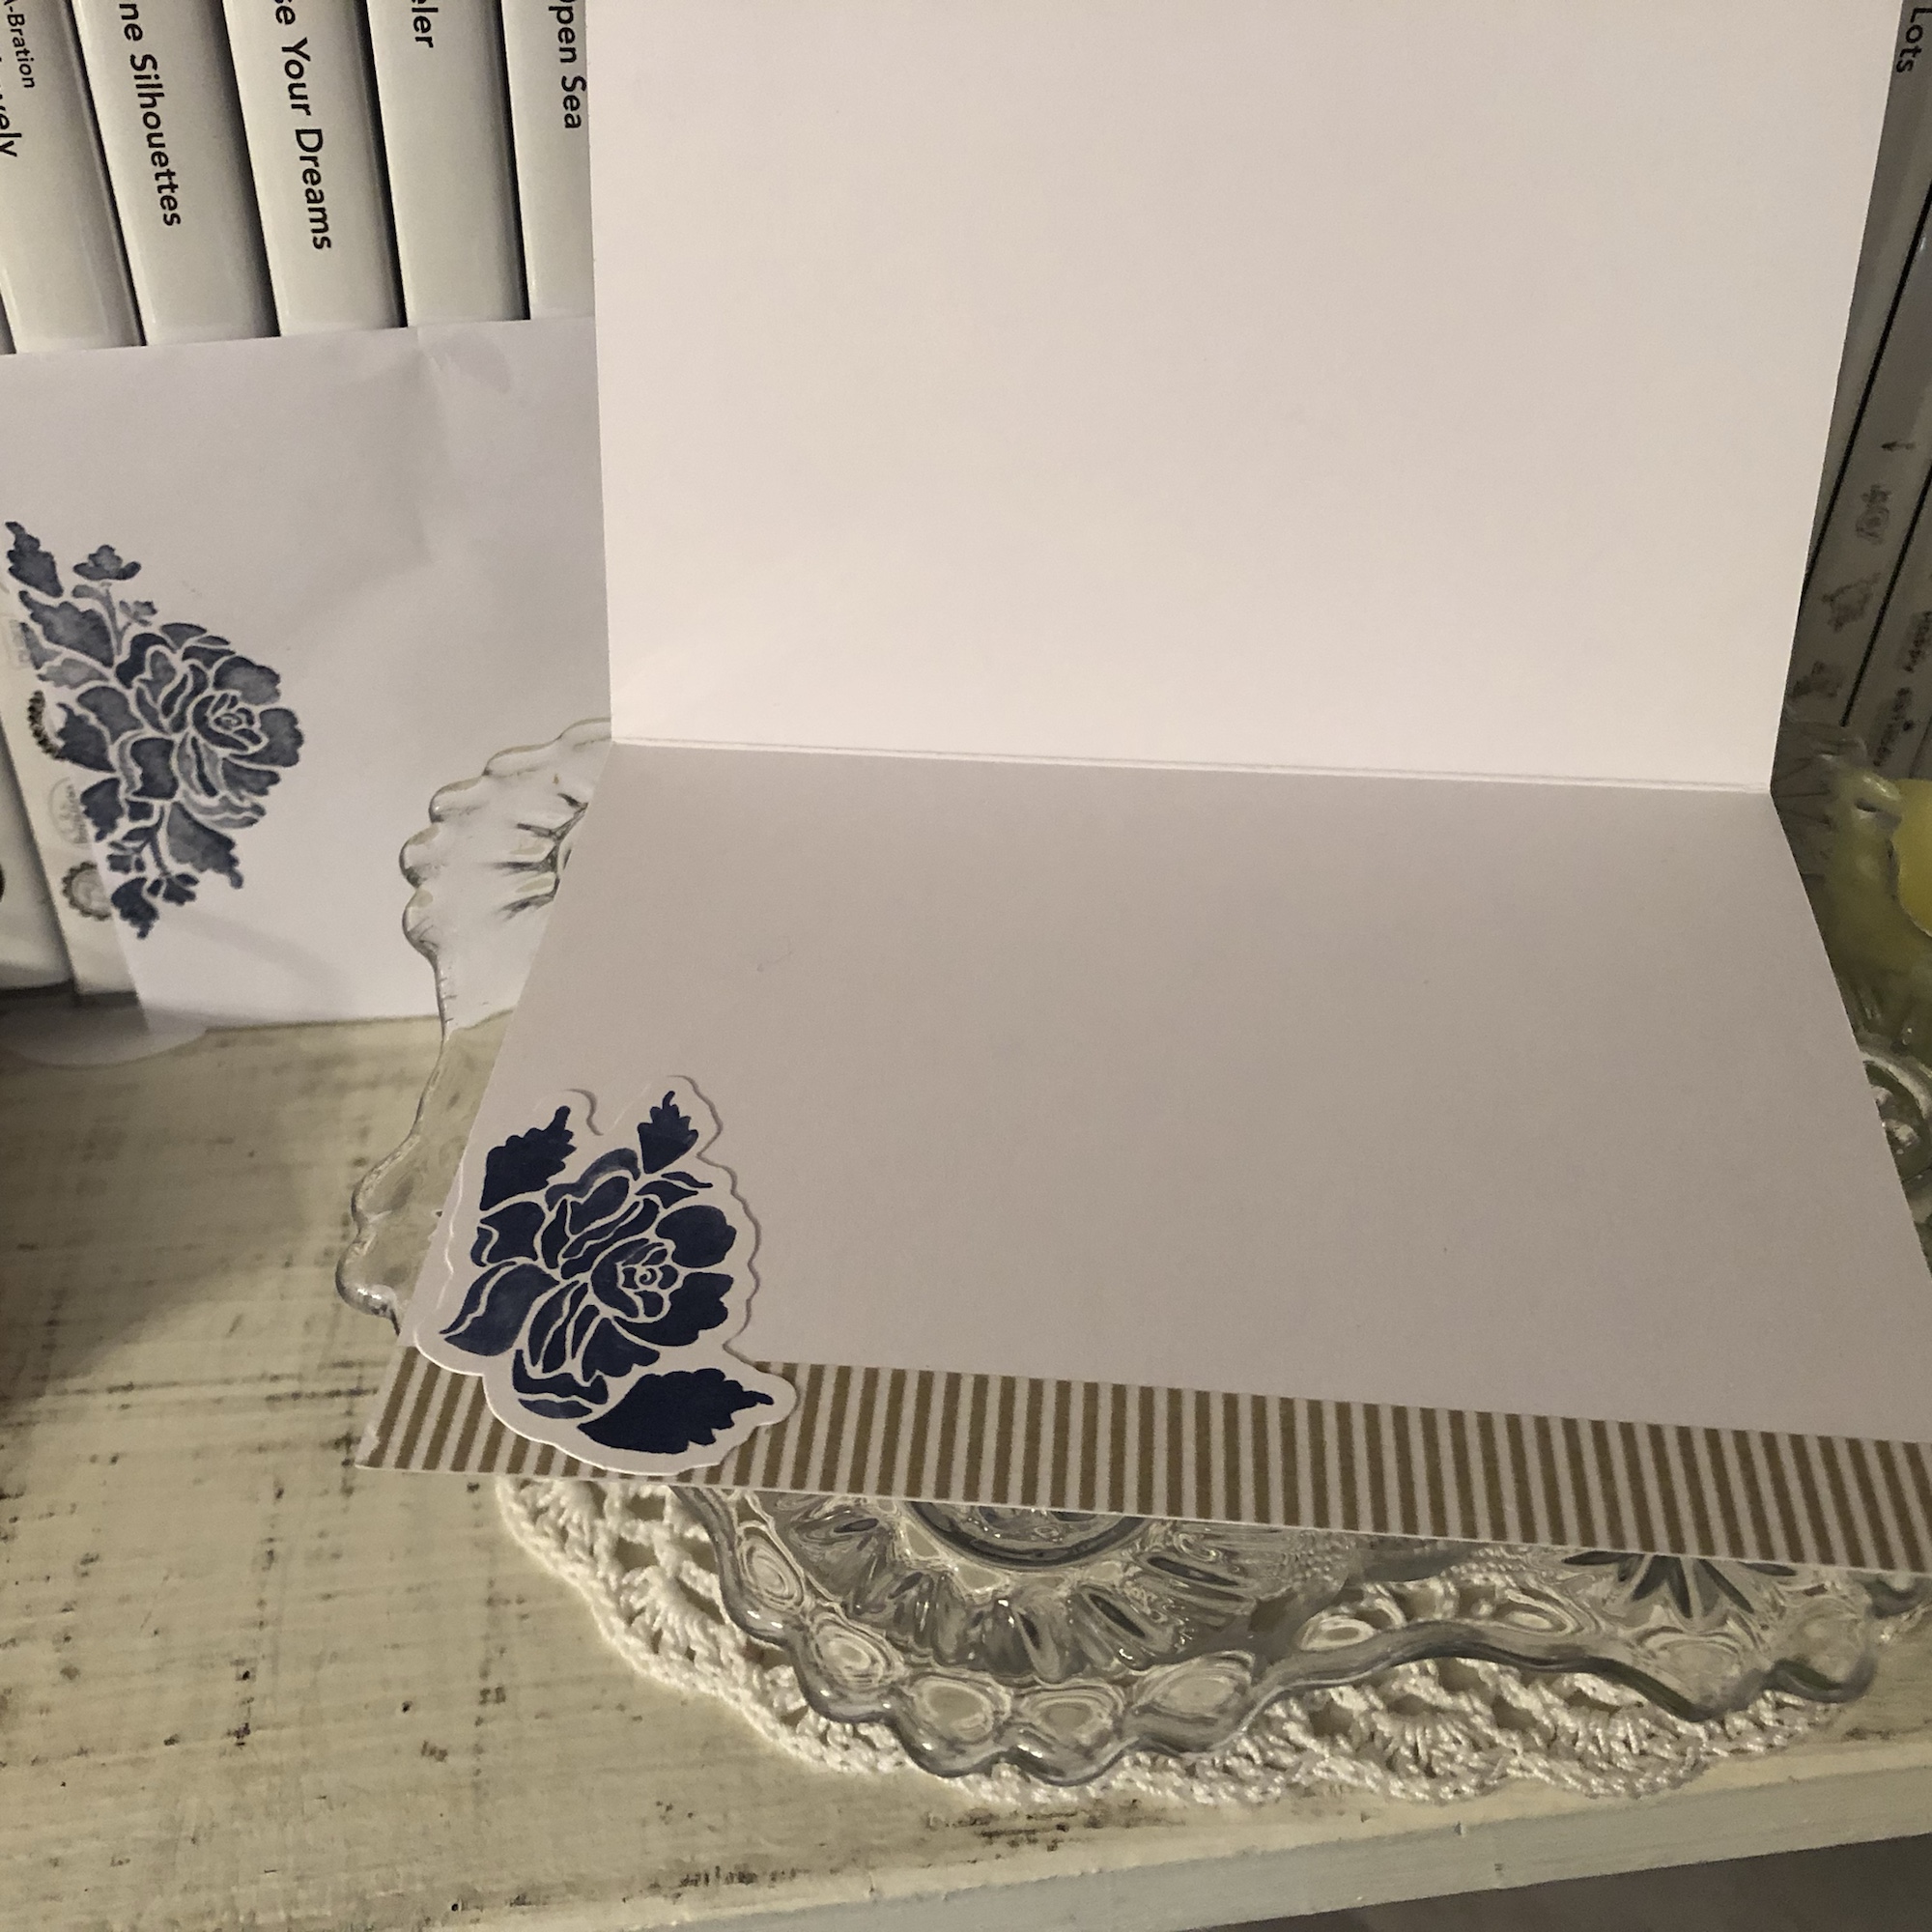
Blue flower die-cut and gold washi tape from the kit.
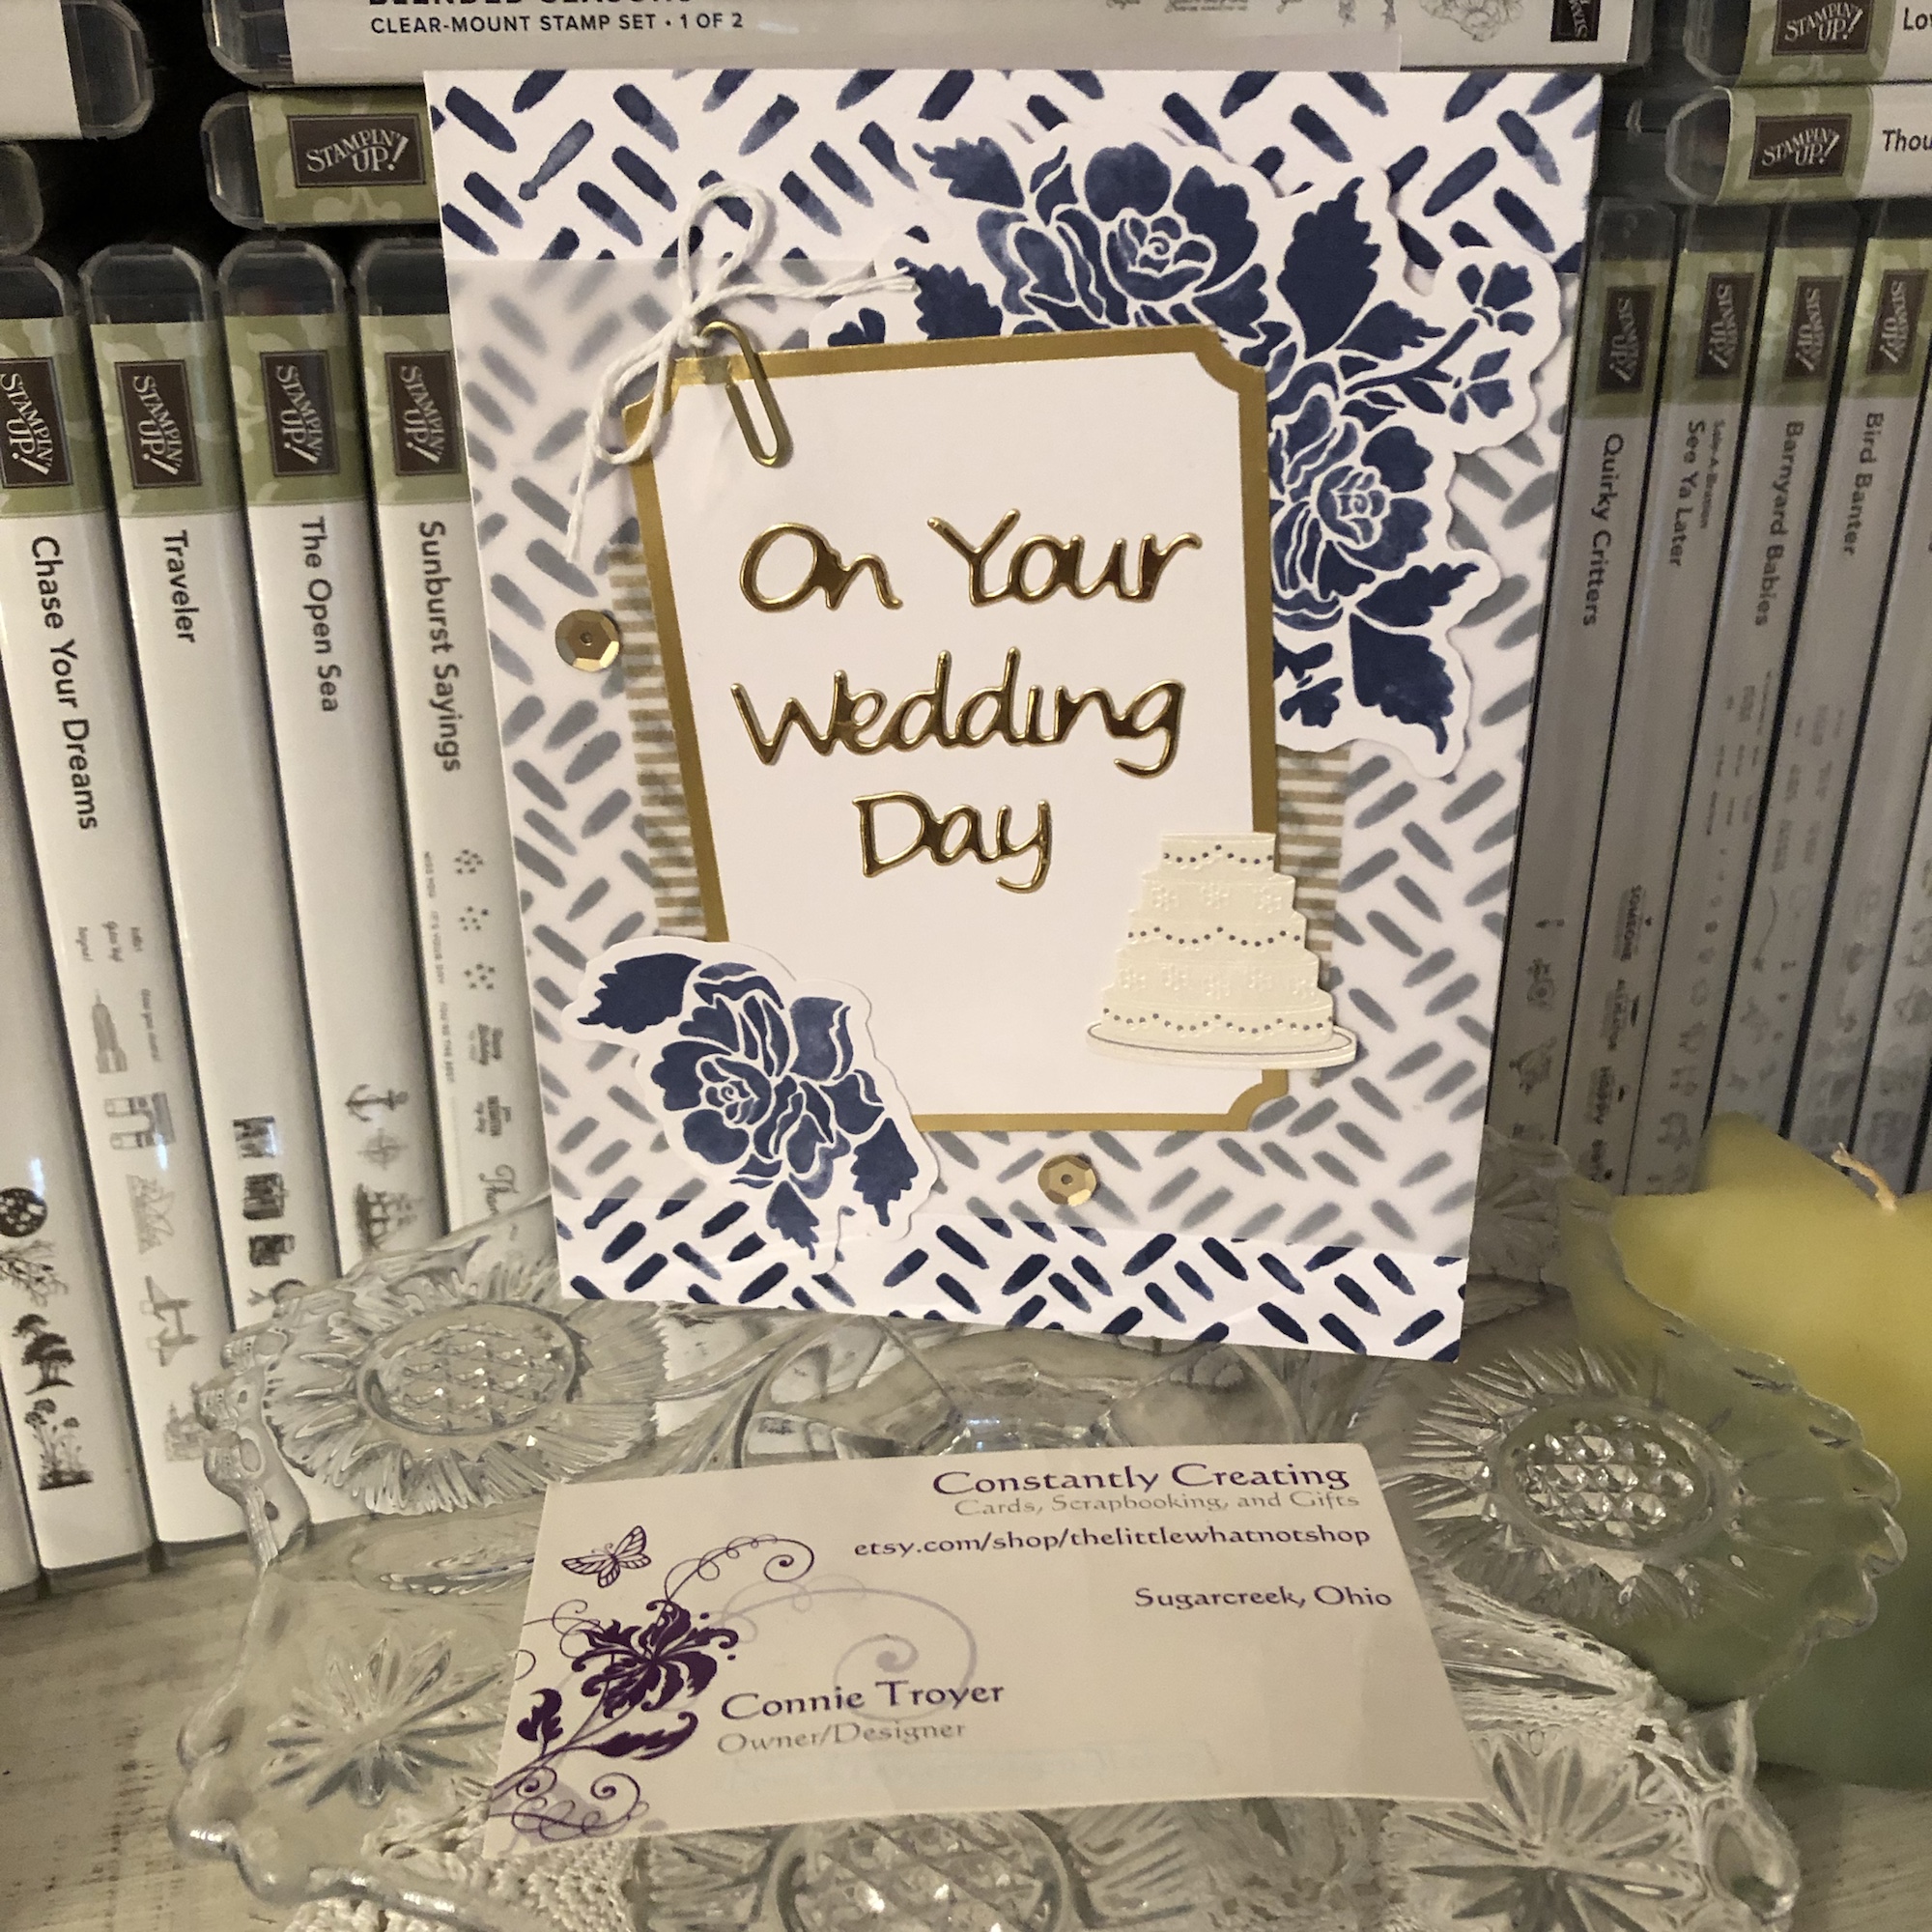
The only additions to the kit here were the Martha Stewart cake sticker and the gold-foil sentiment from a Spellbinders die. The kit even included paper clips!
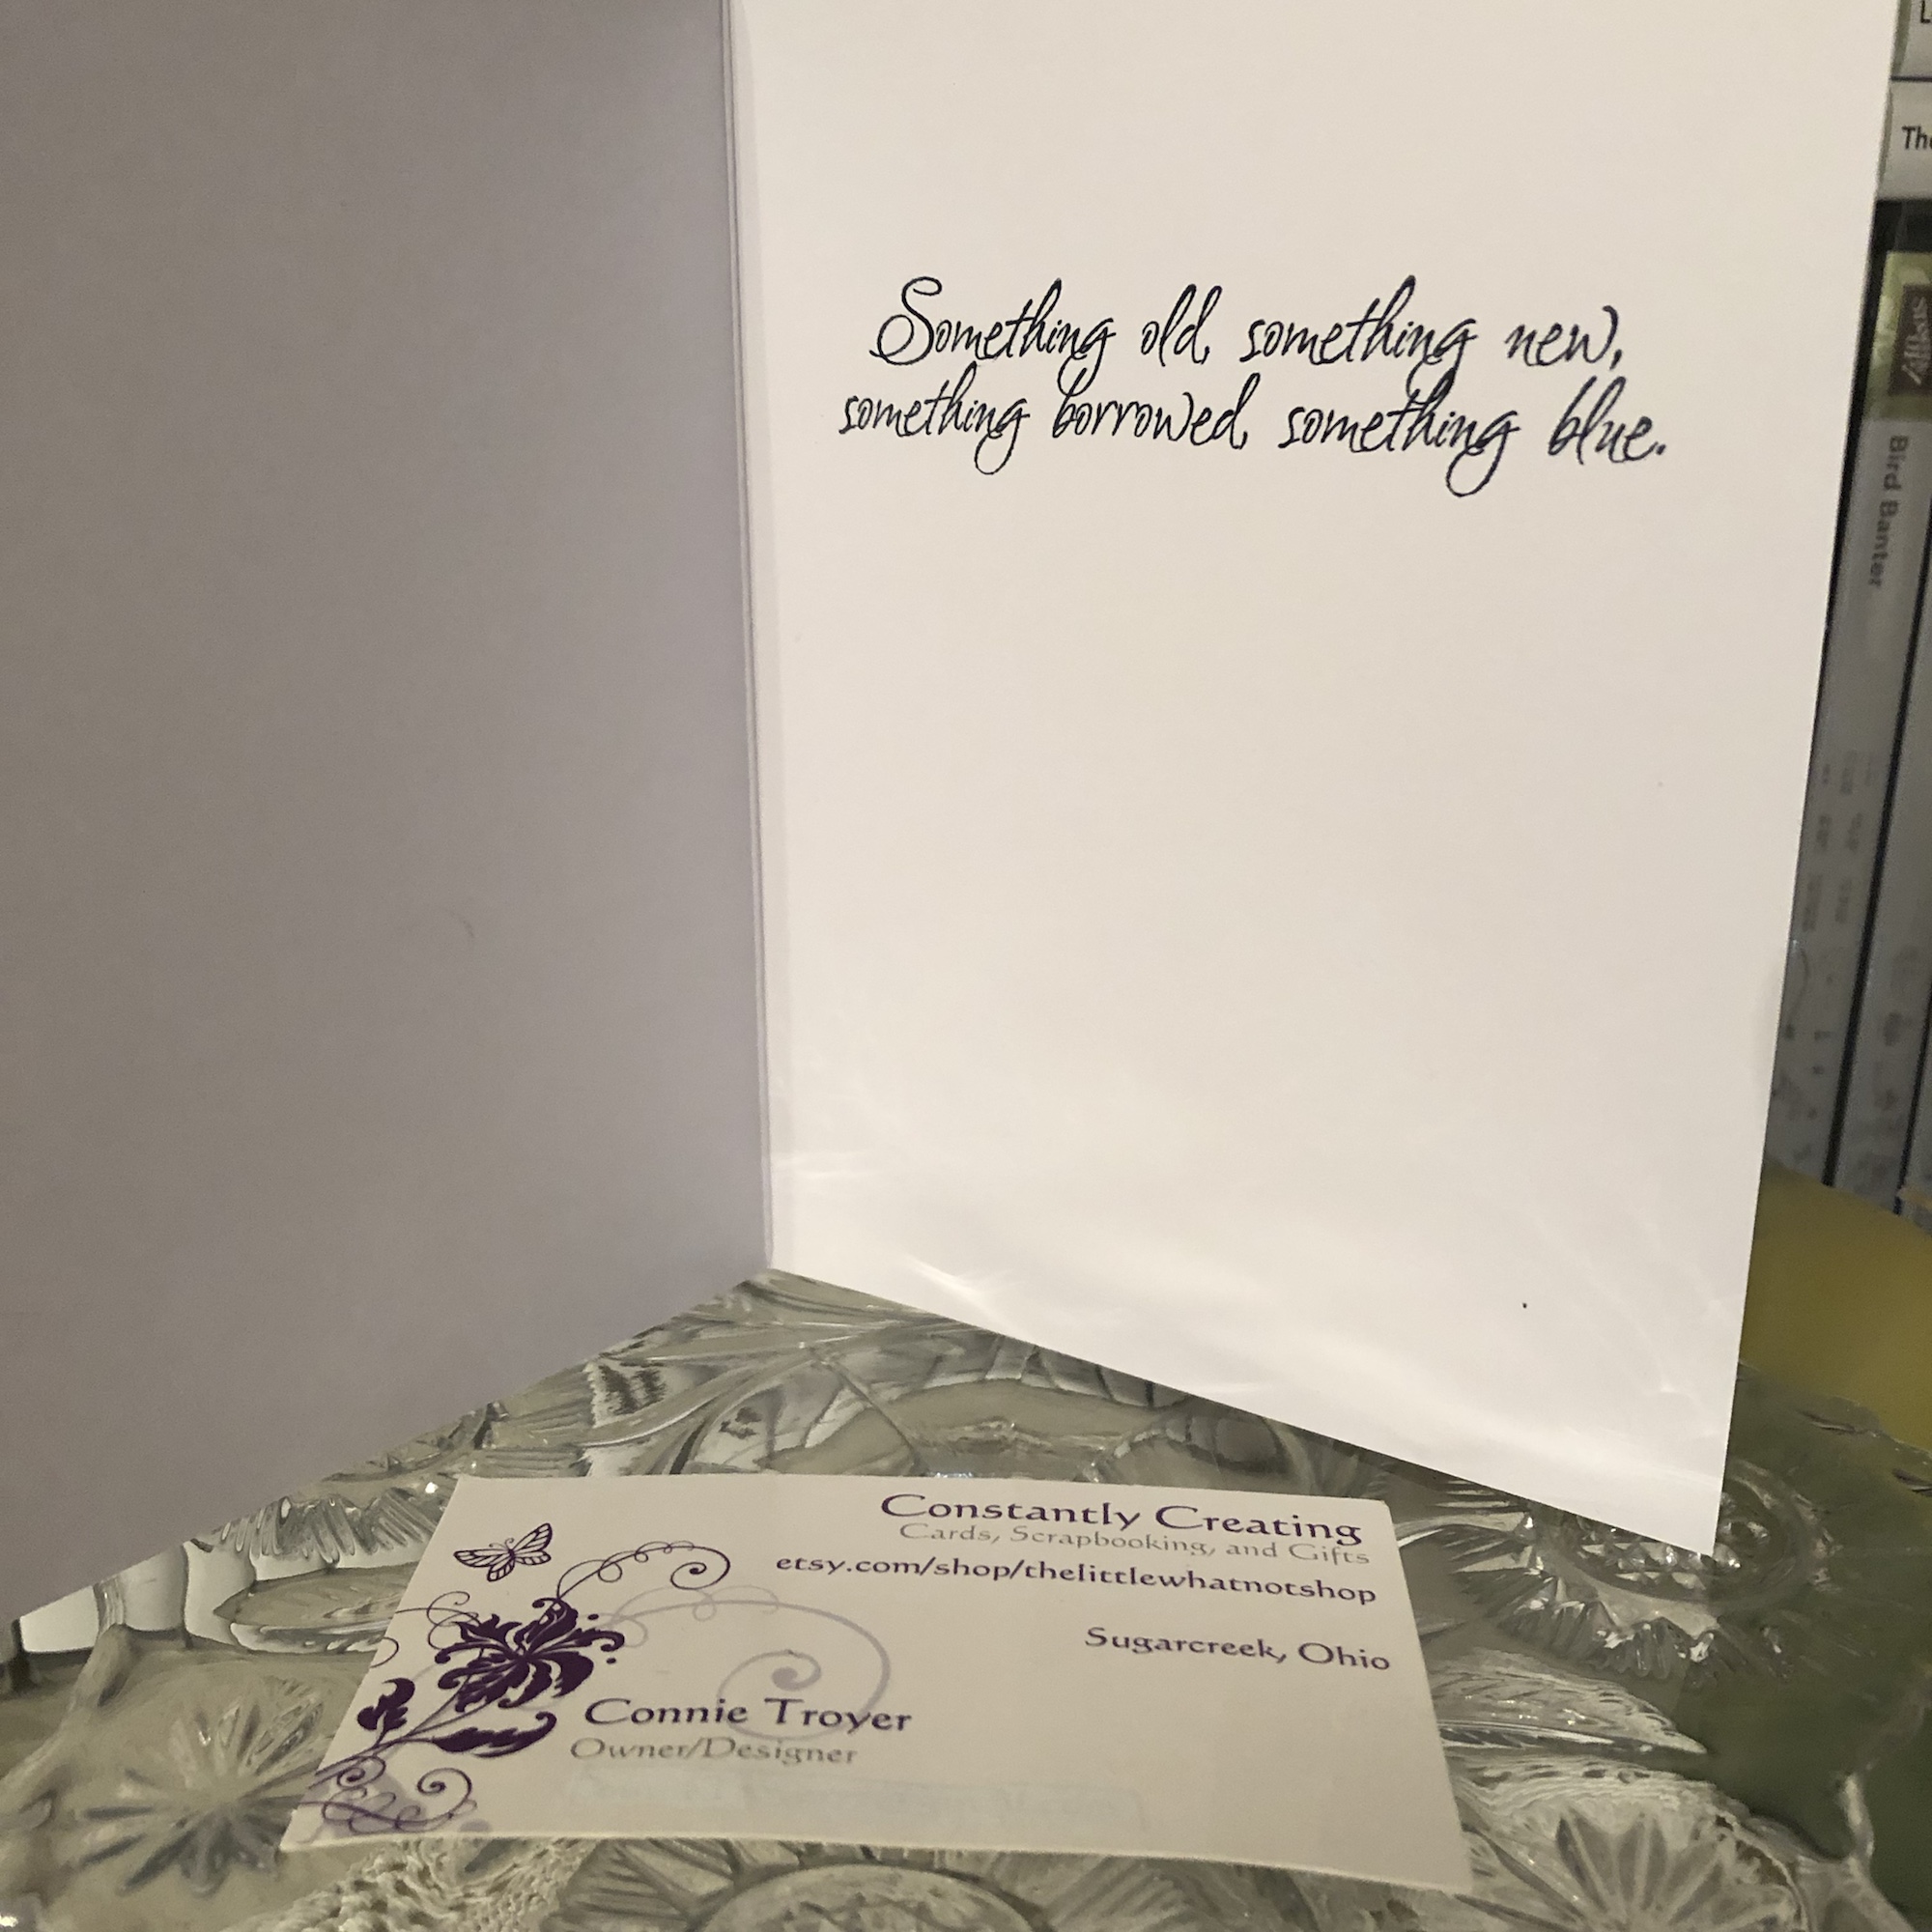
Ink is Night of Navy. Stamp is from MSE.
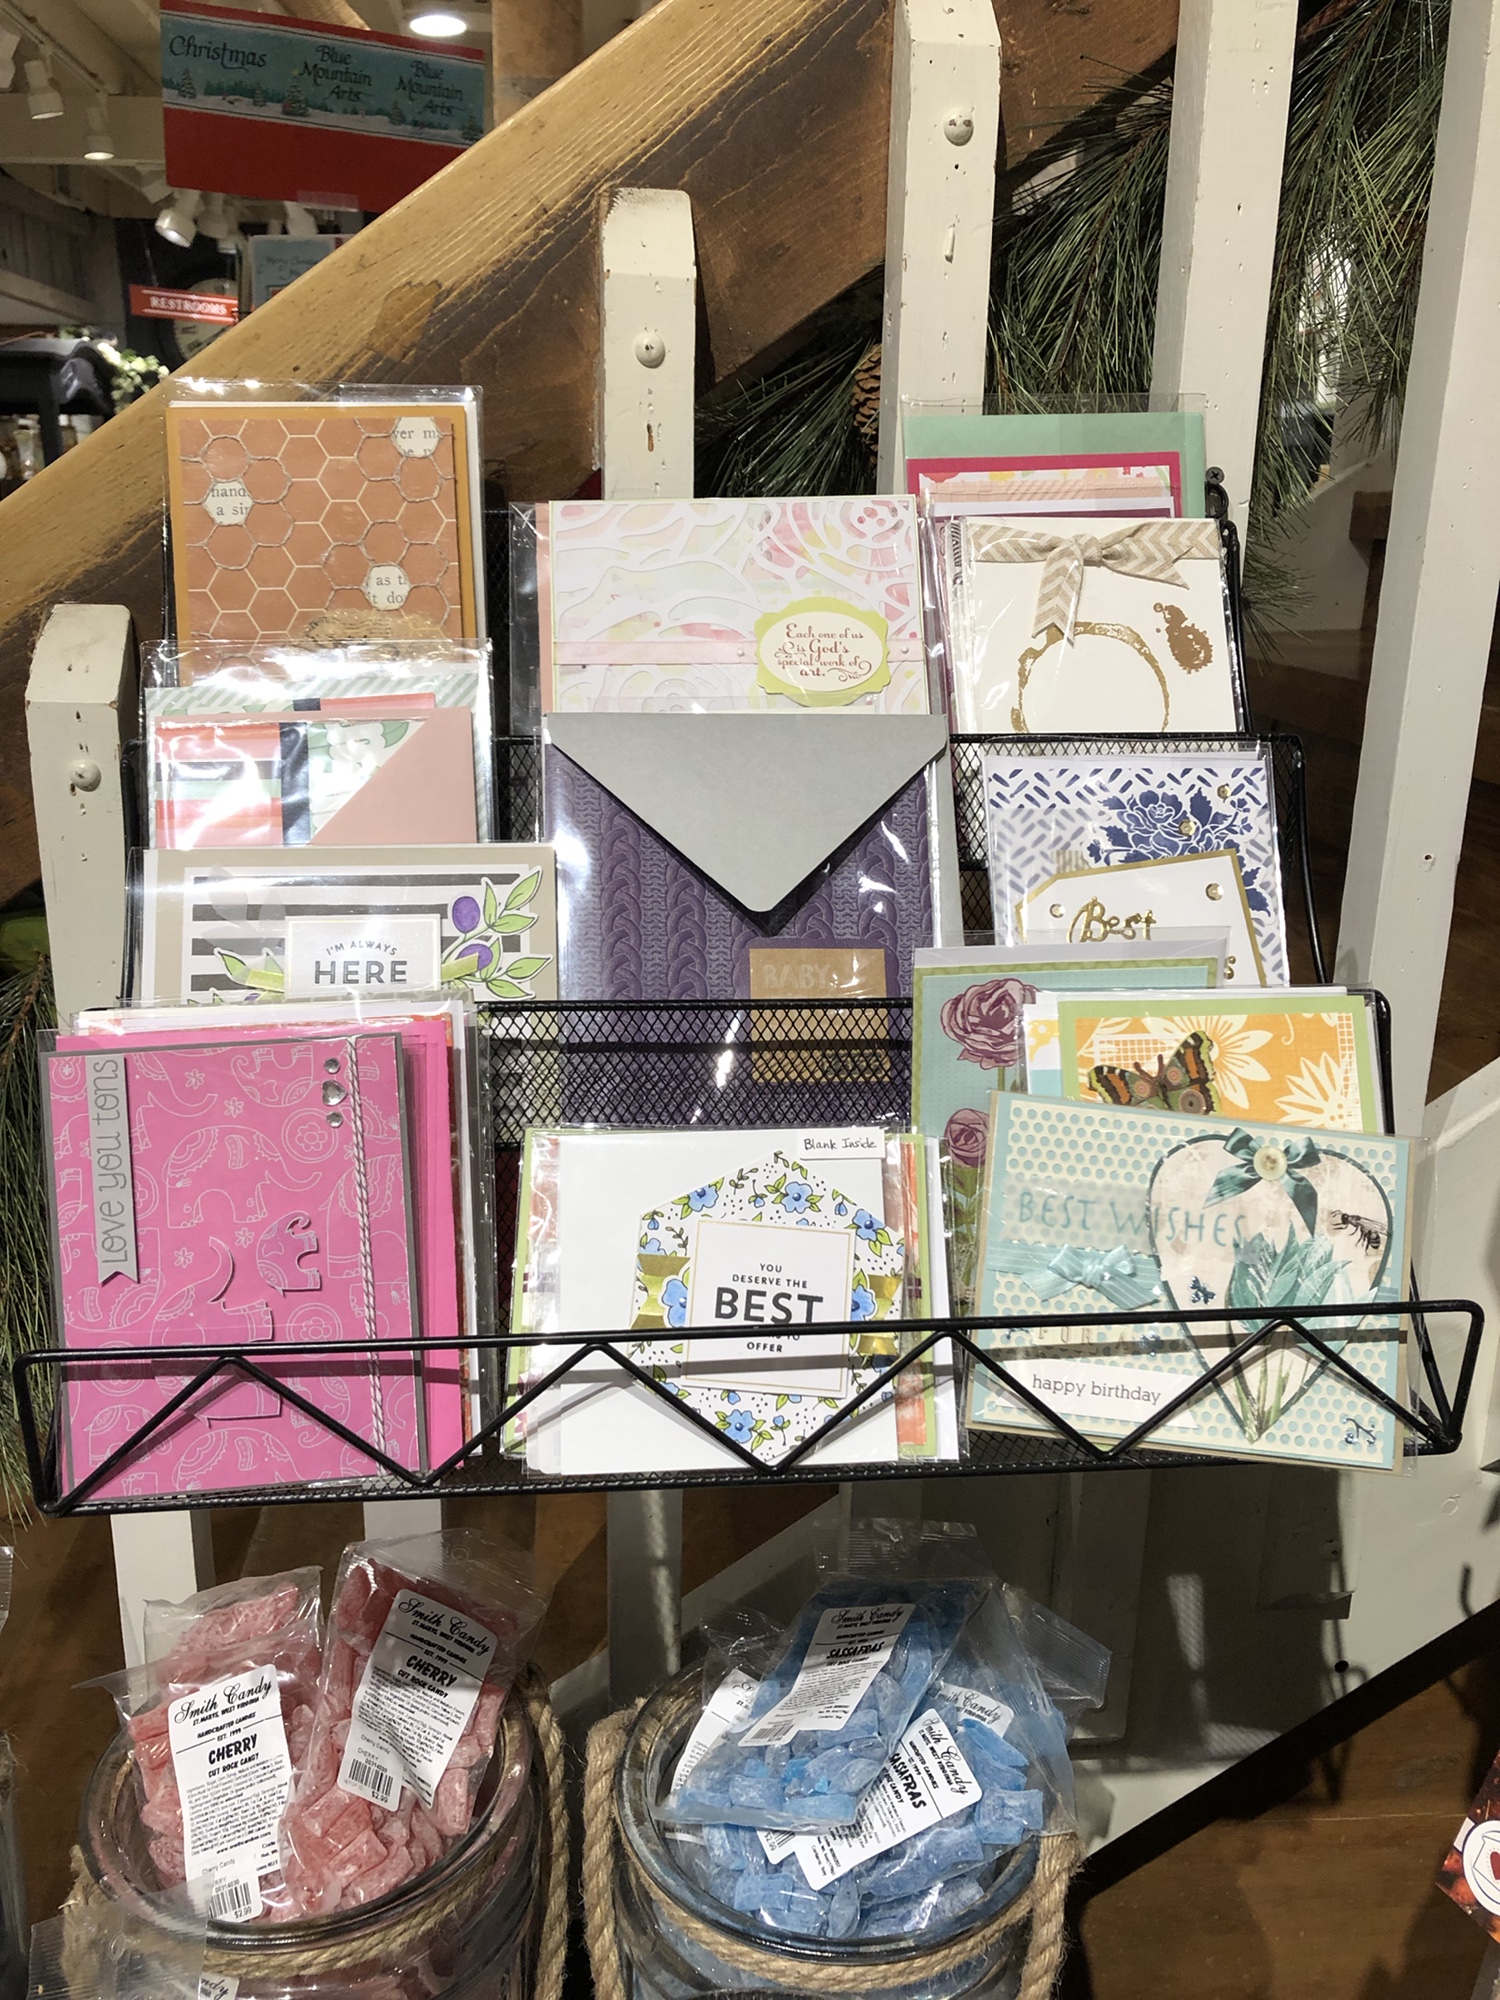
In this gift-shop pic, one of the other blue-and-white ones can be seen with the sentiment “Best Wishes” in gold foil. The die is from a UK magazine. (Two other “kit cards” are also in the picture.)
Thanks for reading! If you have any questions about how I created something, just leave me a comment. 🙂 And stay tuned for another blog post about a “love” card for a blog hop. 🙂
If you need any papercrafting supplies, I’d be happy to become your Stampin’ Up Demonstrator! My direct store link is in my blog sidebar.
While it seems like all I am making right now, when I have time to get into my craft room, is wedding, baby, bee, and lemon cards (for the gift shop and a custom order), I’ve been needing to do up another sympathy card as well. I rarely have a chance to make anything for my friends and family besides birthday and sympathy, to be honest, and those never stop coming. And although it was in the back of my mind to make a sympathy sooner rather than later, this card sort of fell together by accident.
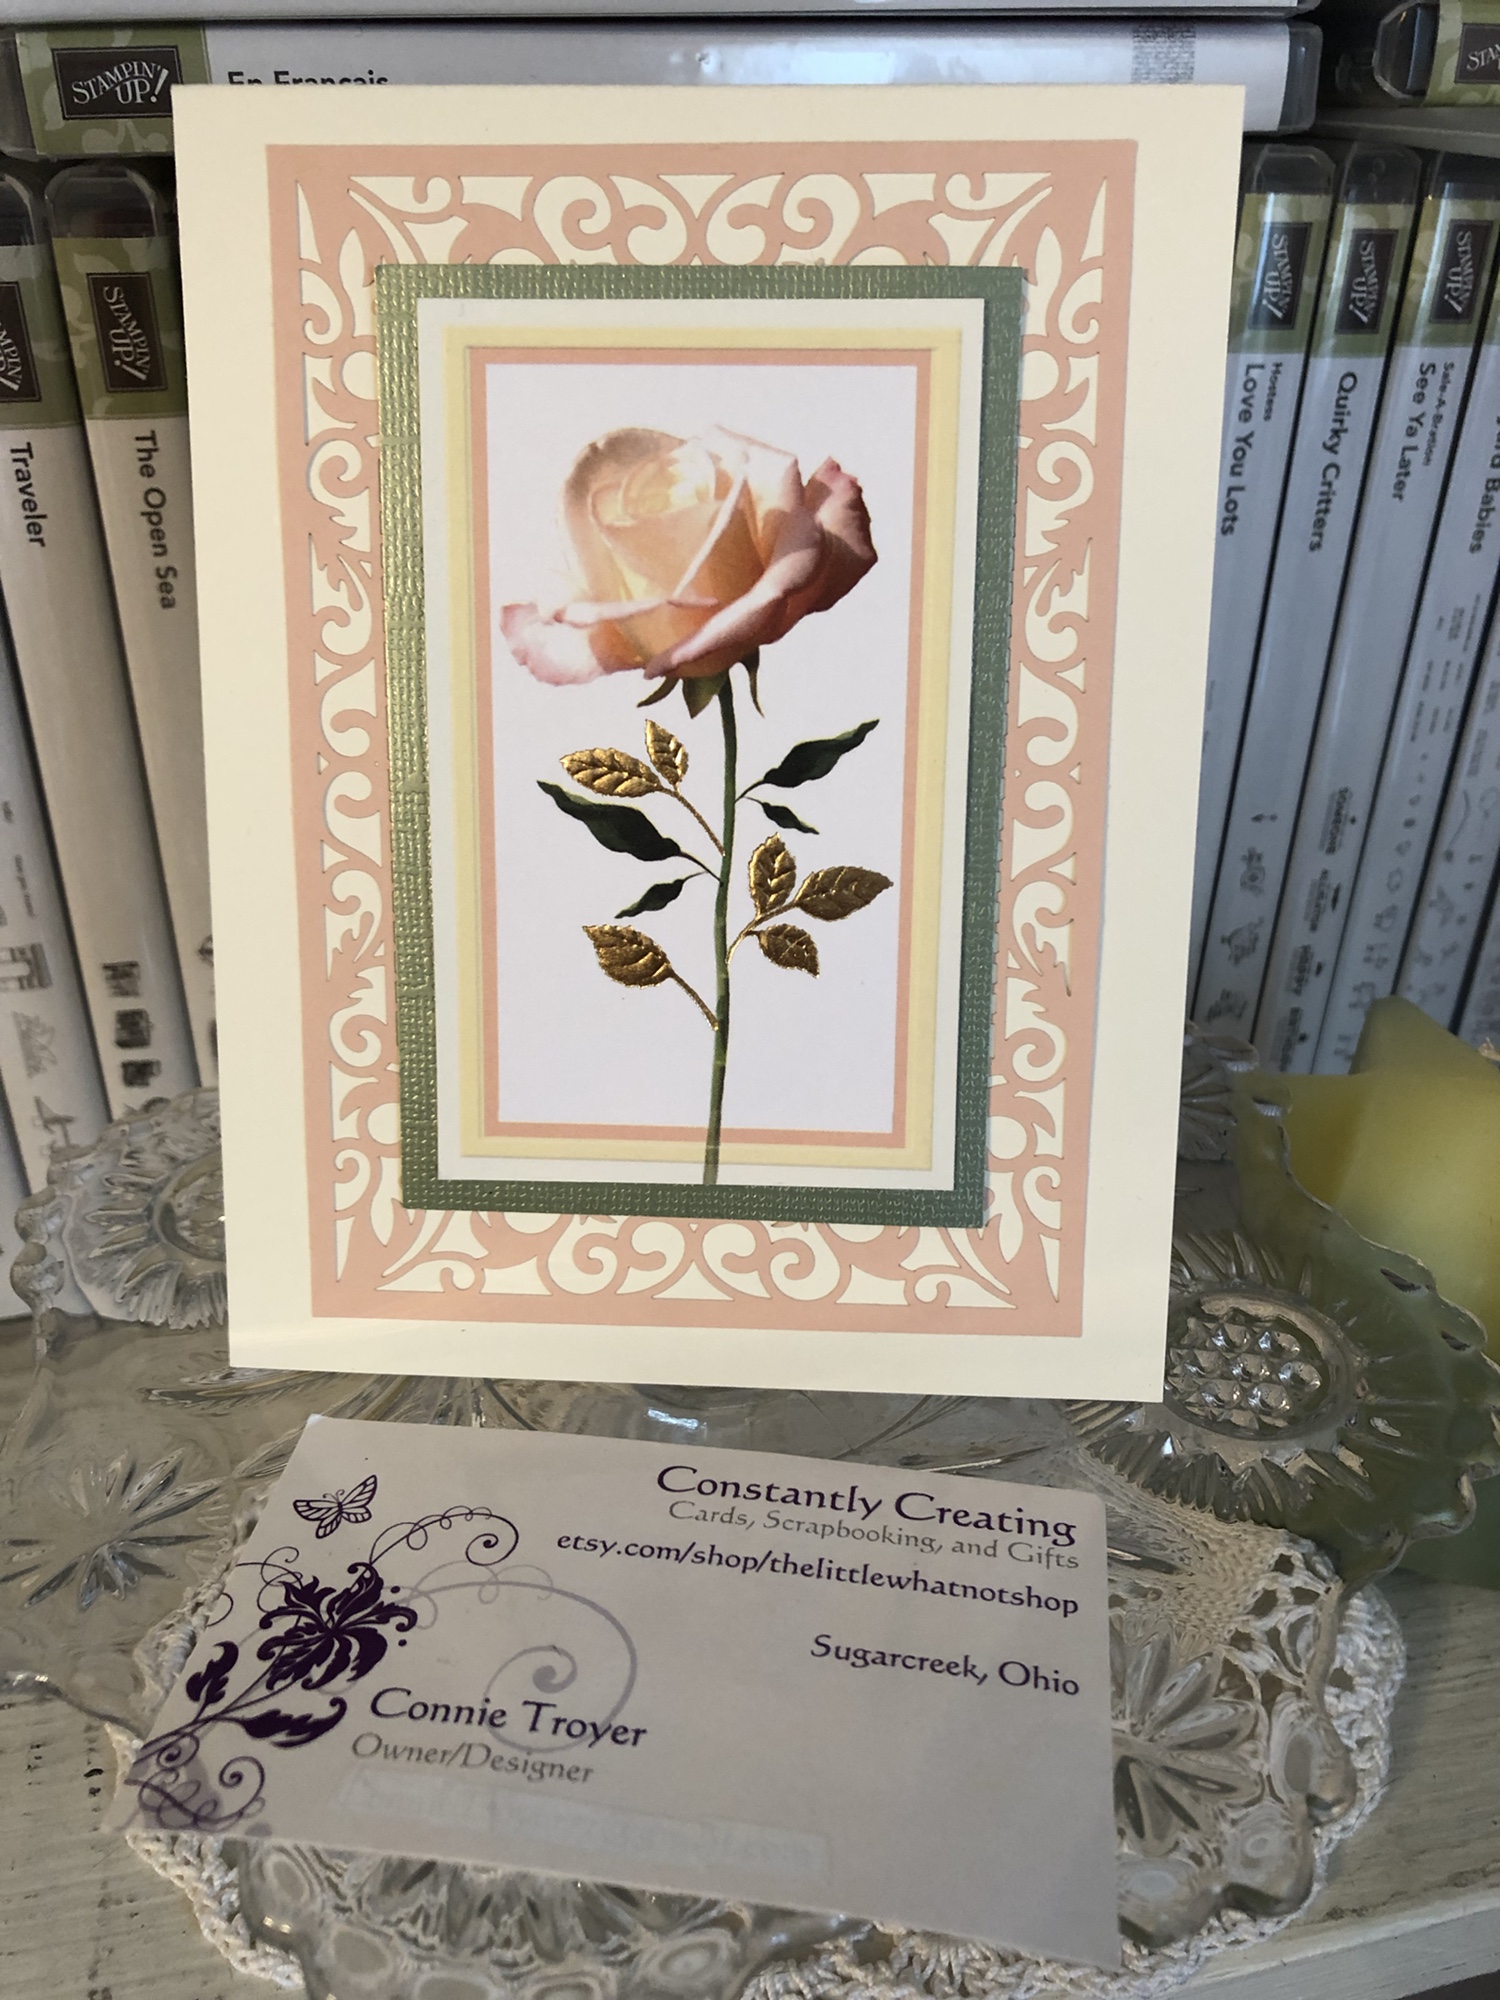
The gorgeous sage green/peach/vanilla/white matted rose piece was in the last RAK I received from a crafty friend. I think it is a piece that came from a mass-produced card and was upcycled, because the leaves are even made of gold embossed foil. It really is beautiful. I had laid it aside because the mat was coming up and looked a tad larger on one side. One night I fixed it and absentmindedly put adhesive on the back before I realized I hadn’t prepared anything for it to go on…so I kept shuffling it around my desk for a few days, upside down so it wouldn’t stick to things. 🙂
I was actually searching for papers for another wedding card when I spotted my new pack of Petal Pink and white Beautifully Detailed Laser-Cut Specialty Paper” (148812, $14) that is in the new 2019 Occasions catalog (orderable as of January 3)–and it matched perfectly with the rose piece I had just moved…again. (The specialty paper pack includes eight sheets, four each of two design types. One type is a full 12×12 sheet that looks like filigree swirls, and the other type is full of elegant sections that can be cut into card fronts, borders, or accents.)
Once I confirmed that the pieces matched, I carefully cut away one of the card front pieces that looked the best when I placed the rose on top of them to test them (on top of the plastic bag holding the specialty paper, since I already had adhesive in my way). Then I found a piece of Thick Very Vanilla cardstock, cut it in half, and scored both, using one as my card base. And then I laid more adhesive on the back of the rose piece, just in case, before adhering it first to the laser-cut paper and then to the card base. The laser-cut paper I chose has a large opening in the middle, which the edges of the green mat just barely covered on the sides, so the adhesive went right through to the base.
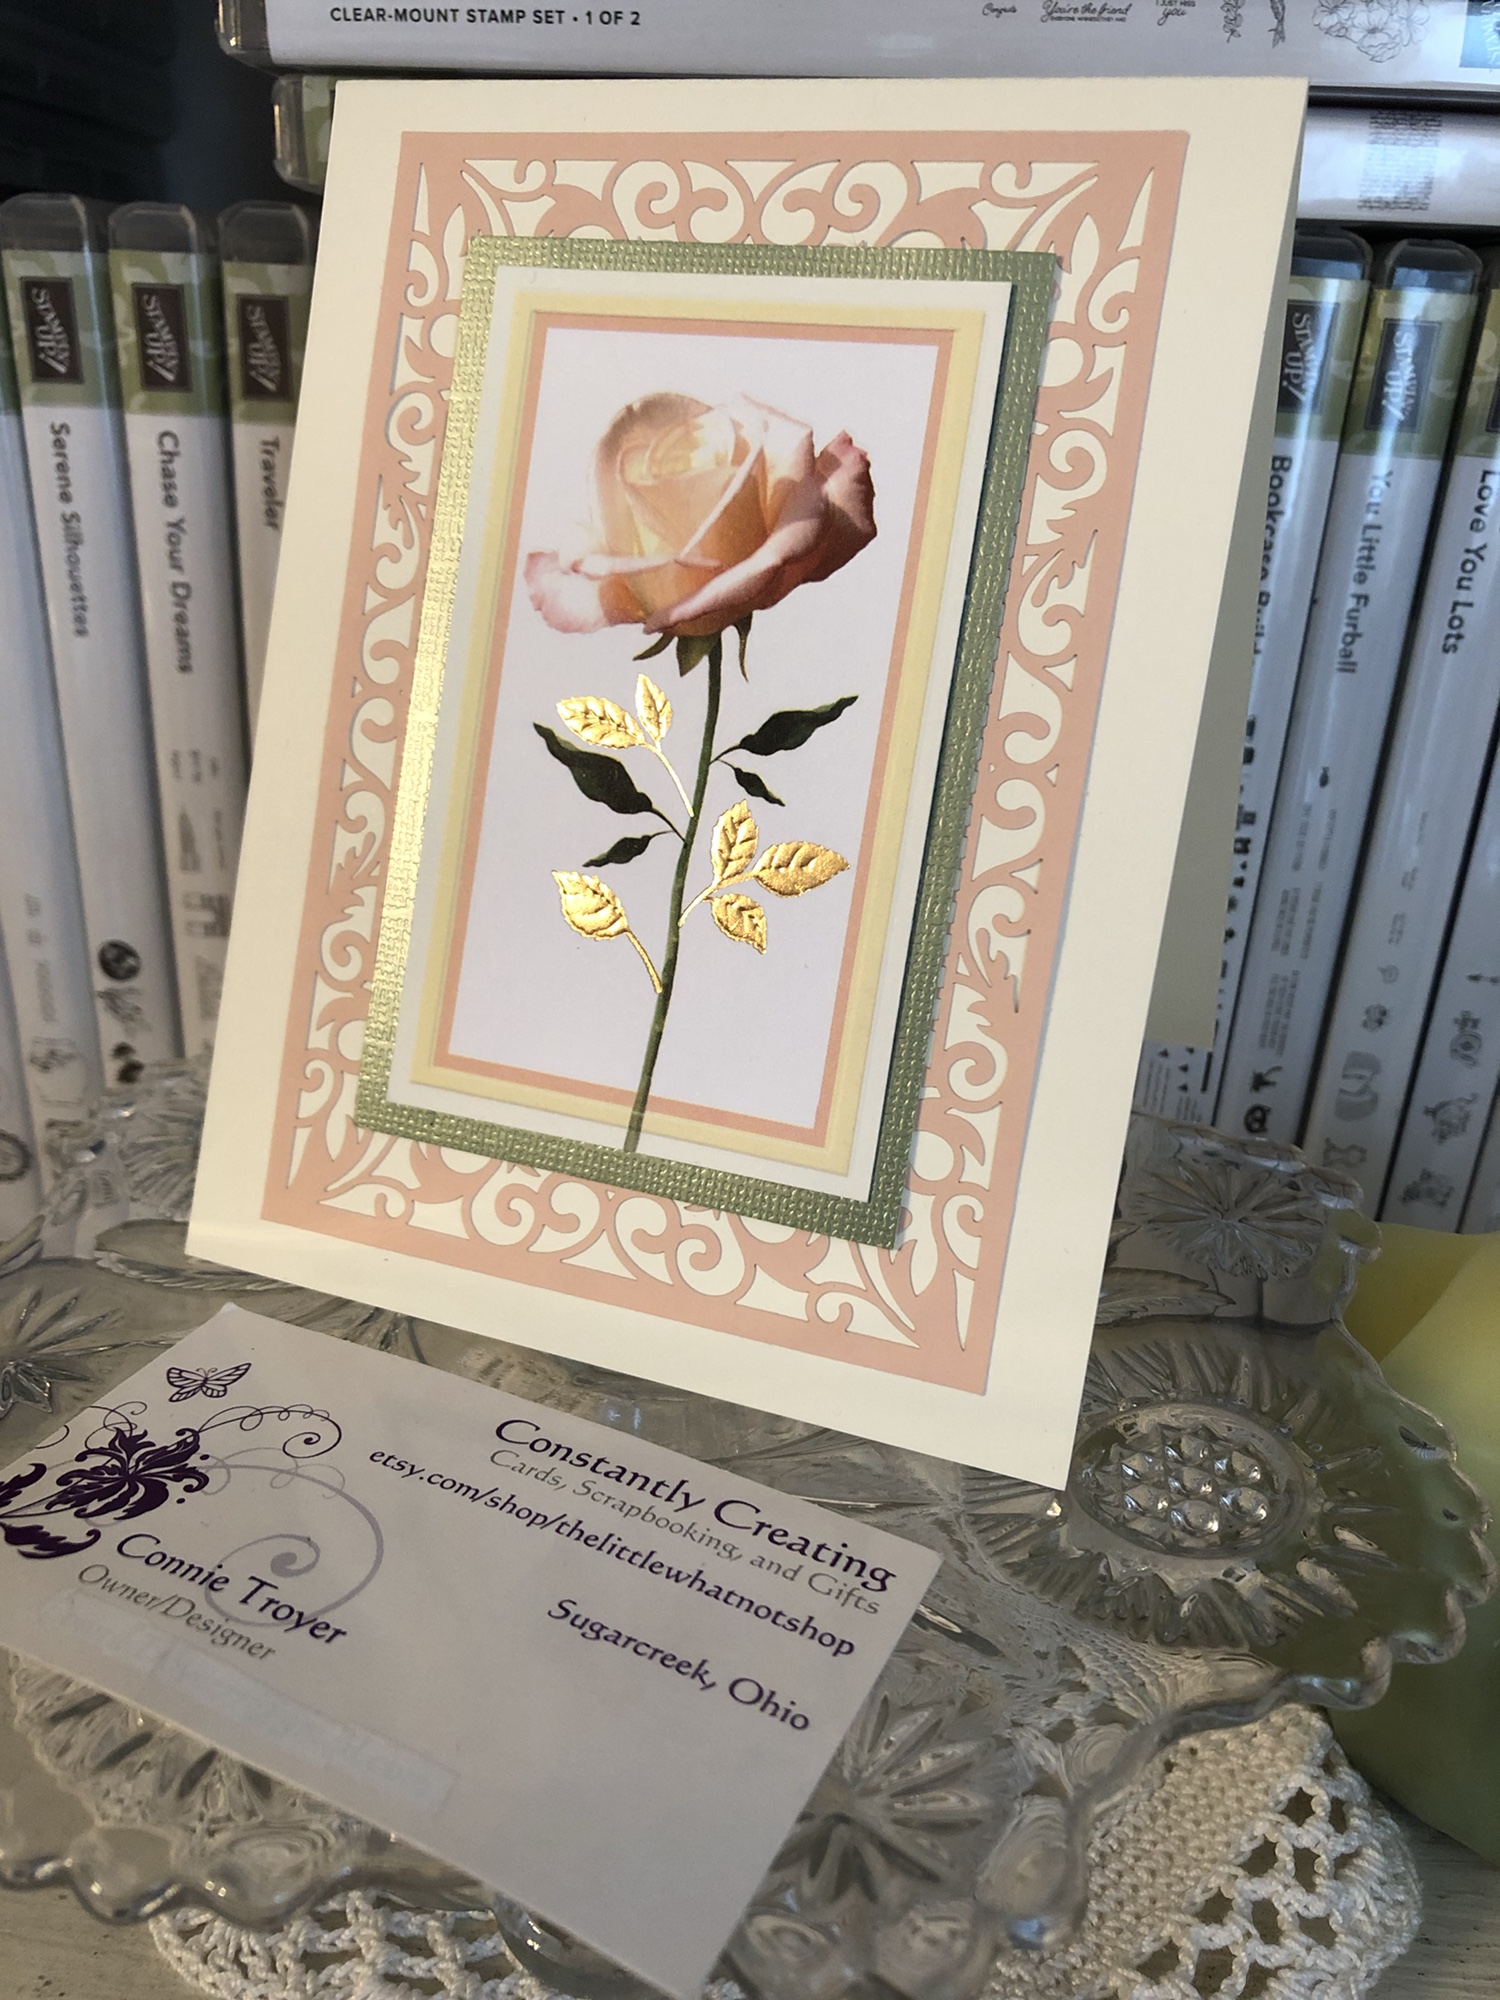
I almost left the borders of the specialty paper free without gluing them, but I was afraid they would get creased since they’re so delicate, even though they’re a good weight. So I did take a bit of my Art Glitter fine-tip glue to tack down the corners in the thickest part and occasionally on the sides just to keep it from catching on something.
I kept the inside simple with a stamp from the retired Thoughts and Prayers stamp set from SU, and I used Grapefruit Grove ink because I thought the paper was the same color until I checked it tonight (oops!). I may go back and add one of the border pieces of the specialty paper on the bottom, but I haven’t decided how much room we will need for the handwritten message of the card.
Be sure and pick up a pack of this laser-cut specialty paper when the Occasions catalog goes live on January 3. There are so many options for creating with it, and it’s simply lovely. Here are other current items I used for this card:
I’m happy to help you order if you need a Stampin’ Up demonstrator. 🙂 You can use the code PNWVCZEU to order through my store (http://www.stampinup.com/ECWeb/default.aspx?dbwsdemoid=2202334) through January 5. (If it is after January 5, feel free to contact me for a new code!)
Halloween is sneaking up on us! To start the celebration, I’ve joined Amy K’s Inkin’ Krew to show some Halloween cards.
Hello, everyone! Thanks for stopping by my blog today. It’s my first time “hopping” with Amy Koenders’s Stampin’ Up Inkin’ Krew!
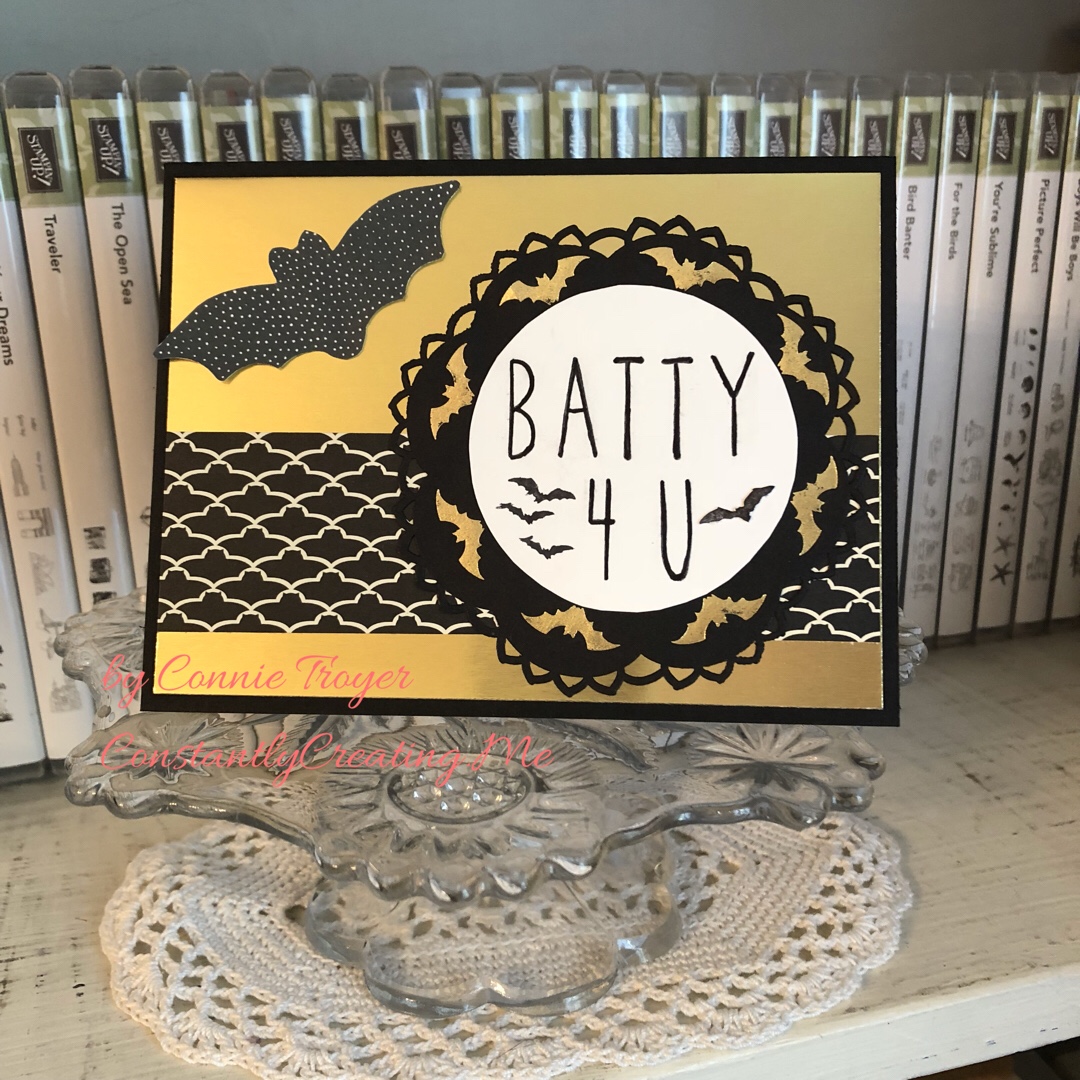
We are focusing on Halloween cards today. Truthfully, I’m not a huge Halloween fan, so I rarely make cards about it, but I did do this one in the more-recent past using mainly Stampin’ Up products. It’s currently for sale in my Etsy shop (thelittlewhatnotshop.etsy.com).
I used Stampin’ Up’s Basic Black cardstock for a base, layered it with gold metallic foil (which makes for some wonky picture-taking), and then adhered some SU “bat” DSP from the (retired) “Happy Haunting” pack across the bottom third of the card.
I can’t remember the name of the black-and-gold foil bat doilies from Stampin’ Up, but they are fun to play with if you run across a pack. (They’re retired too.) They come with black backgrounds as pictured here or the reverse. The large singular bat is from SU’s “Cheer All Year” stamp set and it was stamped in Memento Tuxedo Black ink.
I used a circle die to cut a white piece for my sentiment – I just laid the nested dies atop my bat doily until I saw the size I wanted. And then I used SU’s retired photopolymer “Skinny Mini Alphabet” and placed the letters where I wanted them.
The only thing that isn’t Stampin’ Up on this card are the little bats flying around the sentiment. I found those on a wooden Halloween stamp and individually inked up the rubber parts I wanted and attempted to place them around the letters. Might have been easier, faster, or more accurate to hand-draw some. I had a lesson in patience that day….
I kept the inside of the card simple with a white piece to write on and more of the bat paper from the front.
Thanks for joining me today! “Hop” on over to Julie Johnston’s blog by clicking “Next” or go back and visit Sue Prather by clicking “Previous” to see what they’ve come up with for Halloween cards!
If you need to hop around, here is the lineup of participants:
Although I do have other themes than just sympathy coming up (I promise!), it’s sort of where I’m stuck for a few more days. Just so many of them to make lately 😦 , and I’ve hardly had any time in the craft room because of editing projects. I have a feeling it’s going to be a busy fall too. But. I do have this simple offering tonight (that I have to post before I start “hopping” around elsewhere), mailed a few weeks ago now.
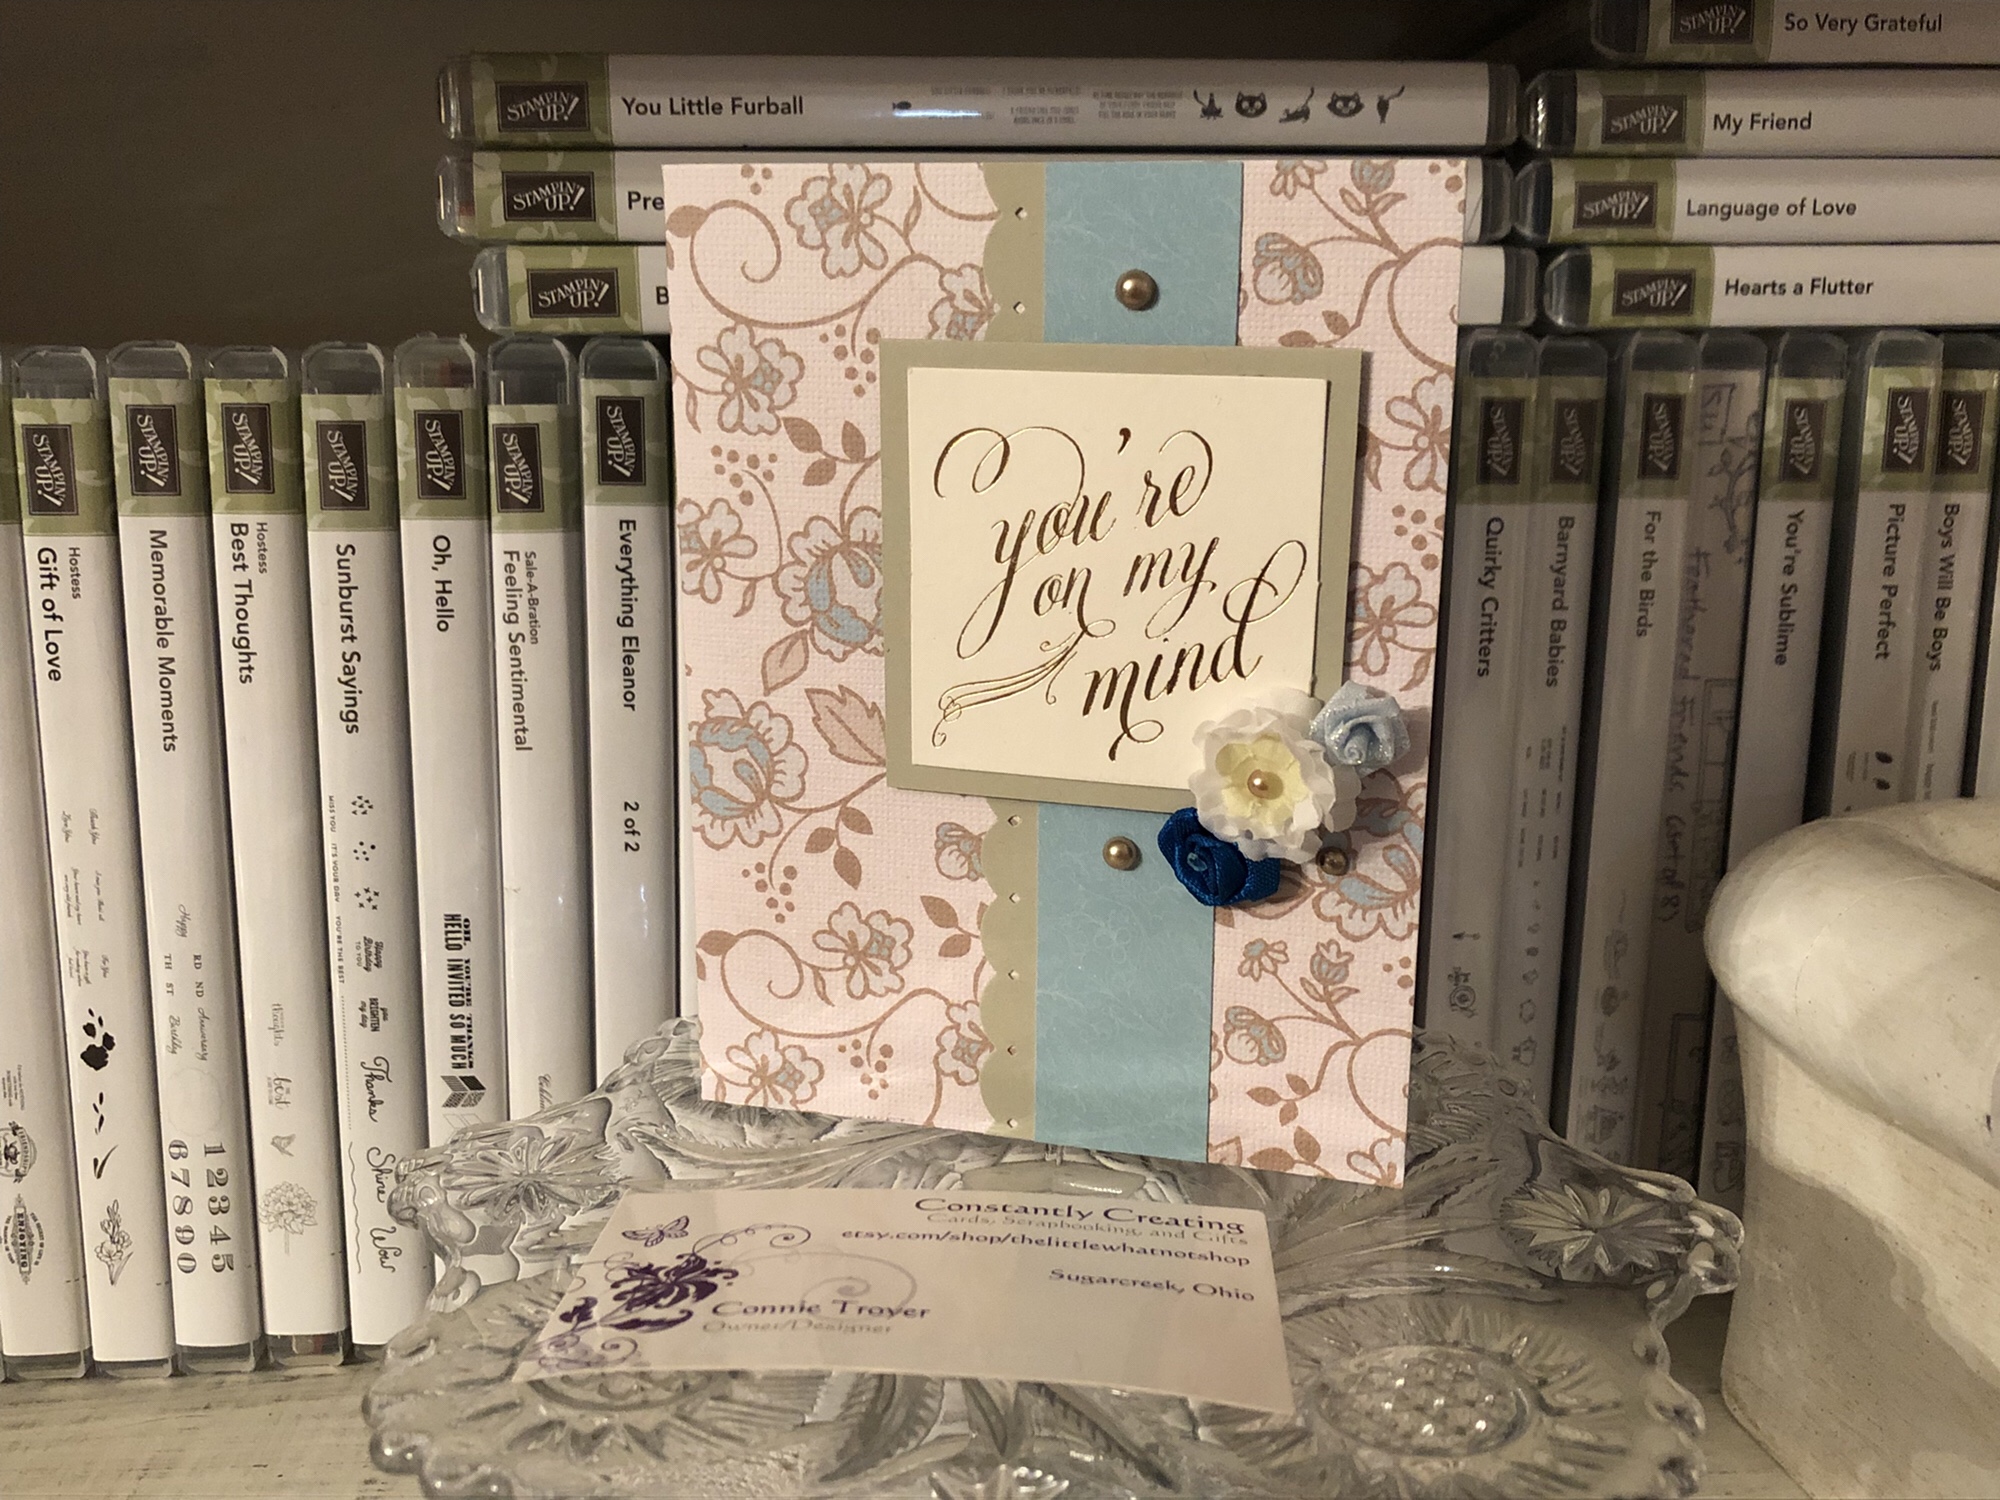
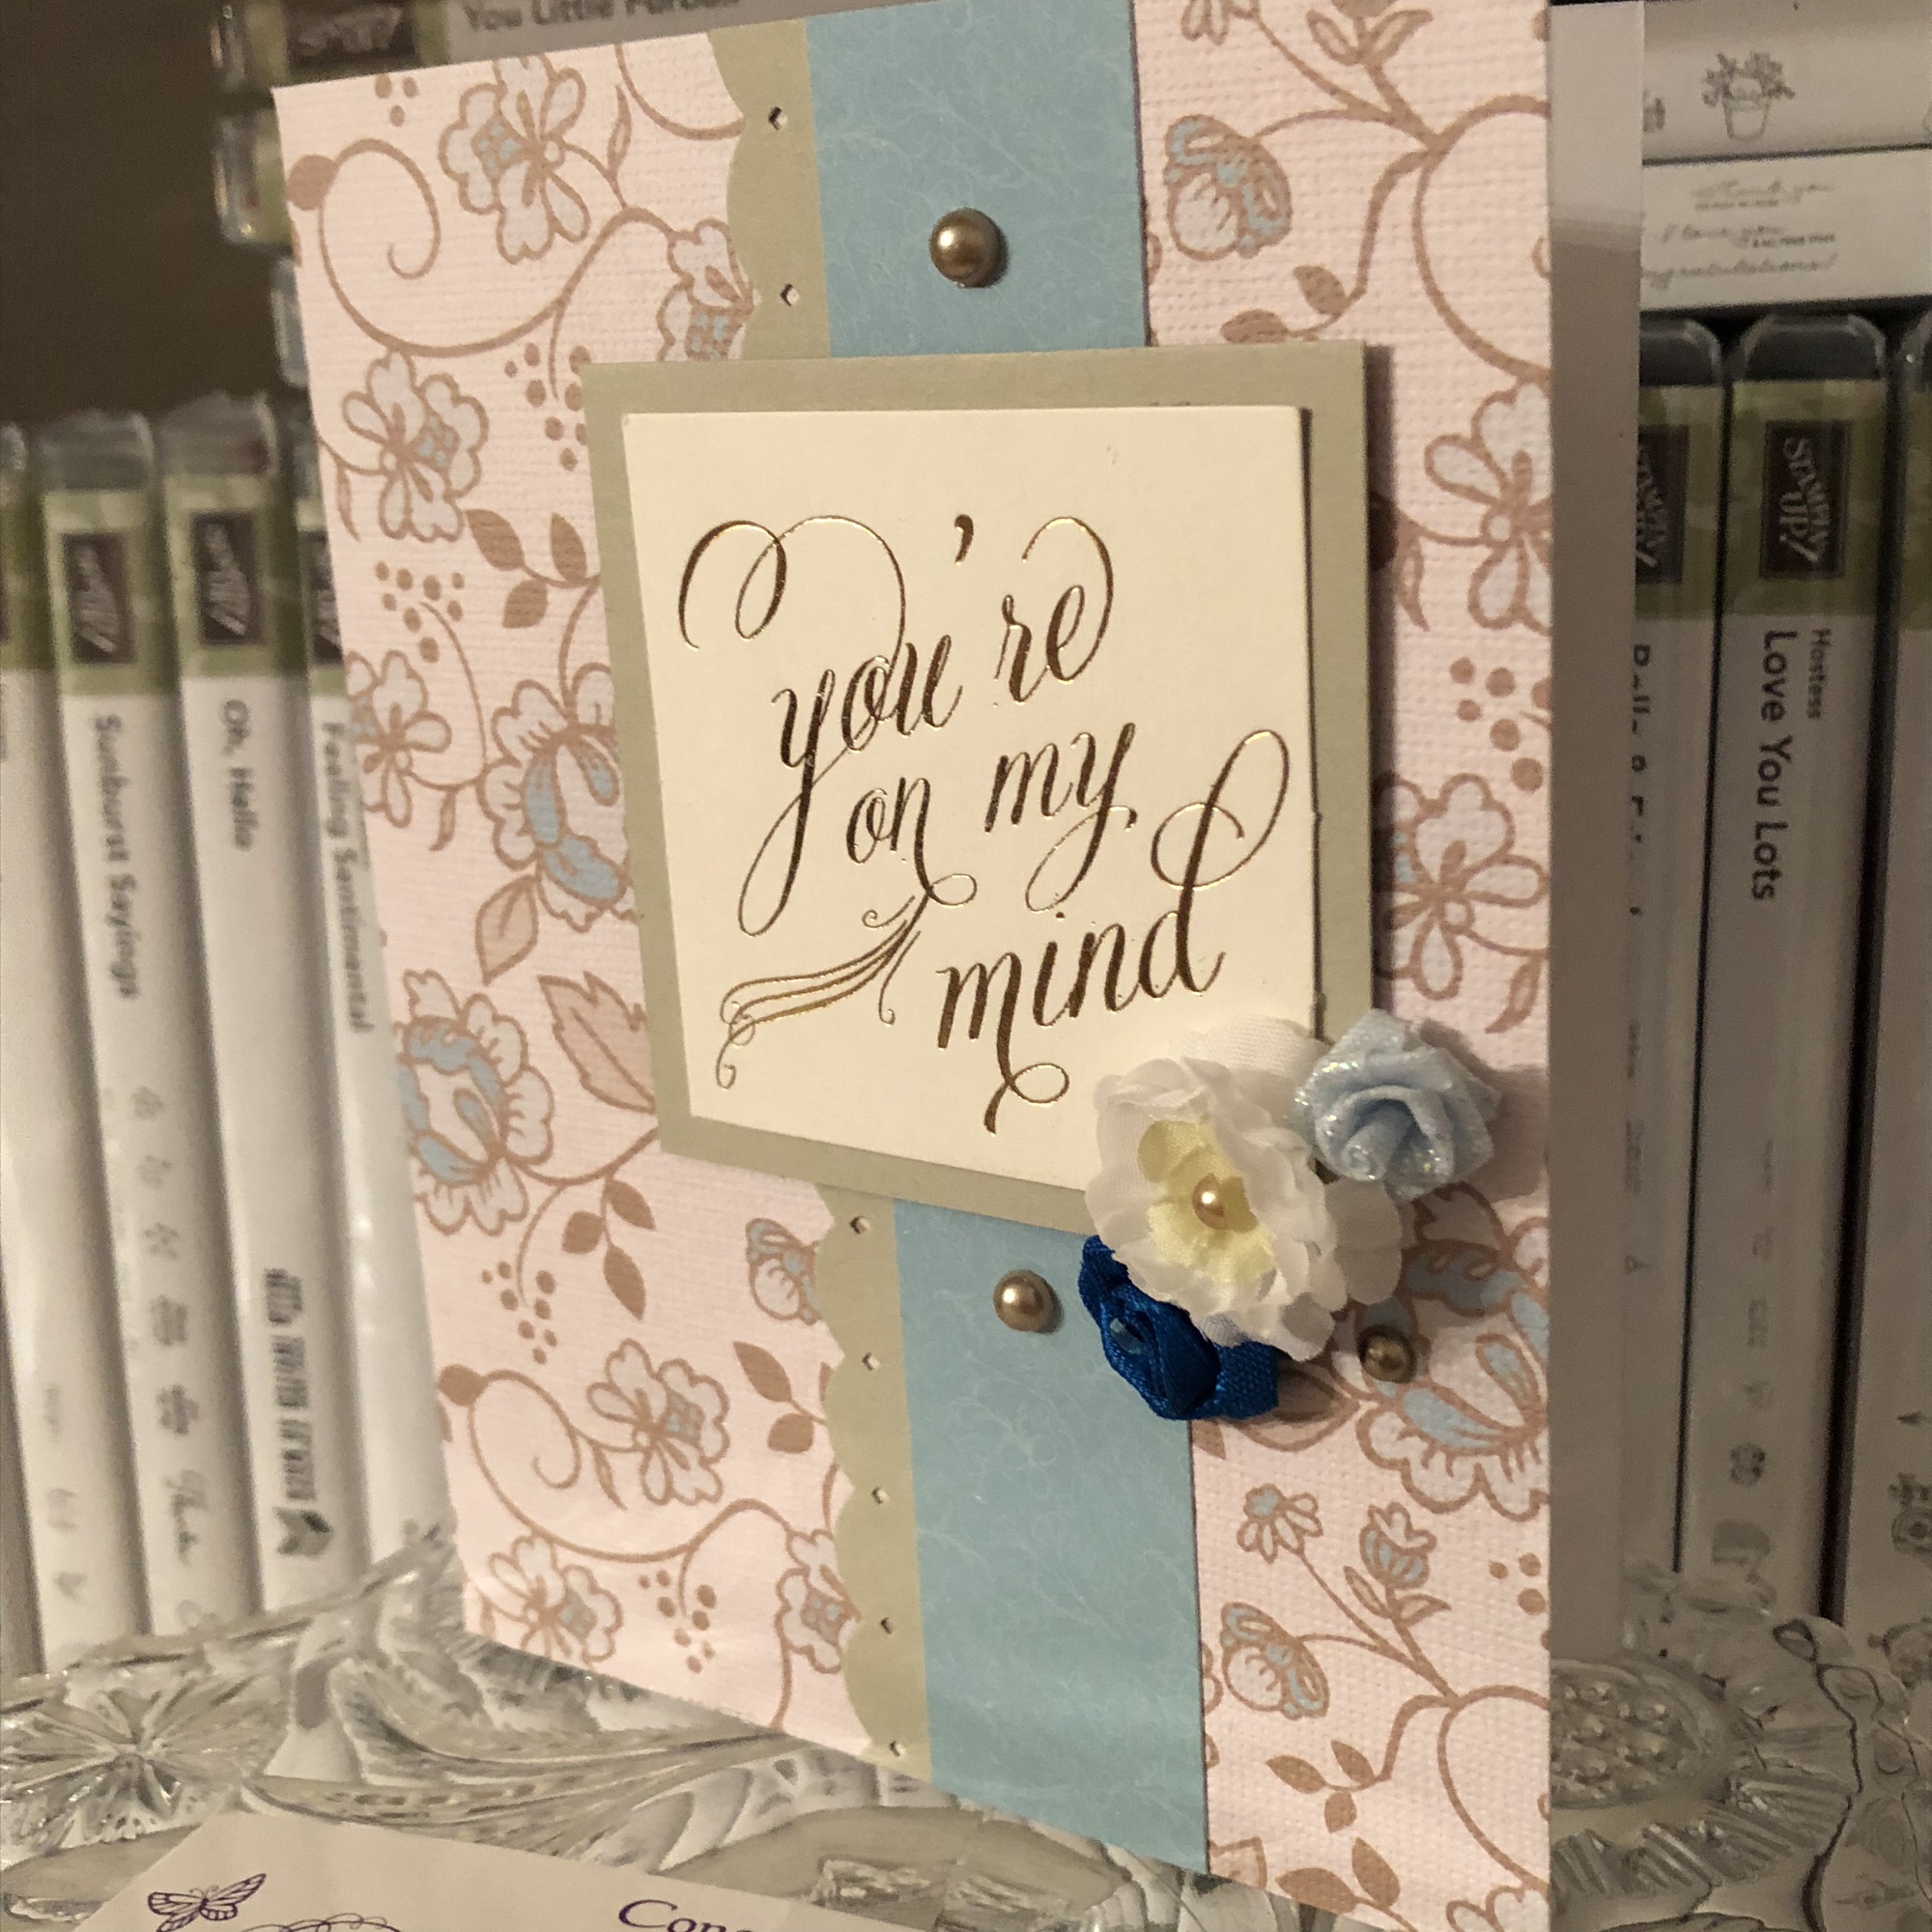
This card was for a dear friend/former roommate who lost her young husband recently. I wanted something reminiscent of a masculine idea but also to incorporate blue, as that was always her favorite color. And I wanted something that hearkened to their relationship, something beautiful and giving an idea of romance. And I didn’t have a lot of time to create it. (I actually worked on it in at least two snatches of time.) Tall order, I guess.
I started off by going to my “cheat box”: a photo box I’ve filled with premade or prescored card bases, so that when I’m short on time, I can simply pluck one out of there. I’ve either already done the work on it or bought it usable. Although I prefer to use Stampin’ Up cardstock (80-lb. weight) for my card bases, I do also have a stash of printed American Crafts and DCWV bases (thank you, Marijane). So I found one that was flowery (romantic), tan (somber/masculine), and blue (the whole point) and hoped I could make it work.
I find printed bases harder to create with. There’s not much difference between a plain base that I top with patterned paper or a printed base, but I always find the latter harder to pull together into a card. But they are lovely and useful, so I keep trying.
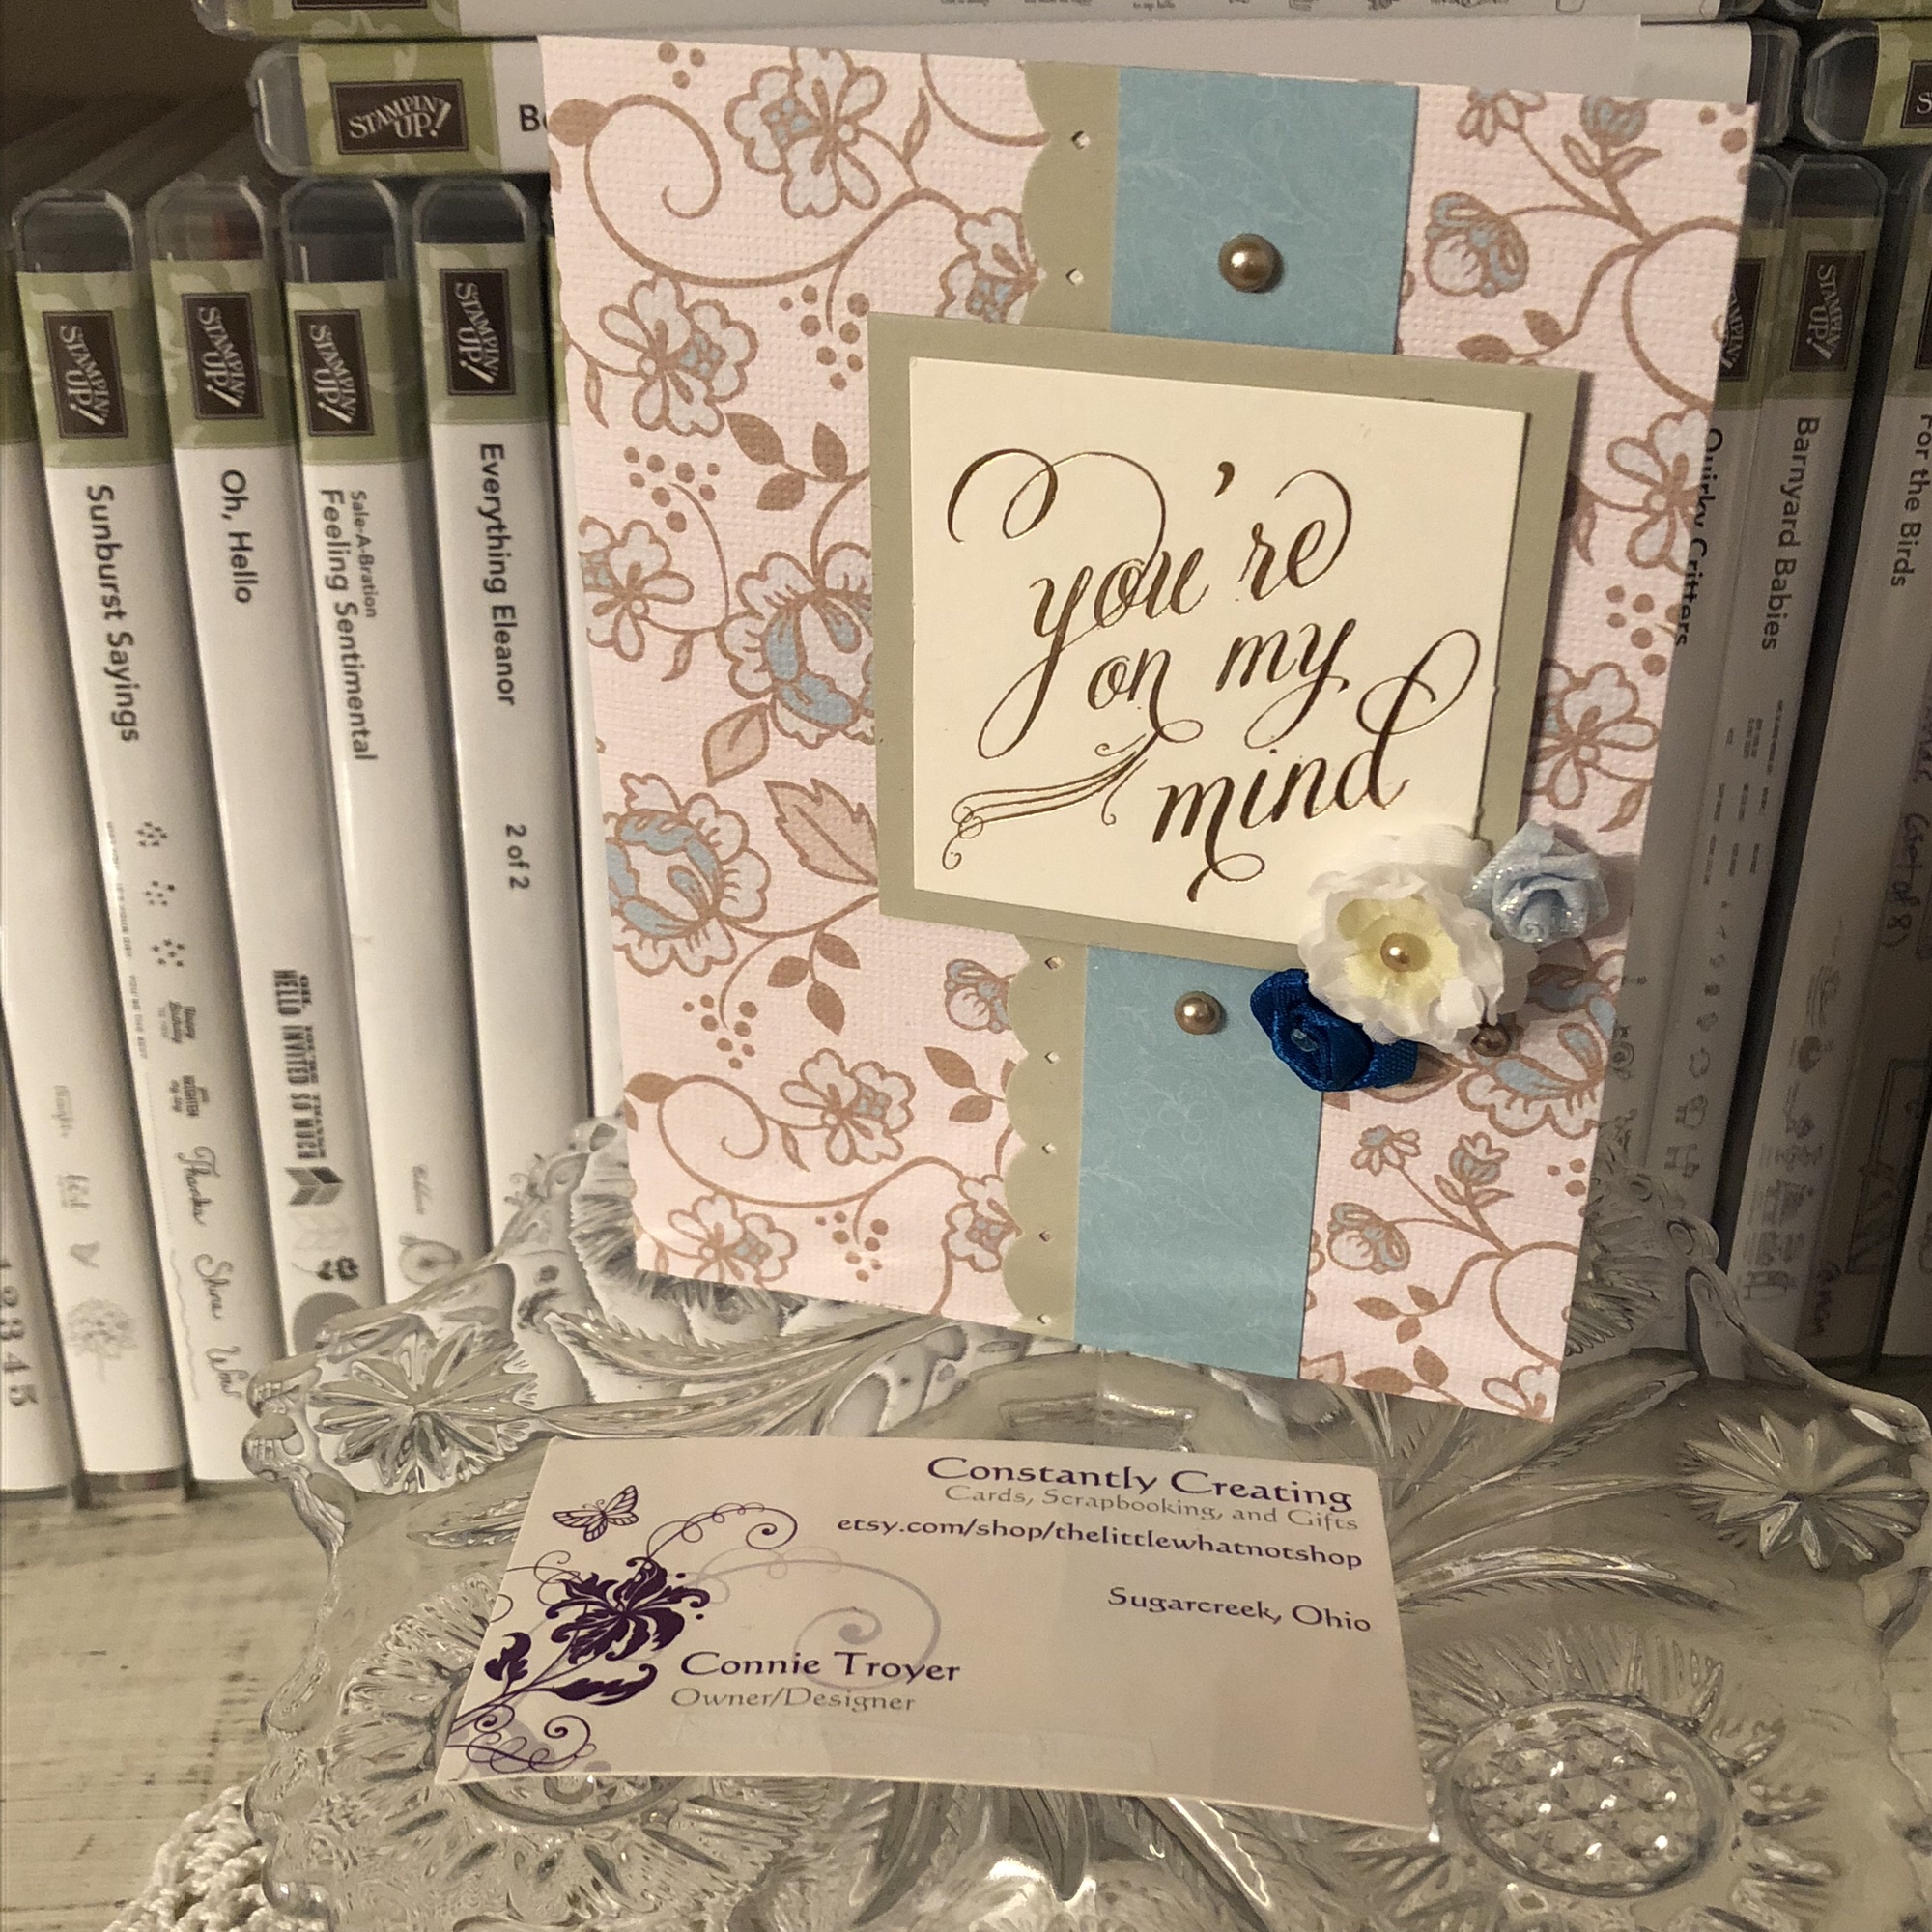
I had a random scrap of blue flowered paper hanging around that seemed to match the color on the base fairly well, so I wanted to use it somehow. (I think it might be very retired SU DSP.) And I had sorted through my set of Anna Griffin sentiment tags and toppers beforehand to pull out ones that could work with sympathy cards, since it seems to be the “season” for that. This one spoke to me the most for her because of what she means to me and how the news affected me. Plus I liked how the gold foil in the sentiment matched the tan in the base.
So I found some SU cardstock that coordinated, used an EK Success edge punch on one side of a long strip for the middle, and matted the sentiment with the same. (I think it’s either Crumb Cake or Tip Top Taupe cardstock.) And as I look at the pictures here, I’m wondering if I didn’t match the top and bottom bronze pearls after all (both in size and color). I meant to…. I remember thinking that the smaller size of pearl looked better next to the flowers; it didn’t take up as much room. And I already had the big one stuck at that point. Must have been more in a hurry than I thought and forgot to switch it out. (Or maybe it’s the angle of the pictures?) Erg. Well, I can’t ask for it back now. I never claimed to be perfect anyway. It’s handmade, right?
I did have some fun rummaging through my random flower canister for ones I could use on the front of the card so it wouldn’t be so plain. I nested a tiny cream one inside a couple of layers of white ones to bring in the cream-colored background of the sentiment and topped it off with a champagne-colored pearl. And of course I had to use blue flowers. This arrangement and color scheme seemed to work best. The dark blue flower is fabric ribbon with a gem in the middle of it, and the light blue rose is a rougher blend.
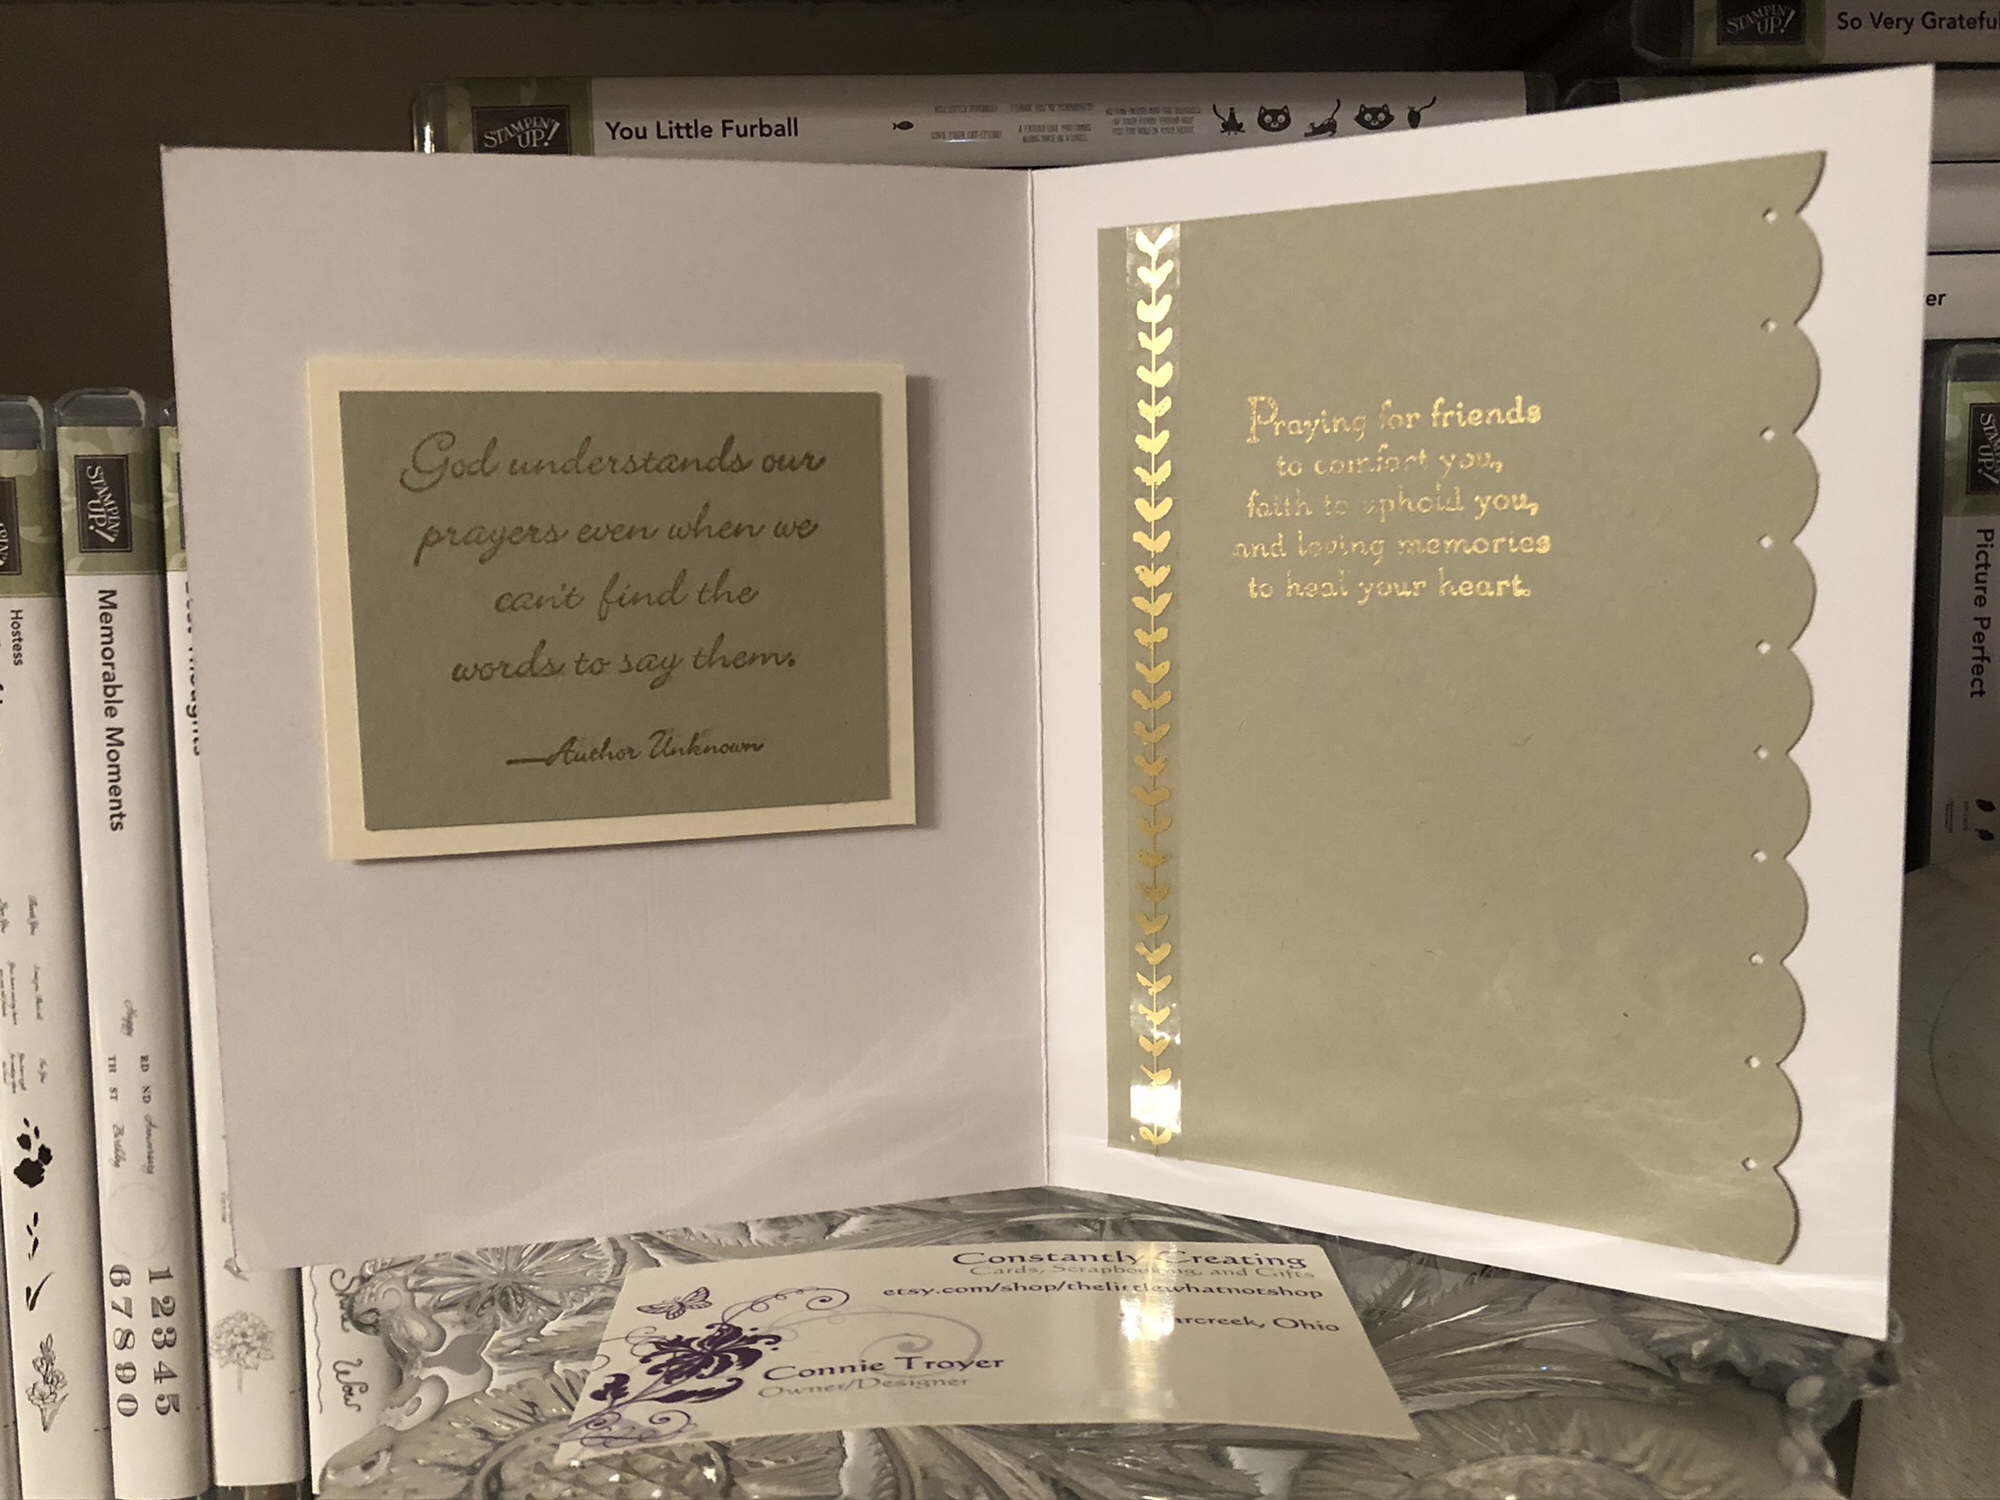
I chose the same SU cardstock from the front for the inside, since the inside of the card base was white. I matted the left-hand sentiment with cream for contrast. Both stamps were inked with an Encore Gold Metallic pad and heated with a heat gun afterward. The left-hand sentiment is from a retired SU set called “Words of Wisdom,” and the one on the right is from the retired SU set “Thoughts and Prayers.” I used a gold border strip from the retired SU “Painted Love Gold Vinyl Stickers” from the last catalog down one side and edge-punched the other with the EK punch from the front.
So that’s it for this one. I’m glad I’ve actually managed to mail it. Still working on that for some of the others. 😛 More to come later. Back to my edit for now. The juggling continues!
A simple but stunning sympathy to share with you today.
I’ve had a rash of sympathy cards to make lately, so I’ll be talking about those in several posts to come. They are all very different and more of a clean-and-simple idea than ones that are overly complicated.
The one I want to show today was created with a base of 80-lb. weight retired Stampin’ Up Marvelous Magenta cardstock, which matched the main lily design perfectly. It is an A2 size (so 4.25″ x 5.5″).
I cut a piece of retired SU Fabulous Foil Acetate to fit the size of the card front and then glued it with Tombow Multi-Glue (green-and-white bottle) under where the lily block would be attached. The acetate is freestanding otherwise. It is accented with silver on one side and gold on the other. The gold happened to match the warmth of my green better (and my sentiment was also in gold).
I “cheated” a little bit on this card by using a some preprinted materials. (Isn’t that what patterned paper is, though?) Specifically, I can confess that the magenta/lime/white lily piece is the front of a pocket calendar, cut down. I never would have guessed, myself, if I looked at this card for the first time. The block was just too pretty to toss, so I cut off the wording, squared it up, and found things that matched. Luckily for me, one of Stampin’ Up’s current In-Colors, Lemon Lime Twist, also matches perfectly, so I matted the calendar piece with LLT cardstock.
Then, because I was once again short on time (chronic problem), I dug through some Anna Griffin sentiment pieces I’d acquired secondhand. The lime green oval mat is a separate piece from the gold-foil sentiment, but they coordinate perfectly. And using them was faster than stamping my own. I popped up the top oval with Stampin’ Dimensionals and remembered that I had some matching In-Color felt bows from the last catalog. Raising up the top layer allowed me to nestle that bow knot right beneath it rather than stick up in its own layer.
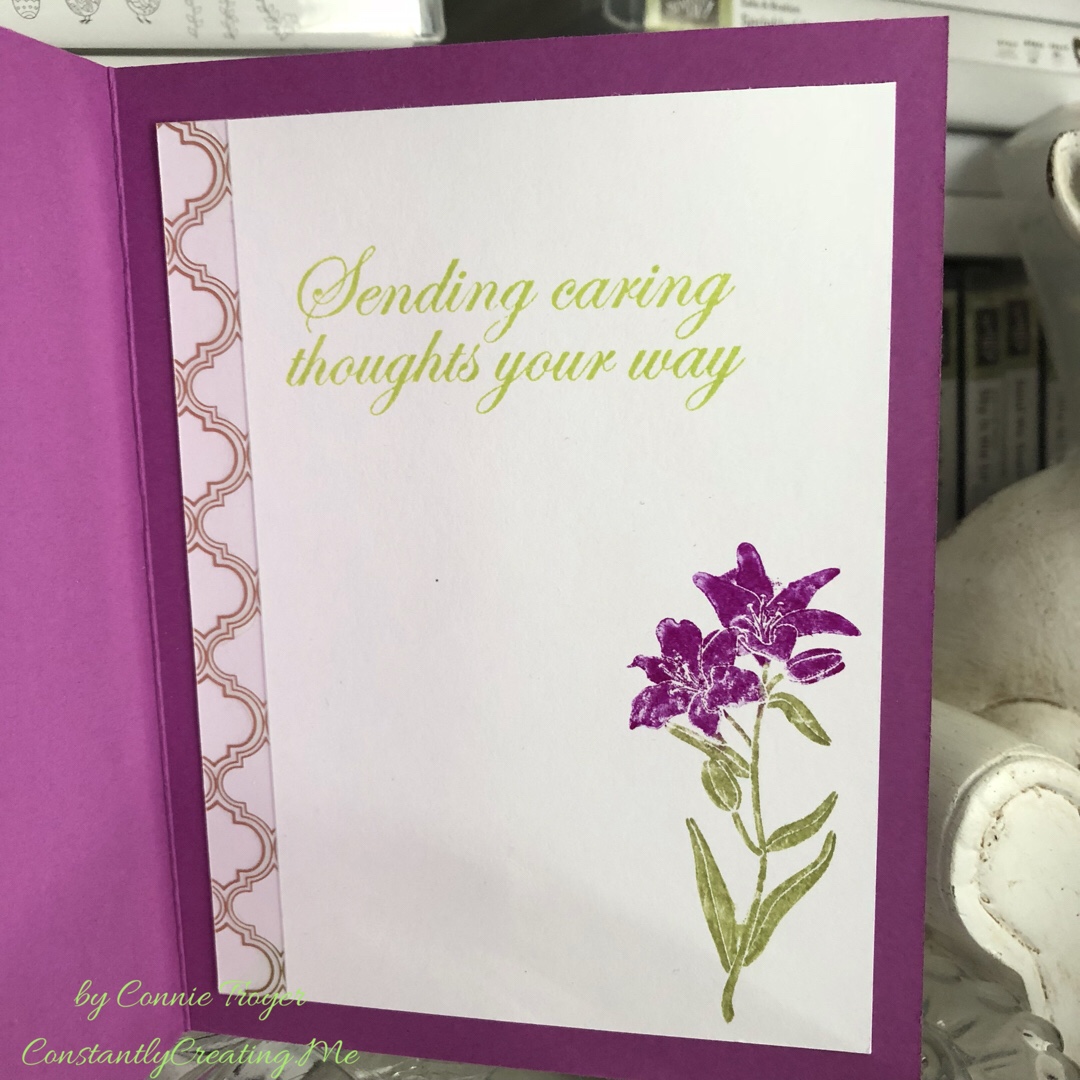
For the inside, I used a leftover strip of the Fabulous Foil Acetate and a Hero Arts set of sympathy stamps that is one of my favorites. I turn to it often. “Sending caring thoughts your way” was stamped in SU Lemon Lime Twist ink, and the flower stamp from the same stamp set was colored with Marvelous Magenta and Lucky Limeade markers on a piece of white paper that I cut to fit the inside.
Clean and simple but elegantly stunning at the same time. It’s prettier in person, even though I did some “recycling” by using the calendar piece. Anything is fair game to go on a card!
Thank you for stopping by and reading! Leave a comment if something I did inspired you!