Hello there and thanks for stopping by my blog! I’m sorry I’ve been quiet lately; I’ve had too many projects and people to please recently. (You all knows how that goes, right? Maybe I’m not the only one? 😂)
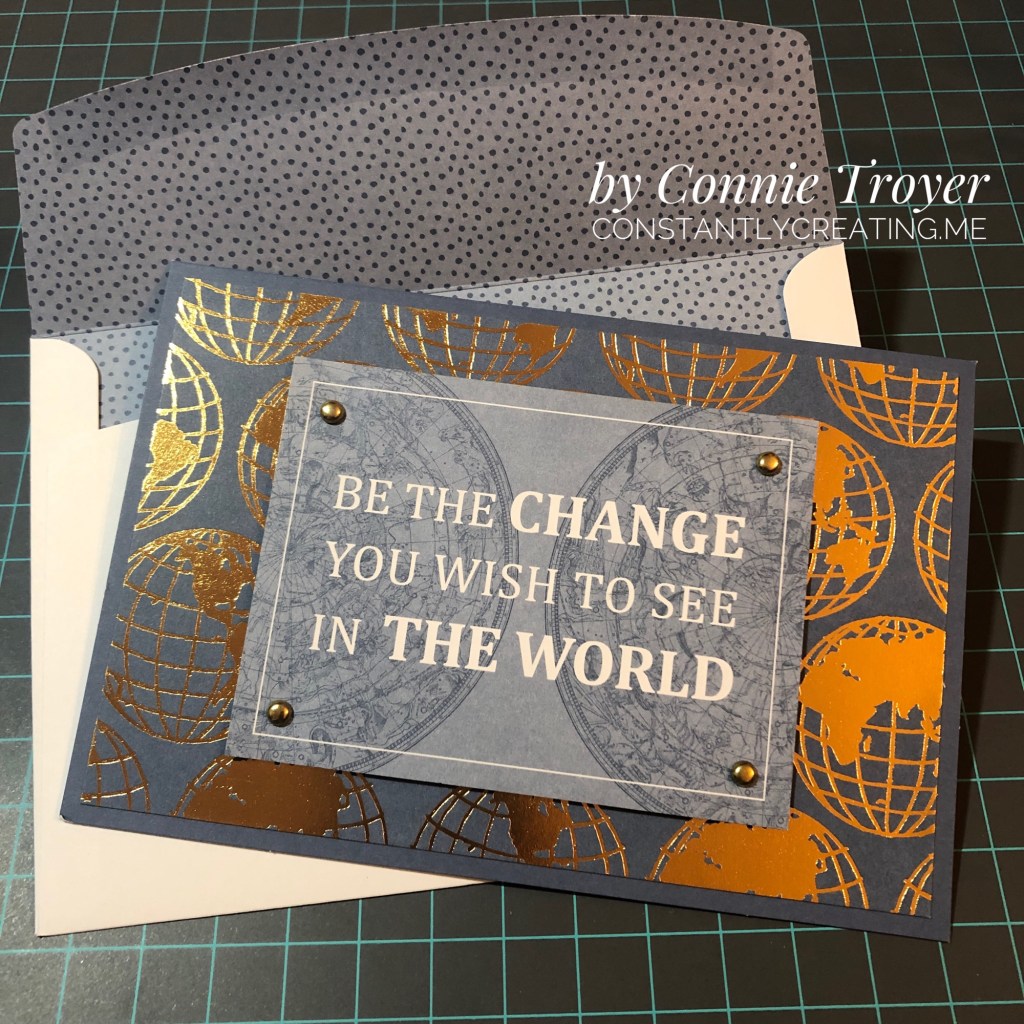
I haven’t had a lot of time in the craft room this month but I did sneak in there a couple of evenings recently to try to finish a batch for my local gift shop/employer. I’ve done a few grad cards and some easy cards. Here’s an easy one you can duplicate if you have or can find the World of Good Memories and More Card Pack and the Flowers for Every Season Cards and Envelopes.
I used a piece of Misty Moonlight cardstock for my A6-sized base first and then picked the large foiled globe card and the smaller 3×4 “Be the Change” card out of the card pack. I adhered the largest card with my preferred glue, and then I measured (yes, I actually measured!) and punched 3/16” holes in the corners for some 3/16” gold brads. Once I had the brads fastened, I popped up the card on foam dimensionals. And that was it! I used a Misty-Moonlight-lined envelope from the Flowers for Every Season Cards and Envelopes and called it done. 😂 I guess simple and easy really is the best. (The next post about a fancy grad card I did this week will be the opposite!) Most of all, I liked the sentiment on this card. I think it could even be used as a grad card, a masculine card, or one of encouragement. Thanks again for visiting, and stay tuned for more when I get time!
Make an easy birthday card (or any other occasion!) with the Dandy Garden Memories and More Card Pack!
Hello again, and welcome back to my blog! Thanks so much for being here. I’m hopping with my teammates from Amy Koenders’s Inkin’ Krew, and we are showcasing birthday cards this month.
I unexpectedly put most of this card together while gathering some supplies to gift another Stampin’ Up demonstrator friend. As I pulled cards for my friend to use from the Dandy Garden Memories and More Card Pack (item 154302), I realized that the larger grid card (which I consider the back of a “prettier” one) went well with the smaller colored dandelion card I’d also pulled. They just looked so nice beside each other that I had to do something about it. 🙂 Since there are two of each card in the card pack, I sent her one and made mine into a card right away.
I appreciate how the grid has that colored “frame” around it, which makes it look like another layer. It is just one card from the pack. I used the Night of Navy twine from the Well Suited Twine Combo Pack (item 154566) and wrapped it around the focal card, offsetting it, before adding Mini Stampin’ Dimensionals (item 144108) onto the back. Then I centered the dandelion card high inside the grid. I took a piece of dragonfly paper from the Dandy Garden 6×6 Designer Series Paper (item 154297) pack and my Dragonflies Punch (item 154240) and punched a dragonfly that I could hover over a dandelion. I used the Clear Wink of Stella Glitter Brush (item 141897) over the entire dragonfly before adding cut-down Mini Dimensionals on the tips of the wings that are above the grid. Since I often do things out of order, I then added the cards to a card base from the Assorted Memories and More Cards and Envelopes pack. My pack happens to be the now-retired Whisper White version, but the Basic White pack is available now (item 159234). I do have some of the Basic White items to use later.
Close-up of Wink of Stella on the wings
I decided to use what I’d made thus far for the birthday blog hop, so I searched my shelves for an appropriate sentiment that would fit in the space under the dandelion/dragonfly card. (Yeah, I didn’t plan ahead. But it still works.) I had several sentiments to choose from and went with the Happiest of Birthdays stamp set (item 152539), which is a new set to me. I love the size and fonts of the sentiments in it. I see me getting a lot of uses out of this particular stamp set. I picked the “It’s your day! Enjoy it” sentiment, lined it up on the grid of the card with my Stamparatus (item 146276), checked that the stamp was also straight on the grid of the plate, and inked it up with the In-Color Misty Moonlight ink (item 153118). Stampin’ Up’s In-Colors are only available for two years from the beginning of their release period. Luckily for me (because it’s one of my favorite colors), Misty Moonlight will be here through mid-2022 since it just came out last summer. I secondarily tested my inked stamp for alignment by first bringing the plate down to a sheet of the Small Grid Paper (item 149621), which fits the Stamparatus perfectly. I’ve found I’m happiest with my stamping that way. I cleaned my stamp with our Simply Shammy (item147042).
I haven’t made the inside of the card because I’m not sure where it’s going yet. I’ll likely carry over some of the matching Designer Series Paper to the inside before I pick a sentiment.
To see the other birthday cards my team members made, check out their links below or use the “Previous” and “Next” buttons. This team never fails to impress and inspire!
If you’ve seen something you like, a purchase of $50 before tax and shipping through my online store gets you a free gift and a point to my reward system. And don’t forget that during the rest of the month of February, you’ll also get to choose a free gift from Stampin’ Up if you order in increments of $50 or more! Who doesn’t love free stuff?!
Thanks again for stopping by, and comment if I can help you!
Happy Birthday, Magnolia Lane—two quick cards using the Magnolia Lane Memories and More Card Pack from Stampin’ Up.
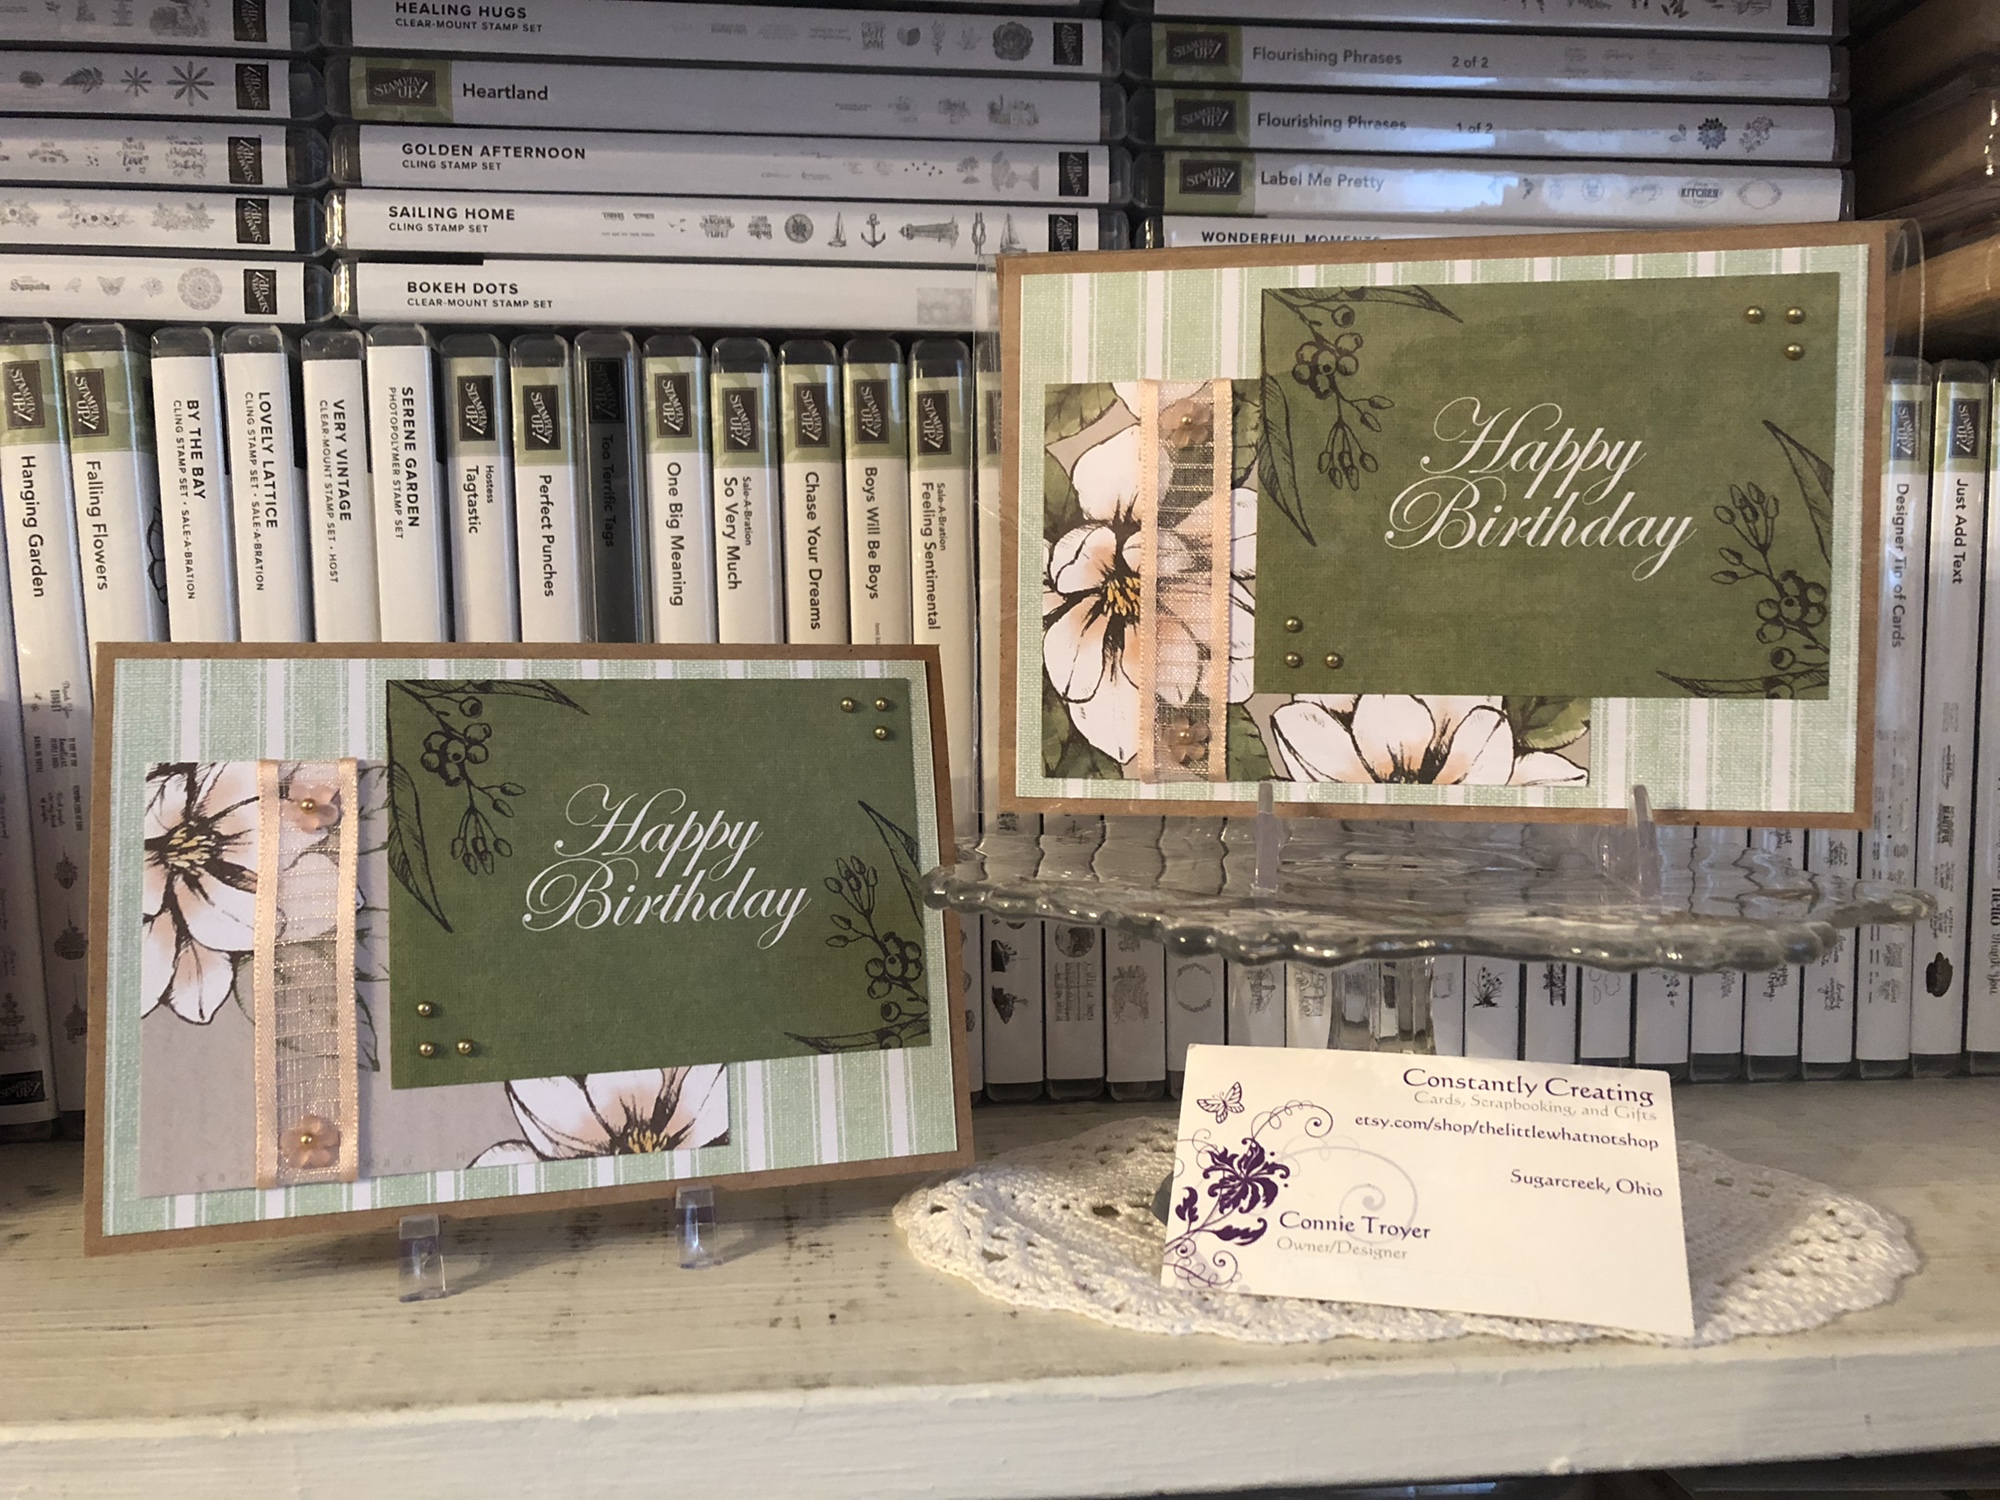
Hello again! It’s time for another Stamp with Amy K Blog Hop! Our focus is on birthday cards this time. I’ve had some busy, busy weeks here. Hope yours has been quieter. It’s time for another handmade-card delivery to my local gift shop, so I took a few hours last weekend to churn through some cards and prepare them. Stampin’ Up’s gorgeous Magnolia Lane Memories and More Card Pack and the complementing Magnolia Lane Large Specialty Memories and More Cards and Envelope Pack made it very easy to have two cards done in record time.
I was really just looking through the Magnolia Lane card pack to see what there was to work with, and, as often happens to me, I began “seeing” cards in my head as different combinations of pieces flashed in front of my eyes. So even though I had intended to only create one card, I liked the final front combination and the 3×4 card I used on the inside so well that I decided my mom needed a birthday card too, no matter how long I had to wait to give it to her. 🙂
The cards in the Magnolia Lane card pack are just so pretty, and there are quite a few with sentiments on them. The “Happy Birthday” one is elegant and classy in its design and font without being over-the-top. Although I could have die-cut the sentiment out of the card, I liked it just the way it was (which was faster anyway).
After choosing a large striped “Project Life”-style card for the background and two flowery smaller background ones to match the “Happy Birthday” card, I then adhered the leafy envelope liner into the kraft envelope and creased the flap. Then I glued the background card I’d chosen onto one of the kraft card bases from the Large Cards and Envelope pack.
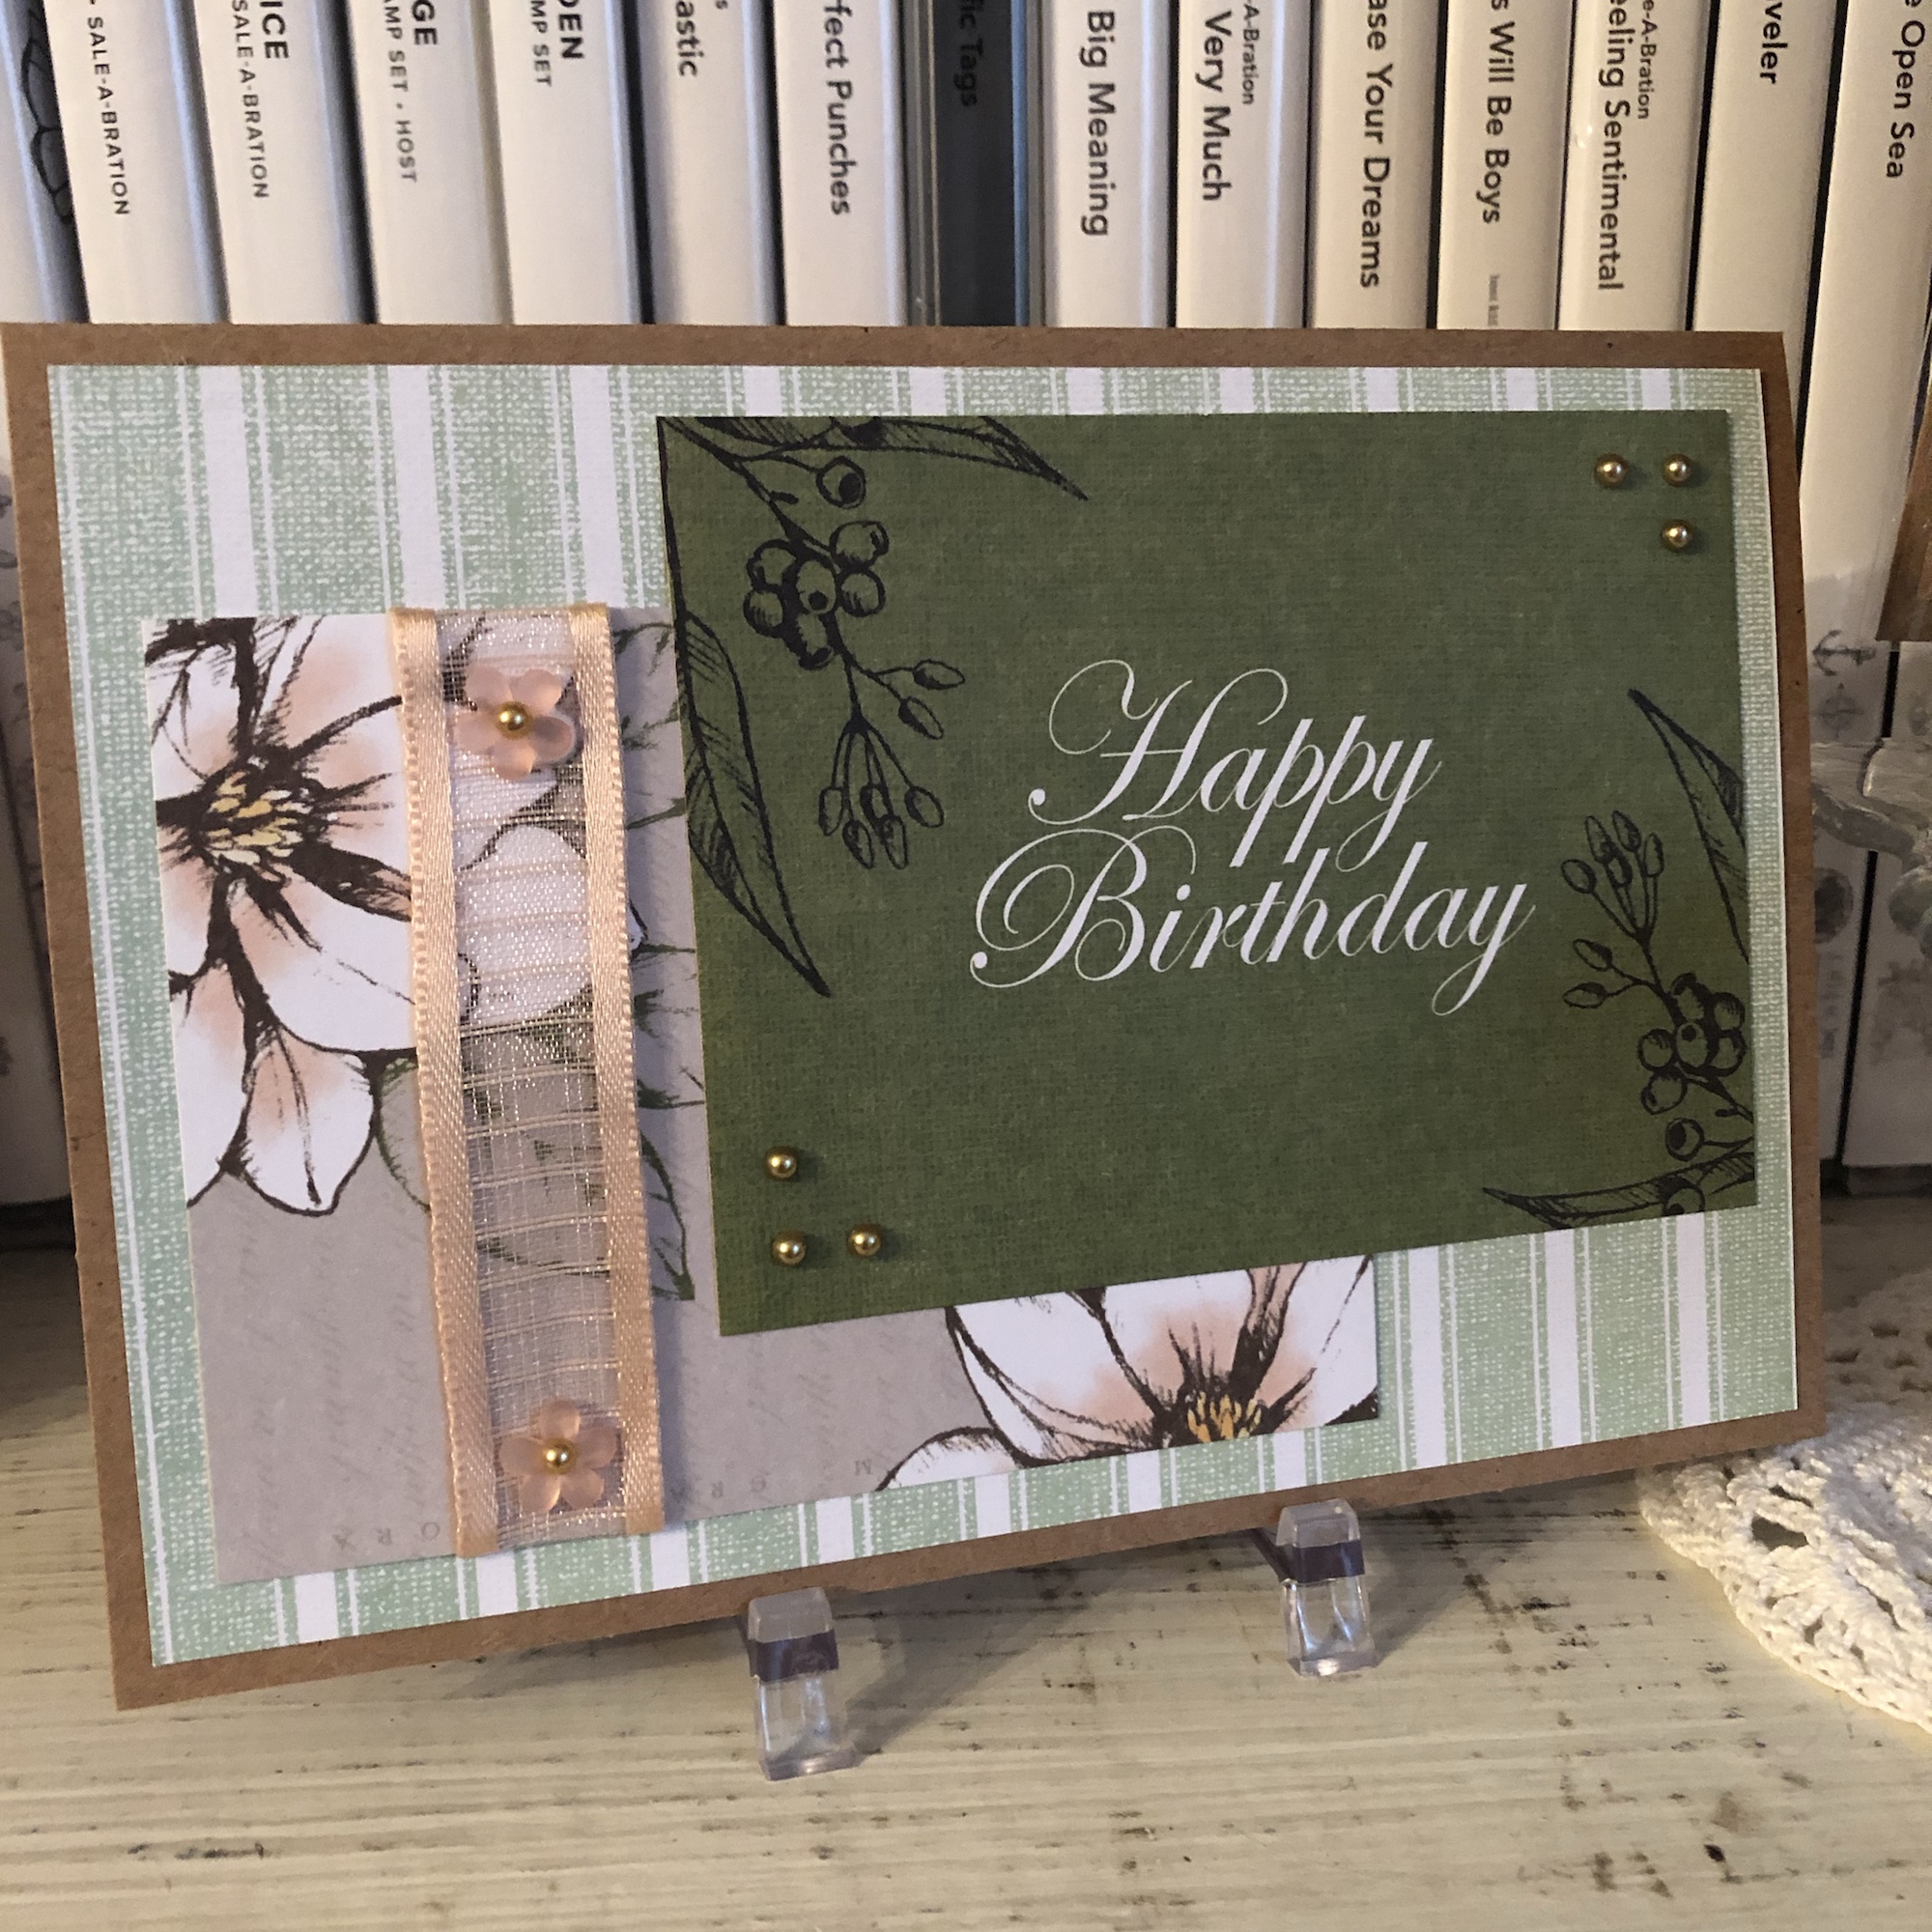
My first card, shown in the clear jacket it will be sold with.
I played around with the placement of the Petal Pink 5/8″ Striped Organdy ribbon on the coordinating 3×4 “background” card, decided where I wanted it, and put adhesive on the back before wrapping the length there tightly, since the ribbon would show the adhesive through it. Then I just staggered the two smaller cards on top of the larger striped card and glued them.
My second card.
I accented the top and bottom of the ribbon with the Frosted Flower Embellishments and then added gold Metallic Pearls in the little divots of the flowers. And then the corners of the sentiment piece looked just a bit bare to me, so I added the pearls there too. 😁
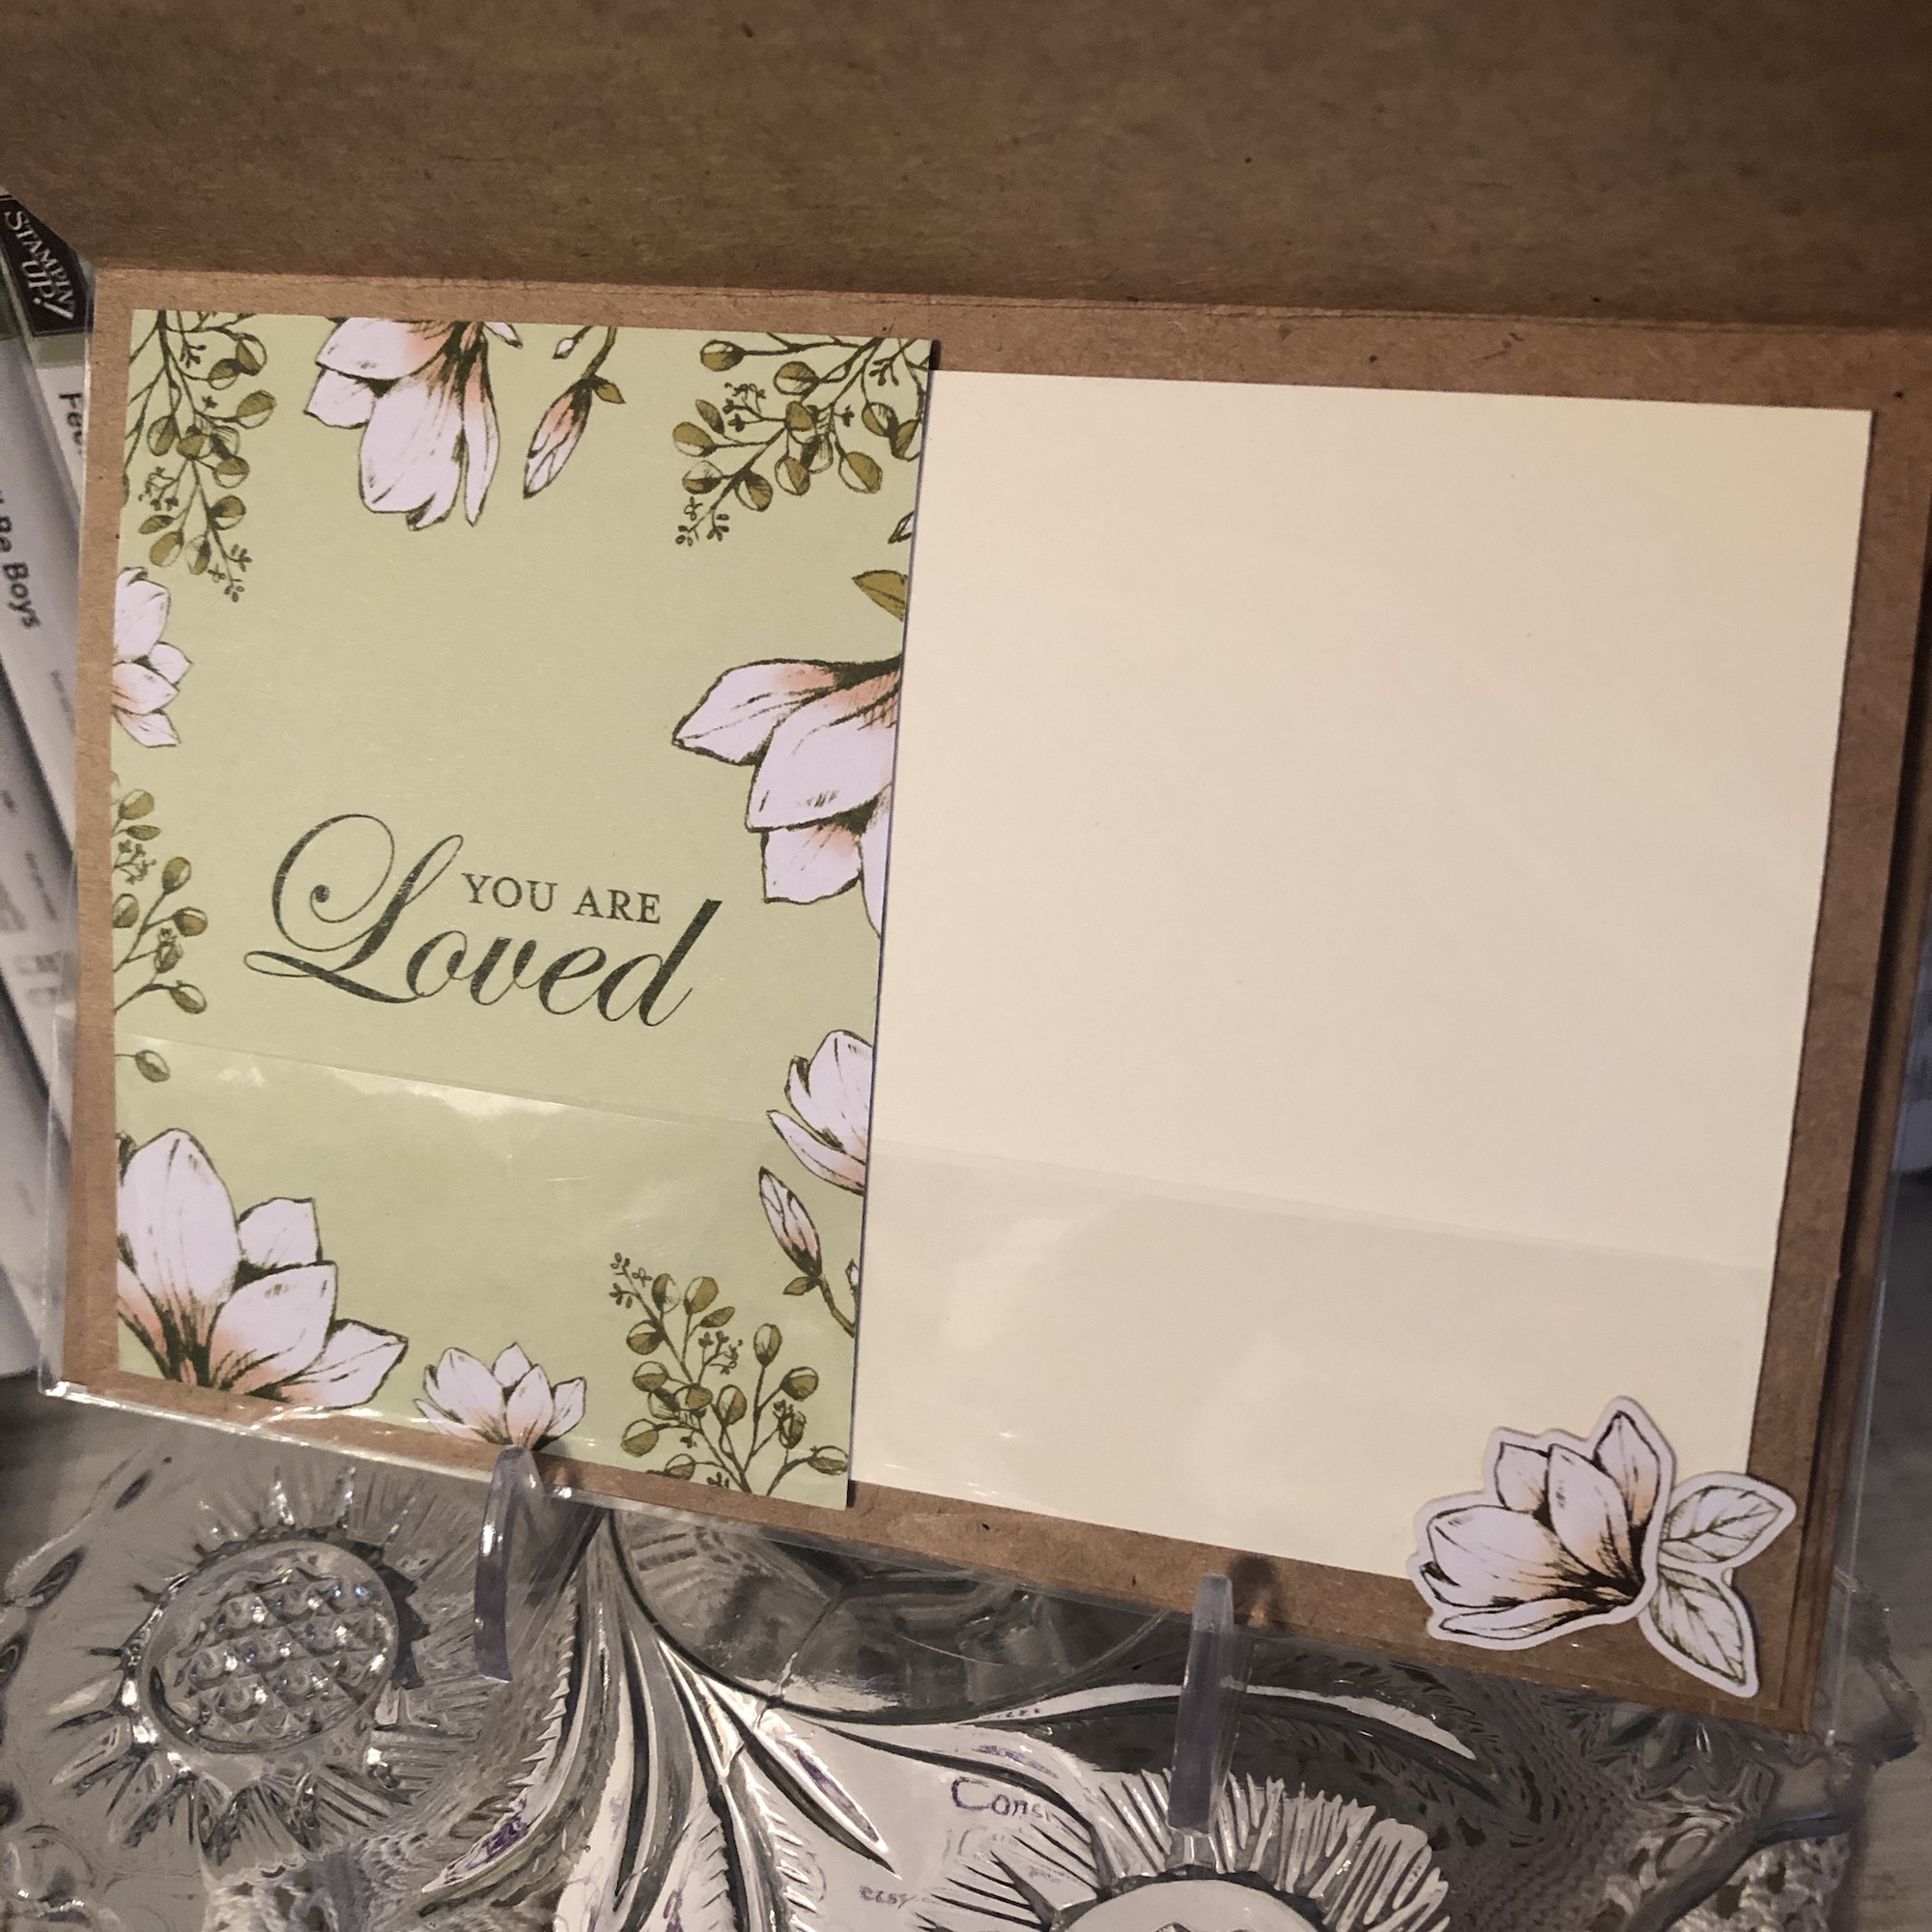
On the inside, I used the “You Are Loved” 3×4 card, some white paper for a message, and a few of the stickers from the sticker sheets included in the Memories and More pack. Easy-peasy!
The inside of both cards (this one is shown inside a protective jacket).
Thanks for stopping by to see my creations. These are great products not only for scrapbooking but for cardmaking too. With everything matching, creating is a breeze! To see what the rest of my teammates have made this month, you can follow the list or “Previous” and “Next” buttons to “hop” from one blog to the next.
If you don’t have a Stampin’ Up demonstrator yet and want to order or receive a catalog, please feel free to contact me for help. If you want to order, use code DWFPUKPH and I’ll happily send my thanks and a free gift! Make it a great week!
Let’s all say hooray that I can finally blog again! I started this masculine card while in Charlotte at OnStage with Stampin’ Up in mid-April but didn’t finish putting it together until the preordered corresponding dies arrived at my house after vacation and I had some time to do sit down with them. The Stampin’ Up team gave us precut pieces in a kit to use with supplies on the table, though we could change it any way we wanted to. I did end up varying my card a little from the picture they included with the kit.
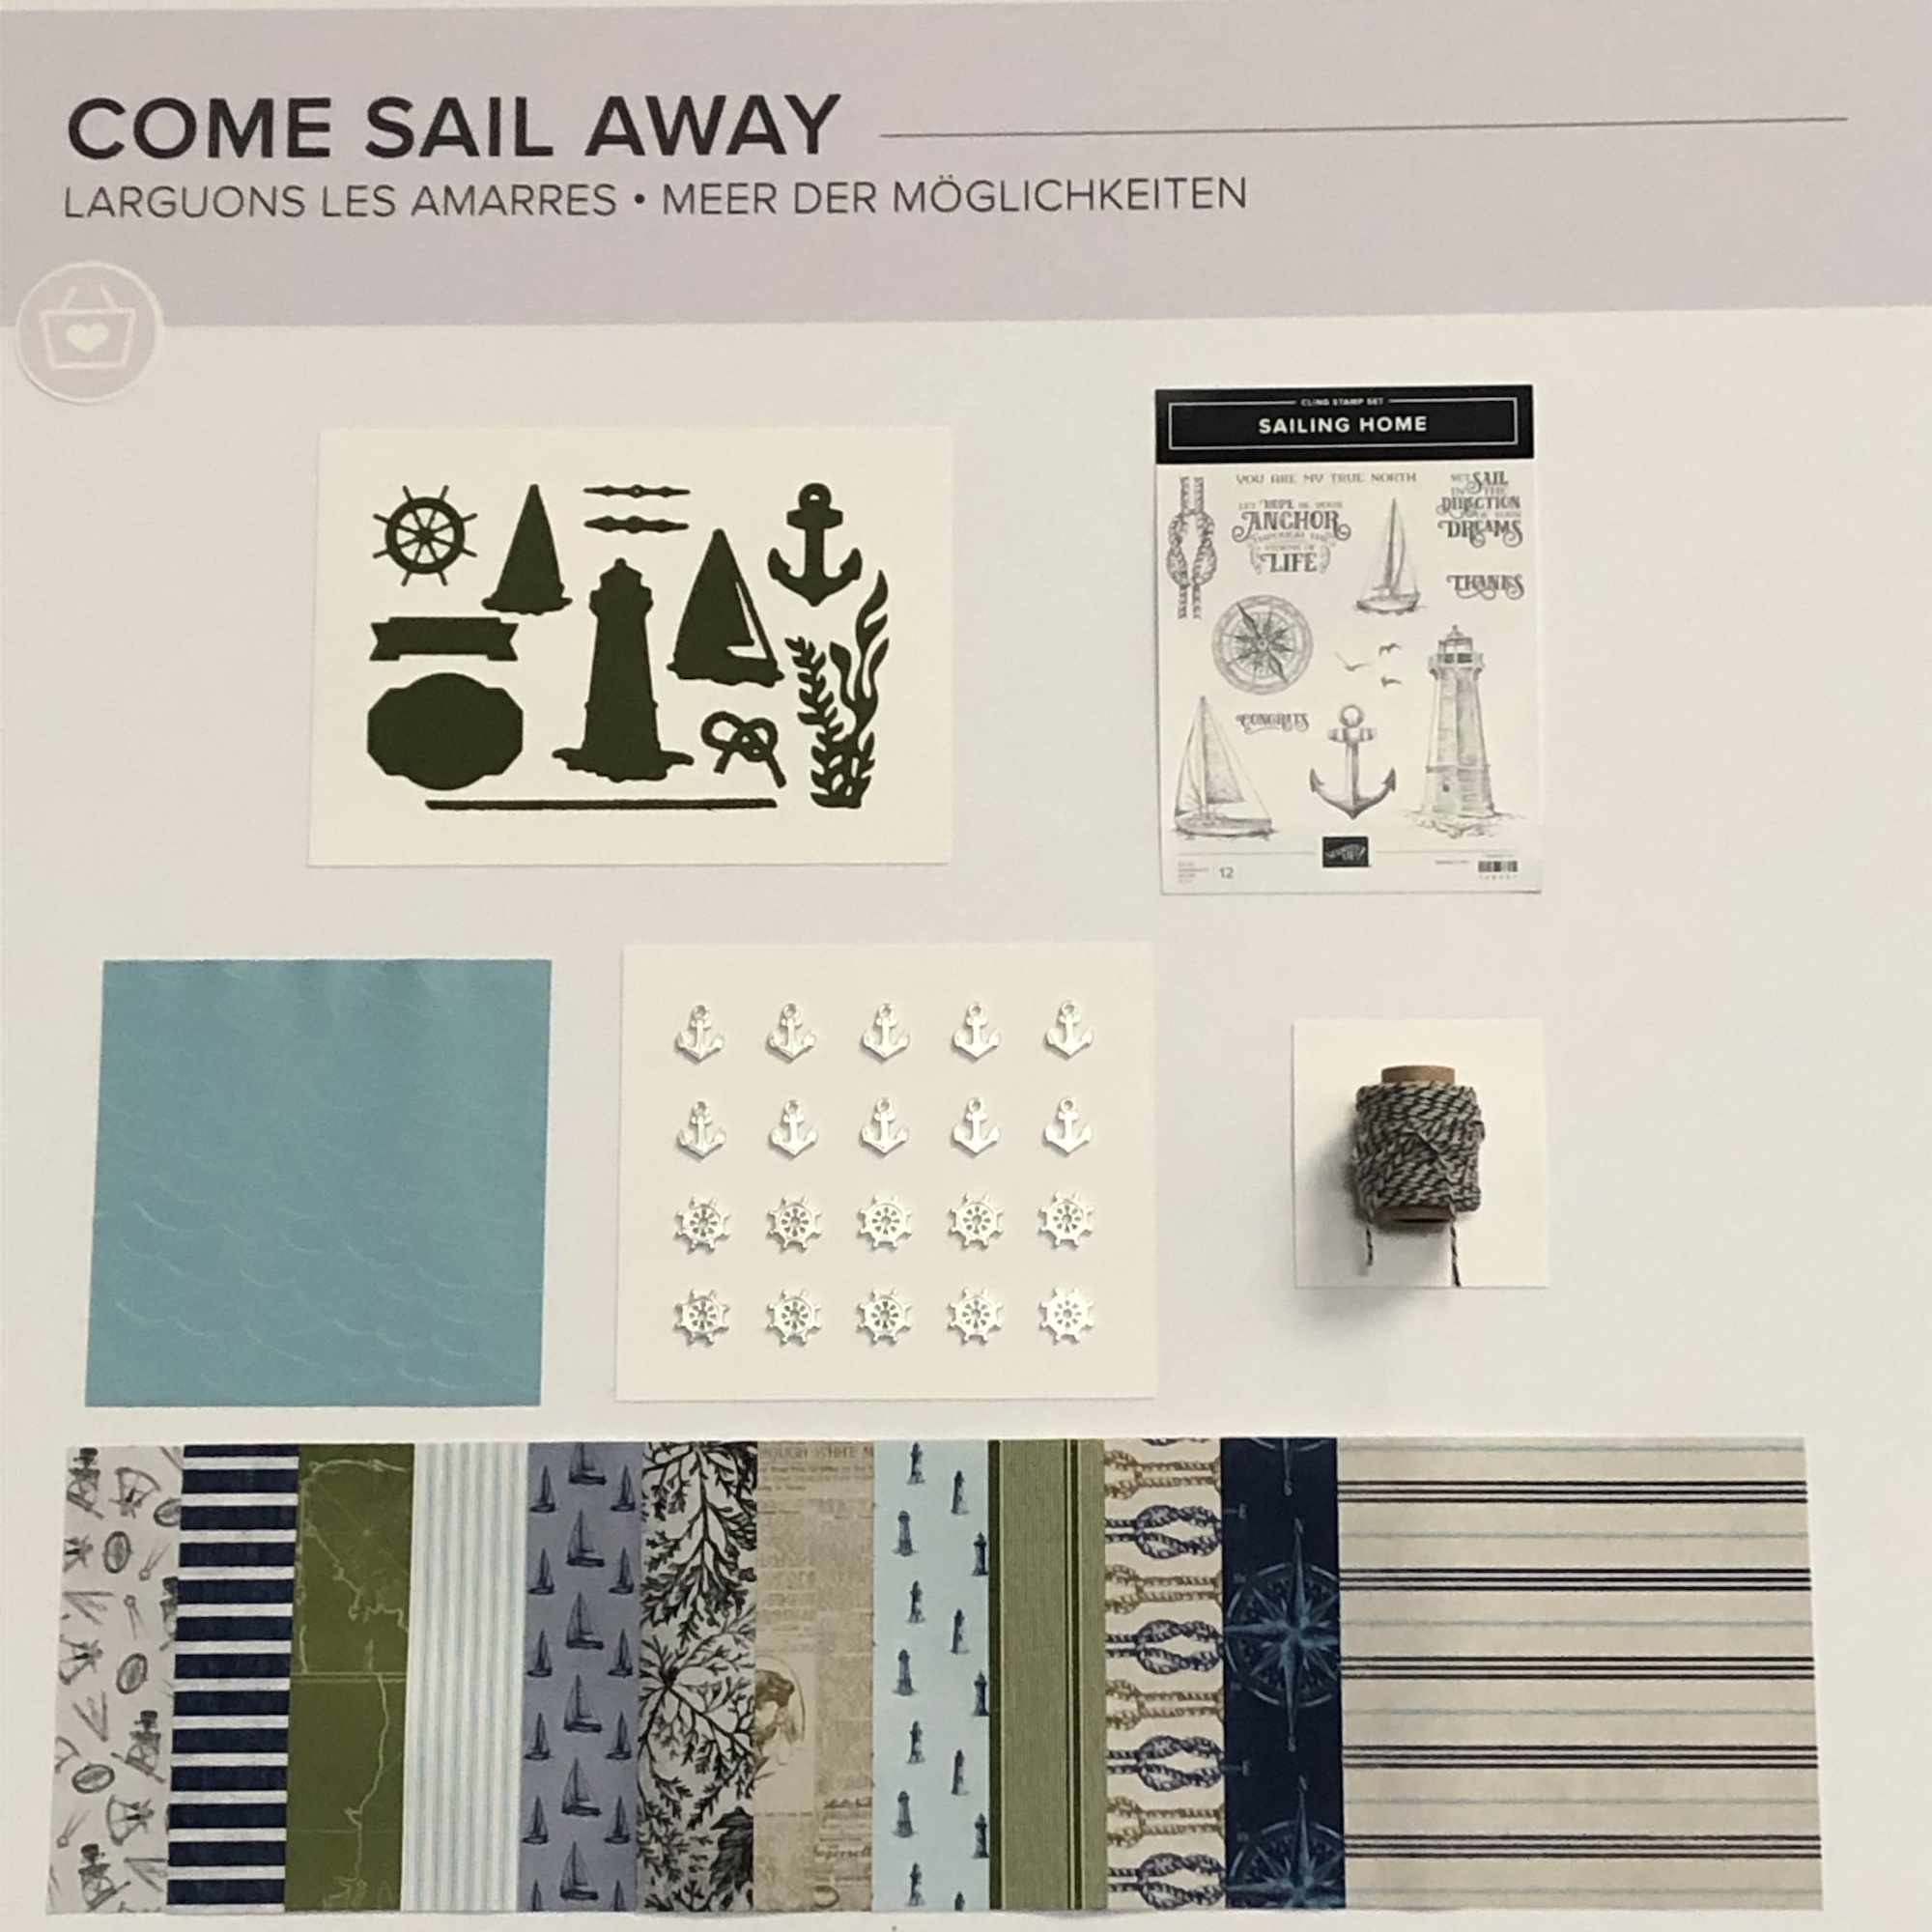
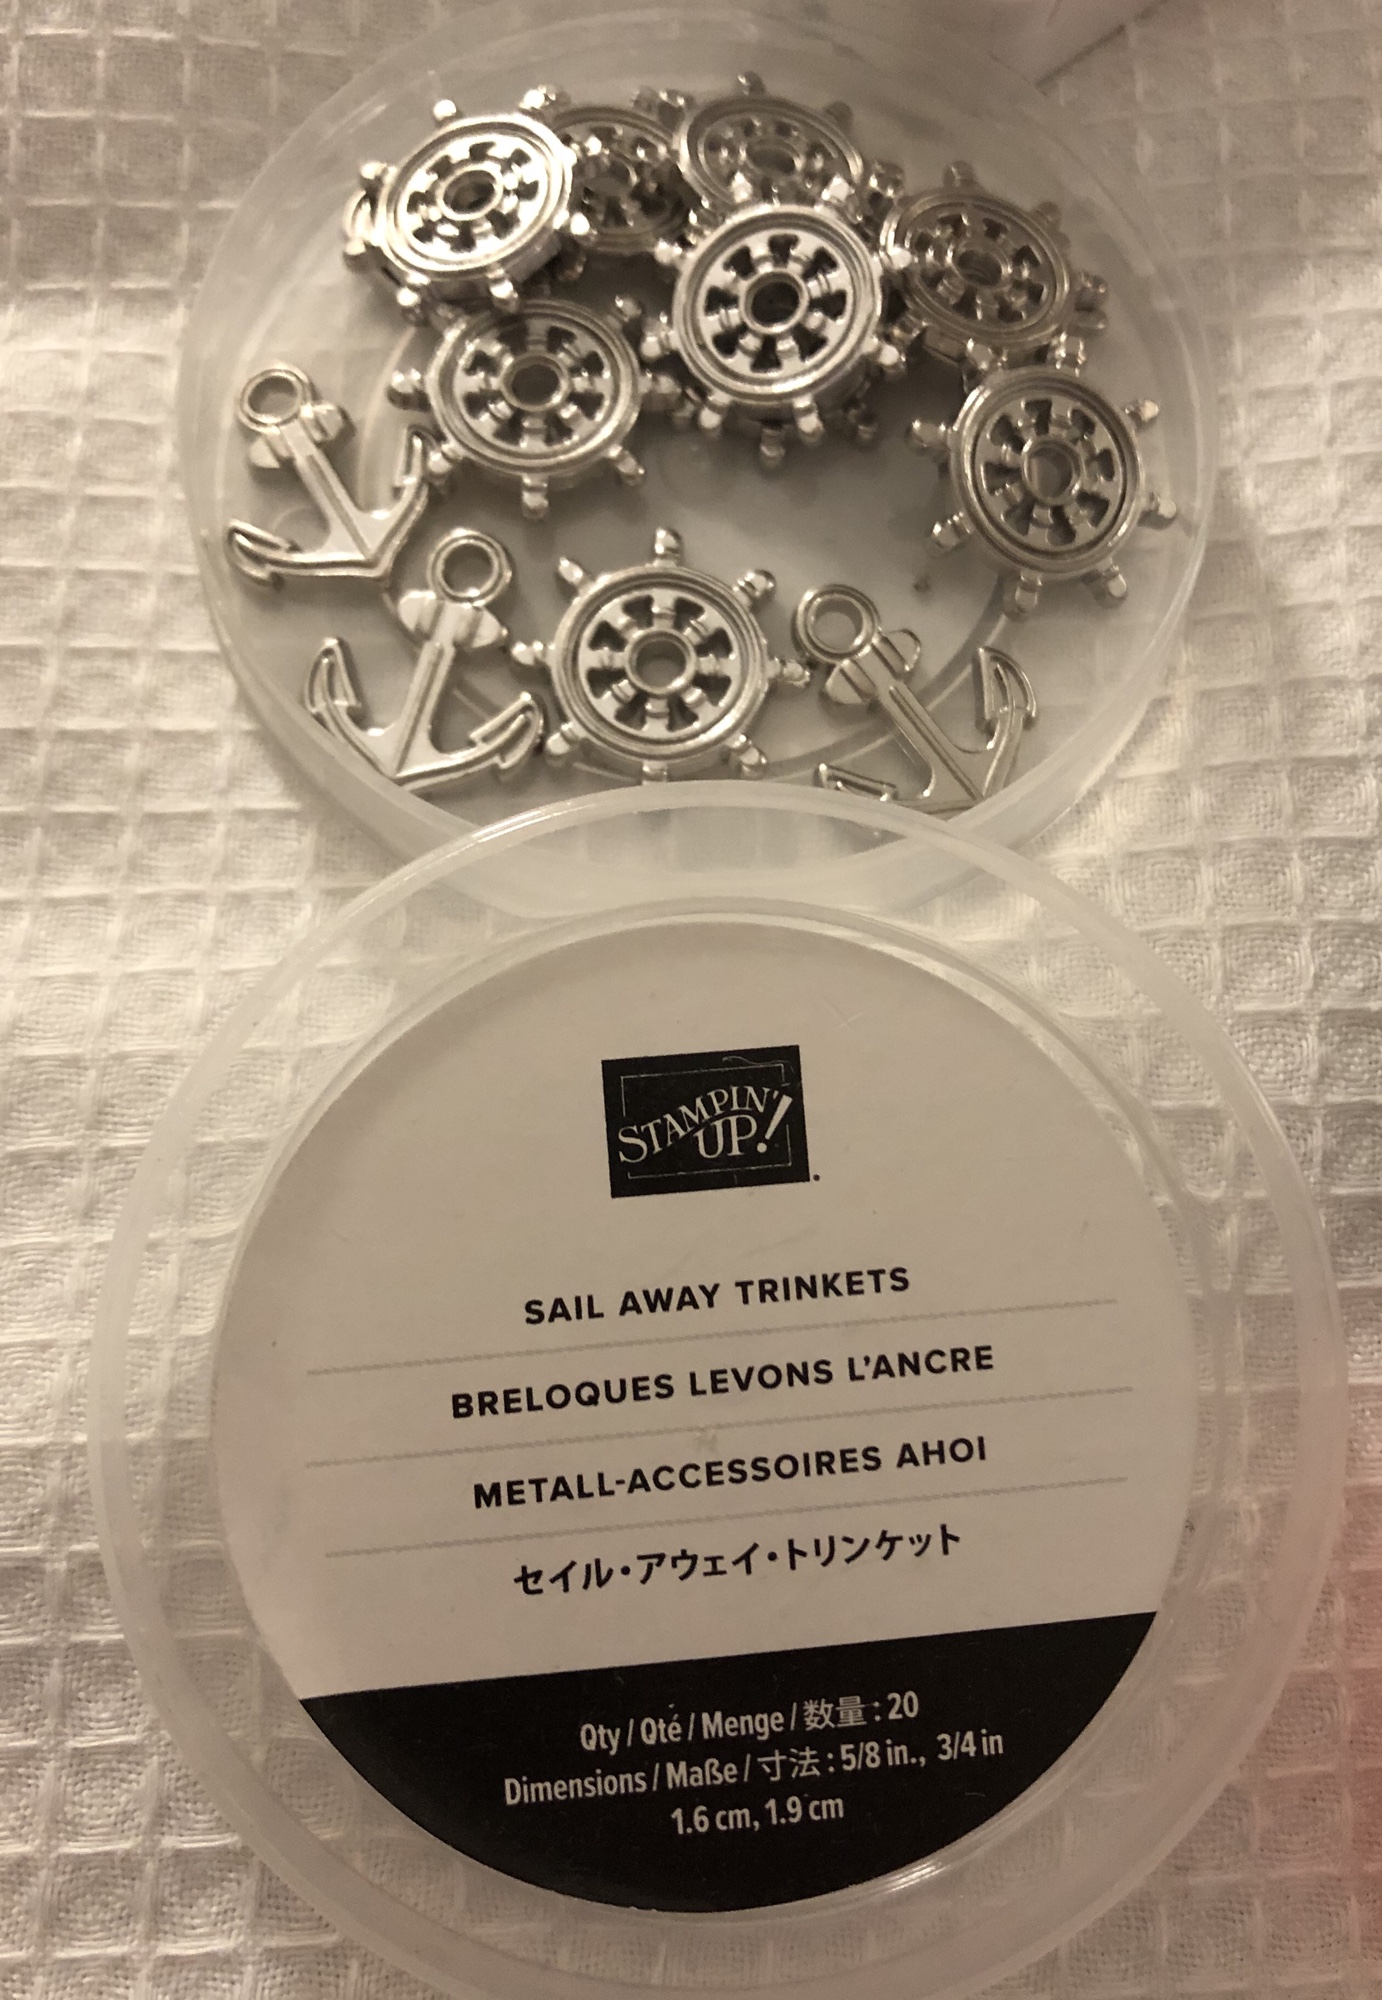
This card features the Come Sail Away suite, which will be new in the 2019-2020 Annual Catalog (available to customers June 4). What I used from the suite is the Sailing Home Stamp Set, the Smooth Sailing Dies, some of the Come Sail Away DSP, the Sail Away Trinkets, and a bit of its Sahara Sand/Night of Navy Baker’s Twine. The suite itself also includes the Come Sail Away Memories and More Card Pack and the High Seas 3D Embossing Folder—and let me tell you, this suite is awesome. I will be making up some cards with the Come Sail Away Memories and More Card Pack soon as well (there are laser-cut specialty cards in the pack of 50 double-sided cards!).
New cling stamp set available June 4.
The stamps, dies, twine, trinkets, embossing folder, and Designer Series Paper. A must-have!
The cards in the Memories and More Card Pack…one of my all-time favorites! Look at those laser-cut designs!
These trinkets are flat enough to mail and lightweight!
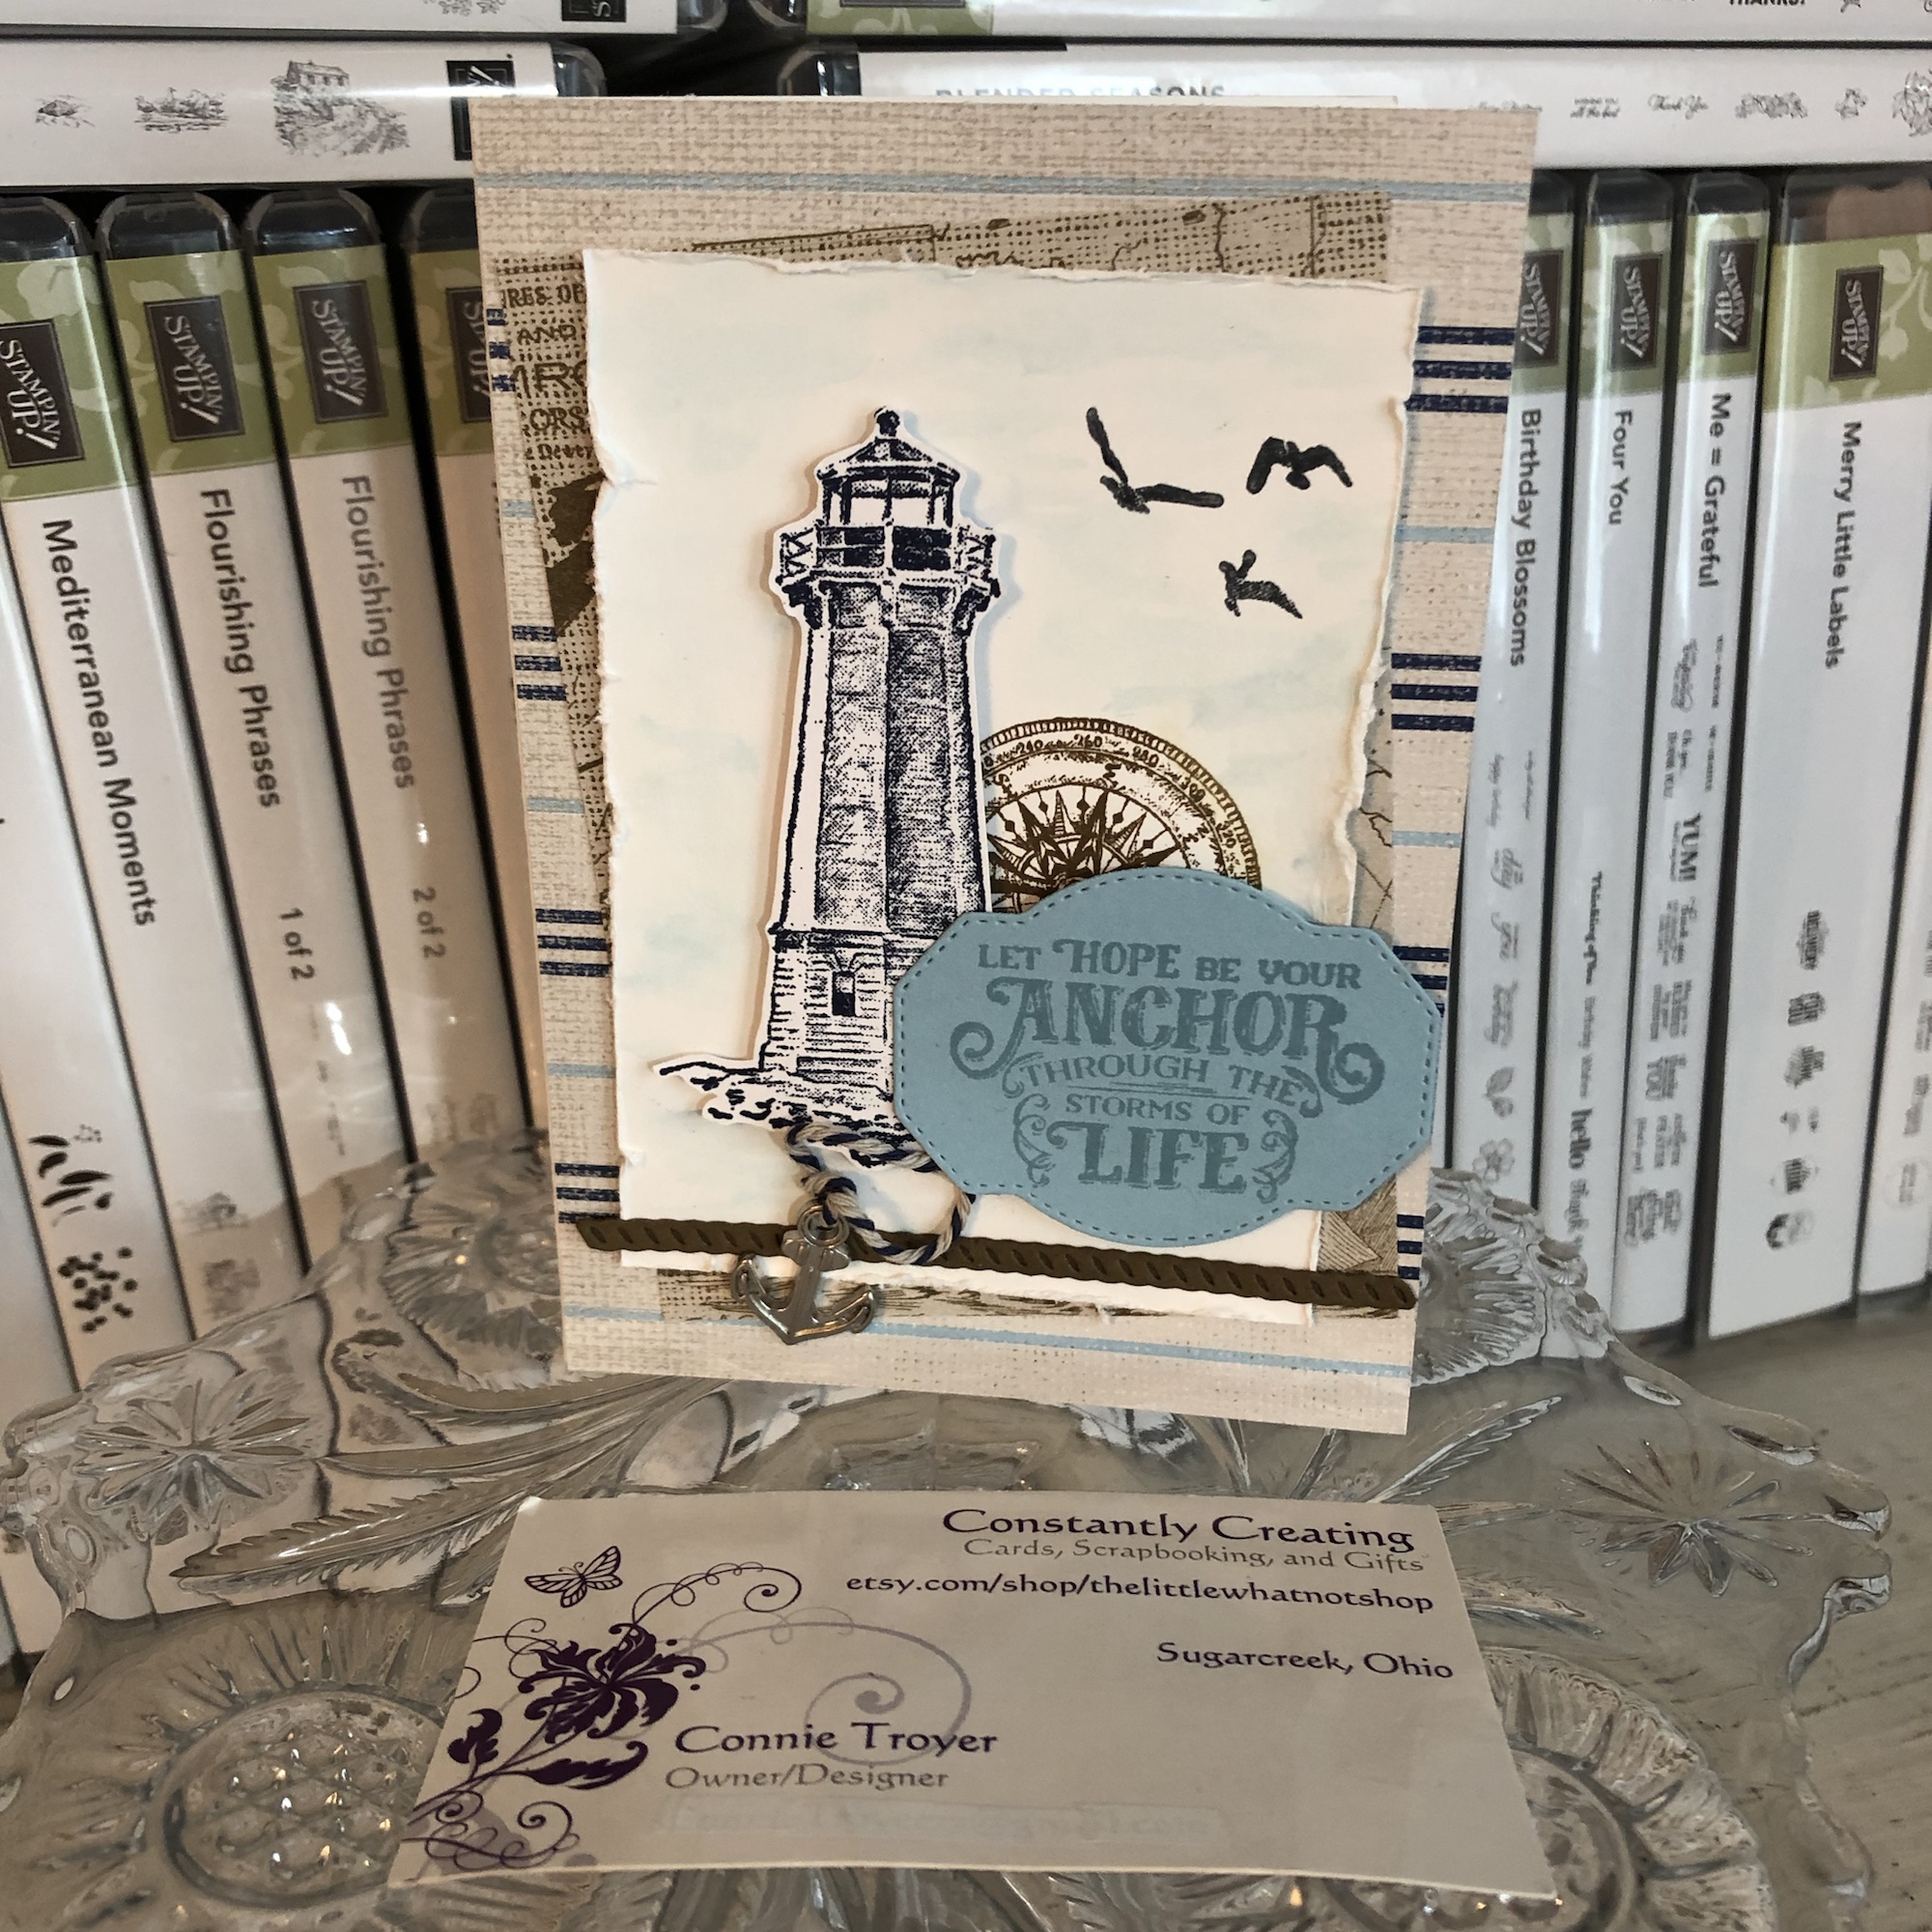
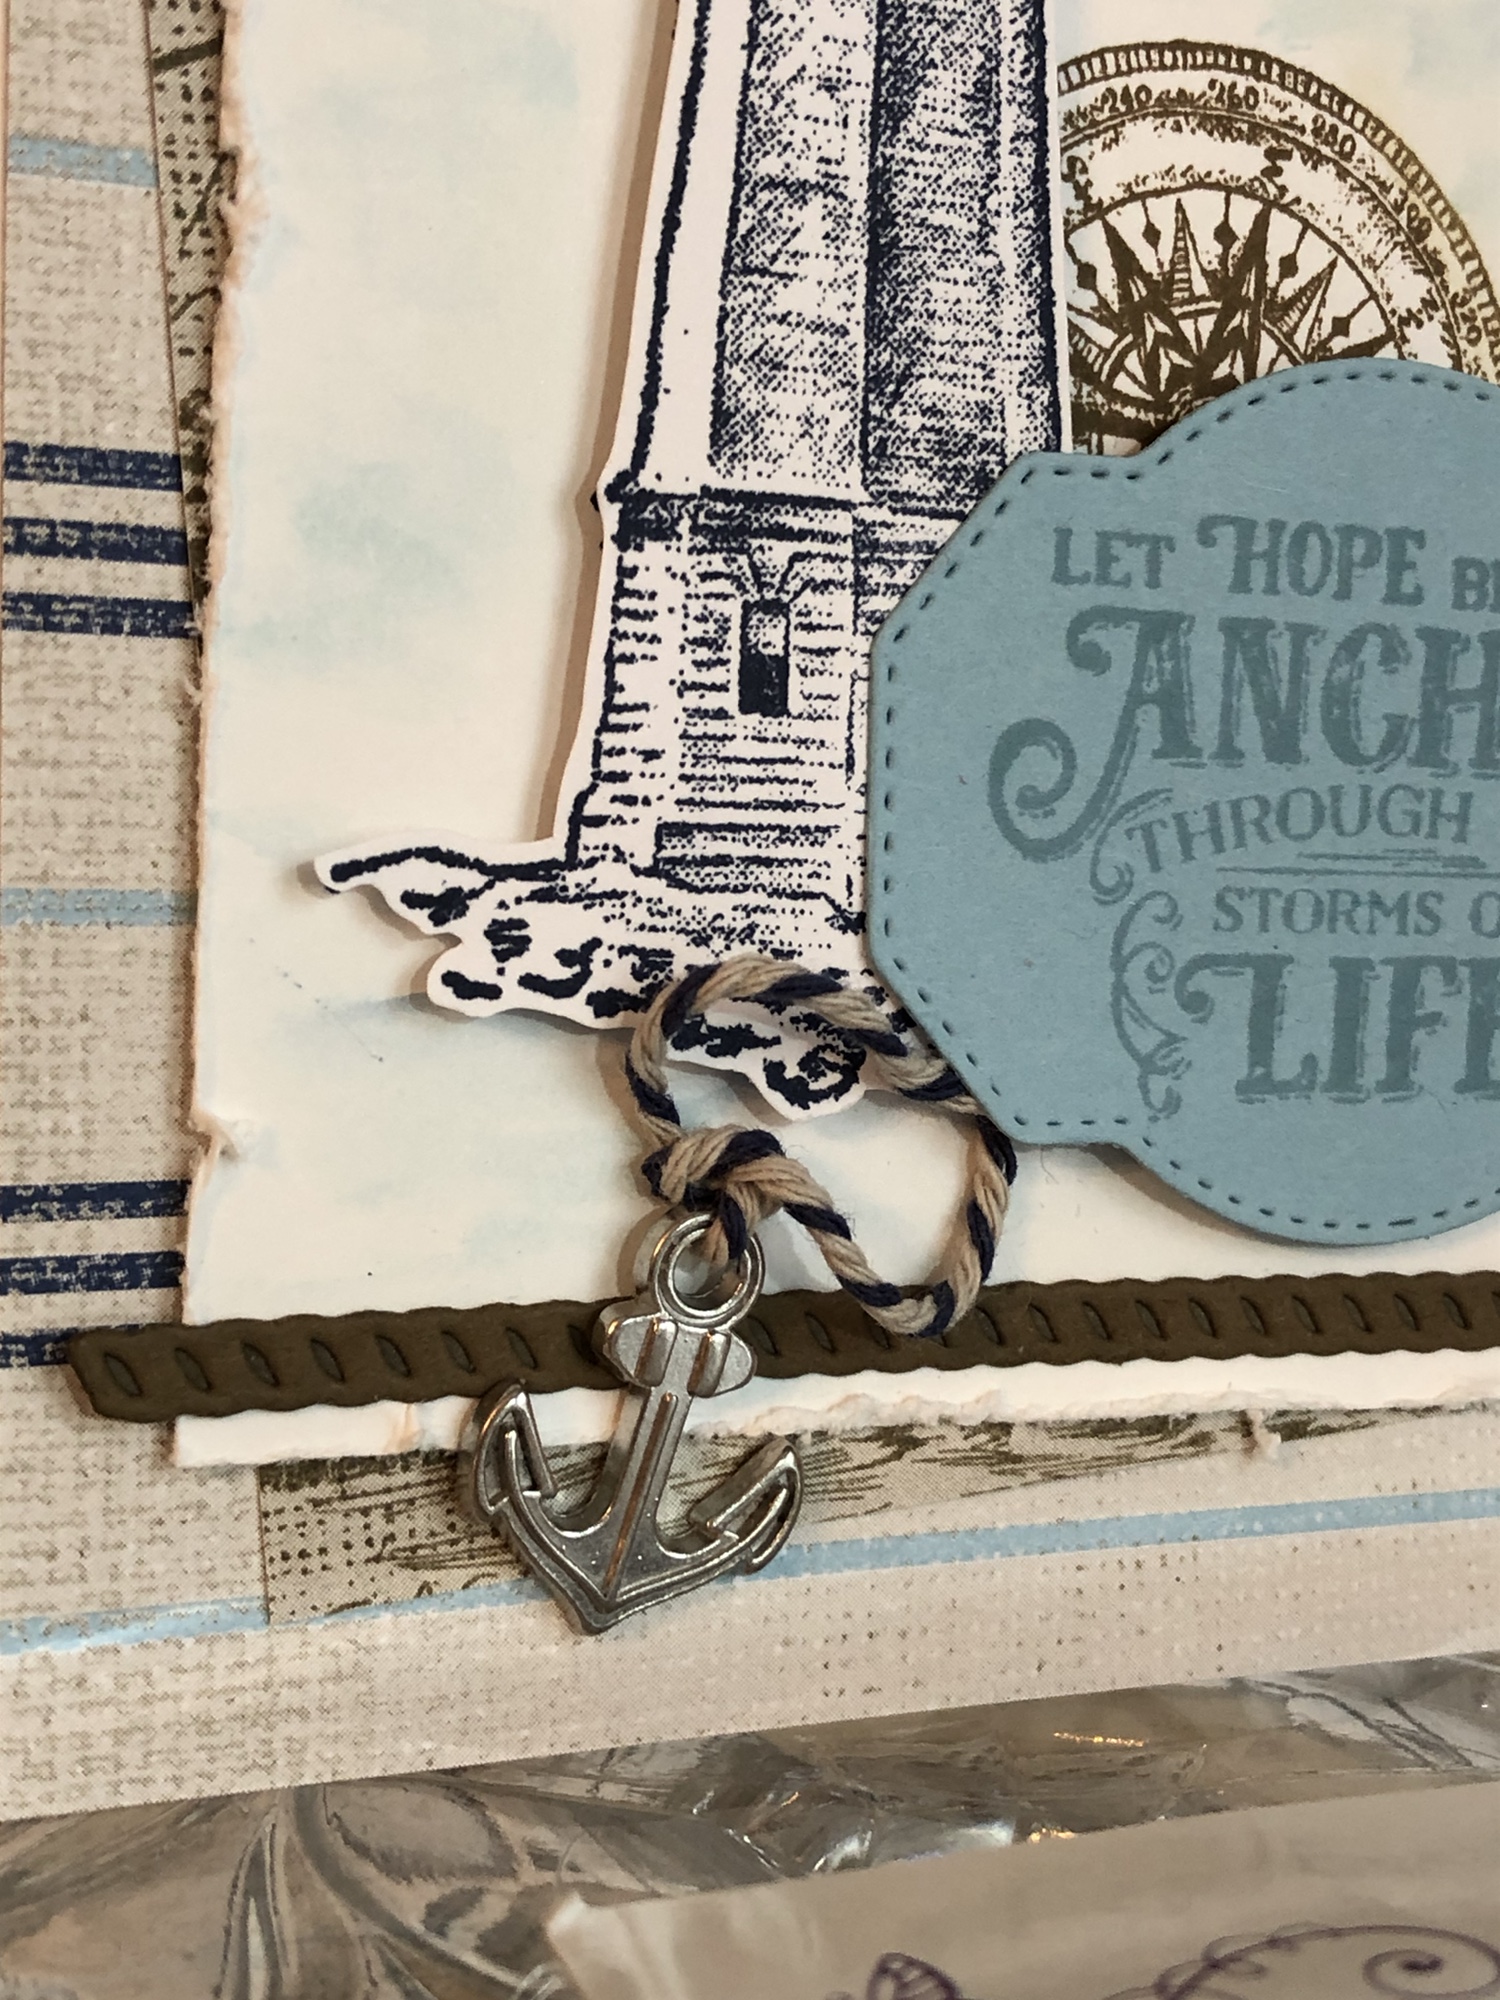
So, for this A2 card, I glued some Come Sail Away DSP onto the card base first and then placed the smaller piece of DSP cockeyed at an angle for its position behind the focal piece. For that focal piece, I used Balmy Blue ink with an AquaPainter to create a light wash of blue sky in the background (technically I did that last, but it’s smarter to do it first).
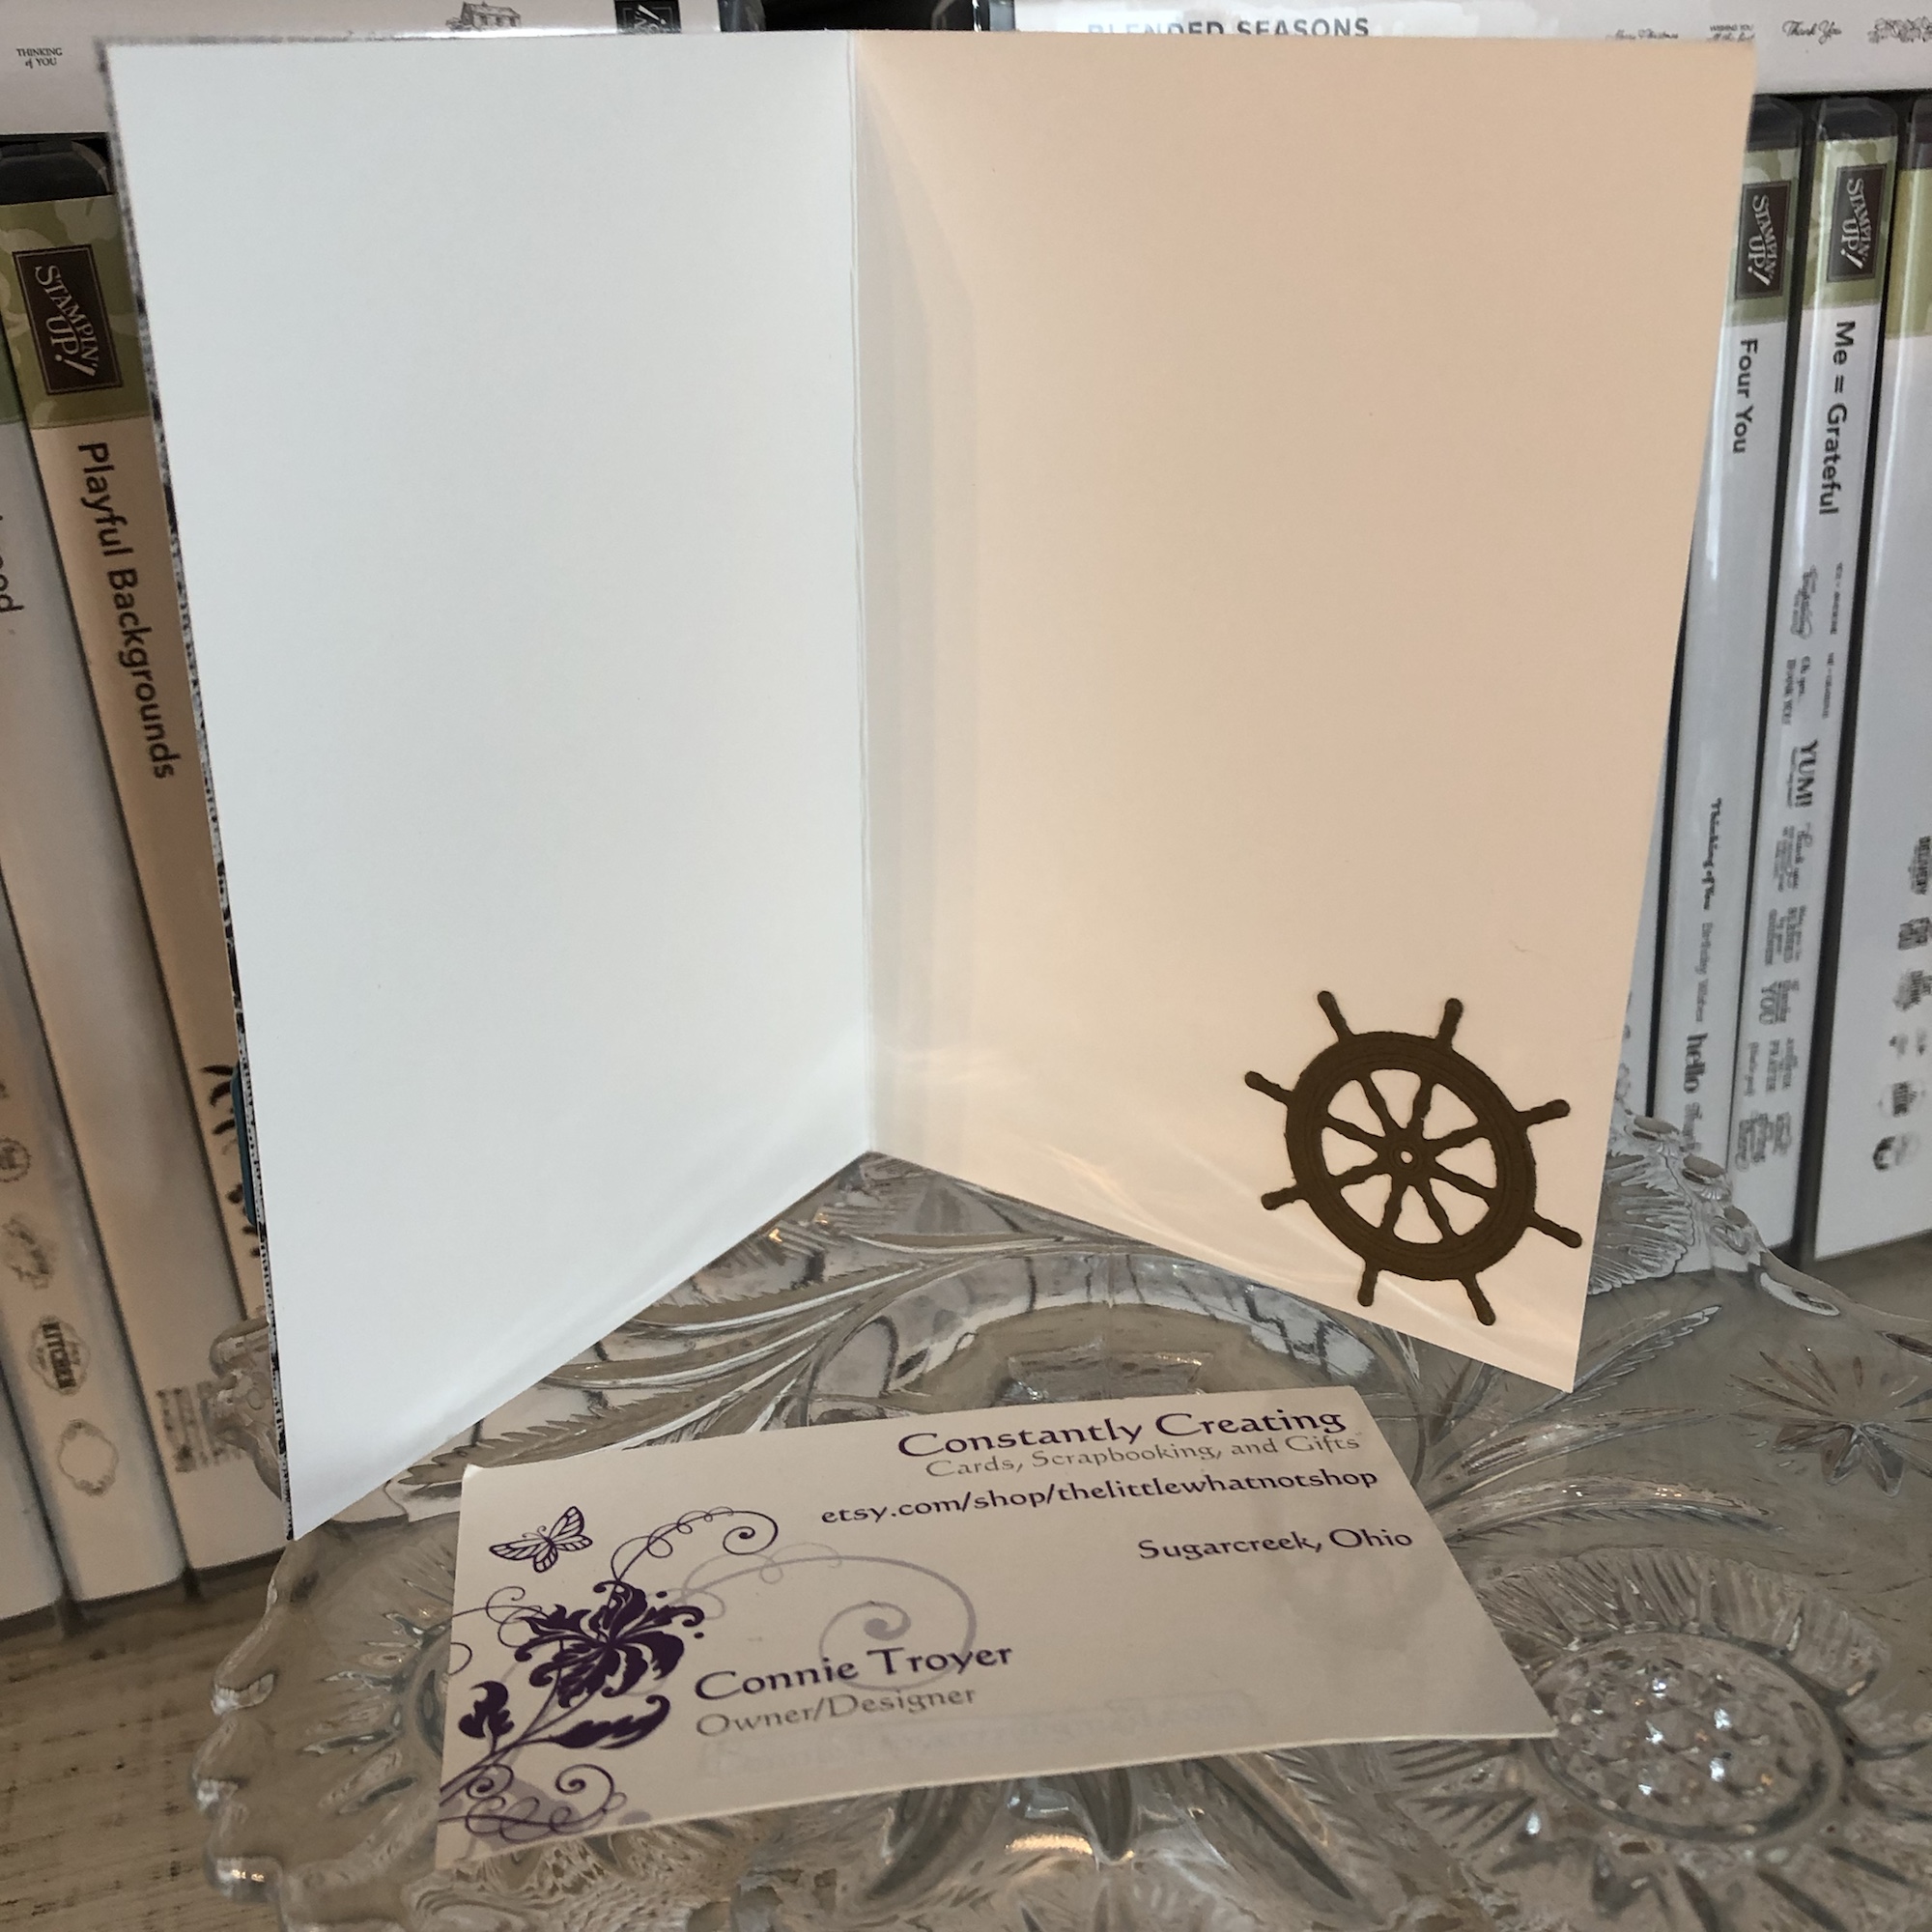
I stamped the lighthouse onto the Whisper White focal piece with Night of Navy ink and then stamped the compass off to the right of it with Early Espresso ink the way the kit photo suggested. Then I stamped and fussy-cut another lighthouse on scrap Whisper White and placed it atop the first one with foam dots so it became 3D. (The kit also suggested we add a die-cut ship’s steering wheel here with the lighthouse/compass/sentiment area, but I moved my wheel to the inside of the card instead—and left plenty of room for an overdue message.)
I stamped three flying birds in Tuxedo Black Memento Ink in the sky and distressed the edges of the Whisper White piece with a distressing tool. Then I die-cut a piece of rope with some dark brown (Soft Suede?) cardstock to lay across the bottom under the lighthouse (it embosses while it cuts!), and I die-cut a sentiment spot out of Balmy Blue cardstock after that. The sentiment die has a wonderful dashed or stitched outside border that is pressed into the paper as it cuts the die-cut.
I then stamped the sentiment (“Let Hope Be Your Anchor Through the Storms of Life”) in Balmy Blue. Since this is a cling stamp set, it is much easier to line up visually, so the stamping went well the first time through, even if I probably should have used Night of Navy ink instead. 😉
To finish off the card, I tied a bit of the Baker’s Twine through one of the anchor trinkets (there are both anchor and ship’s wheel trinkets) and glued the ends of the twine up under the sentiment spot, as if it was dangling there or laying near the lighthouse.
Here are some snapshots I took at OnStage including the display boards of the Come Sail Away suite. Our presenter in Charlotte was the incomparable Mary Deatherage, who happens to be one of my team members! She created the samples on the display boards for this suite as well. It was so much fun (and a bit awe-inspiring) to see her demonstrating the products right up there live in front of us, and she did an amazing job.
Suffice it to say I will be using these again soon! I think the “Set Sail in the Direction of Your Dreams” sentiment is going to be great for masculine graduation cards this season. They hit a home run with this bundle.
Although the new catalog isn’t available to order from until June 4, I’m happy to send one your way once I get them. If you’d like a catalog, just email me! There are also still a lot of great things carrying over and retiring from the two current catalogs. If you need a demonstrator, you can use host code RRCMHZ4E when you shop with me (catch the direct store link in my sidebar at the right or click http://www.stampinup.com/ECWeb/default.aspx?dbwsdemoid=2202334!). I’m happy to answer any questions you may have. Thanks for stopping by! Let me know what you think of this product suite!
I grabbed a 4×6 printed piece from my Sweet Soiree Memories and More Card Pack from Stampin’ Up and adhered it to an Old Olive card base for this clean-and-simple hello card for Stacy. The peach ribbon is from Recollections but matched perfectly, and I also colored in the “Hello” and the centers of the flowers with a Clear Wink of Stella glitter brush pen. Quick and easy card.