Birthday/Celebration and Thinking of You Cards with the Sale-a-Bration Kerchief Card Kit for Stamp with Amy K’s Sunday Blog Hop

Birthday and Thinking of You cards made with the Kerchief Card Kit available for free only during Sale-a-Bration with Stampin’ Up!

img_9128

Thanks for joining me on my blog today! I have to start off with an apology and a correction; this blog post is for Amy’s Tuesday Blog Hop, not Sunday’s. I was thinking of the day I had to post the link! And now I can’t change it…. More proof that I’m not perfect, I suppose. 🙂

So, for the Tuesday Blog Hop, which is going with a birthday theme this month, I decided to make up the Kerchief Card Kit, which is available as a Sale-a-Bration reward for spending $50 before tax and shipping. It had been backordered, but I got it in on Saturday and sat right down to put them together. I’m still making cards for sale for my local gift shop in Amish Country, so this set is perfect to do up for them. I plan on ordering a second kit and selling them in sets of five and some singles, using our Acetate Boxes and some card jackets.

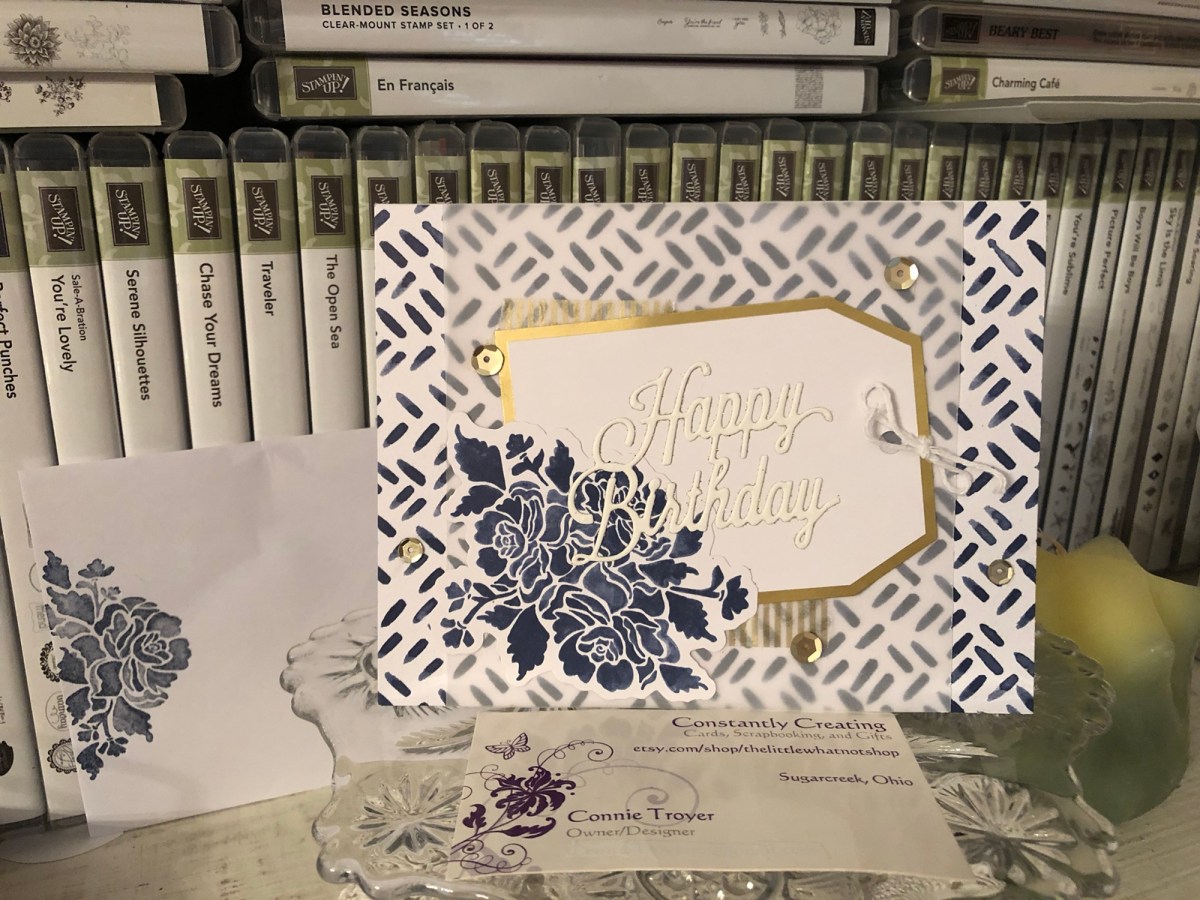
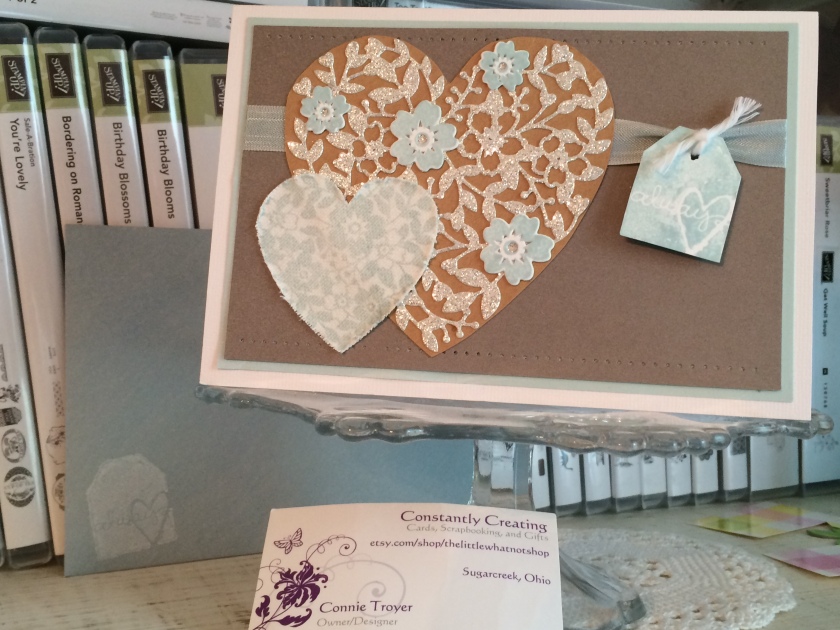
I decided to go with this kit for the birthday blog hop because of the included “Celebrate Today” sentiments, planned for the Coastal Cabana rose cards. (The Poppy Parade kerchief cards have “Thinking of You” sentiments.) I adore the blue cards (and its gold foil-dotted vellum!) because of the colors and style, and the red cards were simple and fun to put together as well (also with vellum, but plain). I also really liked the thicker twine included in the kit, and I hope I see more of it in the future. I was pleasantly surprised and pleased to note that there is no stamp or ink spot in the set; the sentiments are already printed and included as die-cuts, ready to be added to the cards. It made the work go much faster—and yet still allows me creativity to add whichever sentiments I see fit for the insides of the cards.

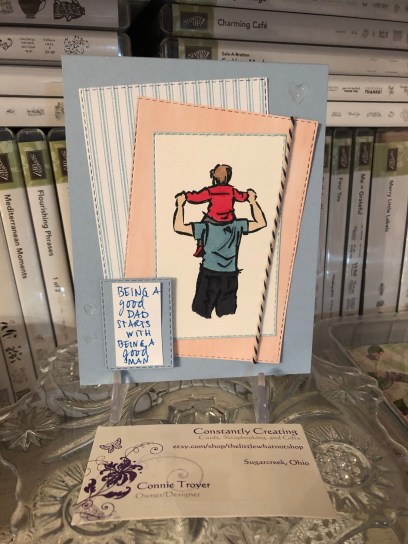
The picture above only shows four of the eight cards in the A2-sized kit because I made two of each of the cards shown. On the blue Coastal Cabana cards, I popped up the rose and sentiment on two of them and left the other two roses flat; I also put two bows up and away at the right and two at the lower left bottom, for variation.

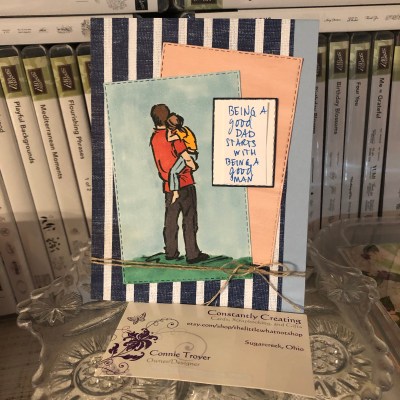
I changed the placement of the gold leaves on the Poppy Parade cards, two being centered and two being placed at a diagonal the way the kit shows. I also changed the location of the bow, not placing them under the tag as in the instructions. I actually even put the bow on top of one of the tags, which is not reflected here.

I finished the cards by adding sequins from the retired Love Blossoms Kit, as I thought the gold, white, and Blushing Bride colors matched well.

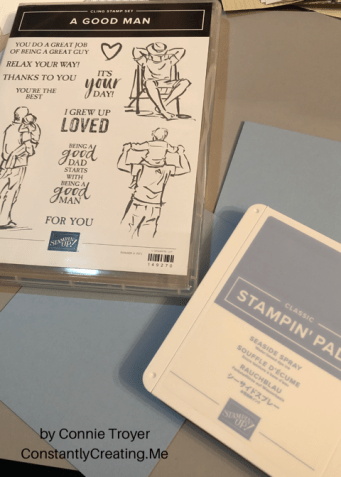
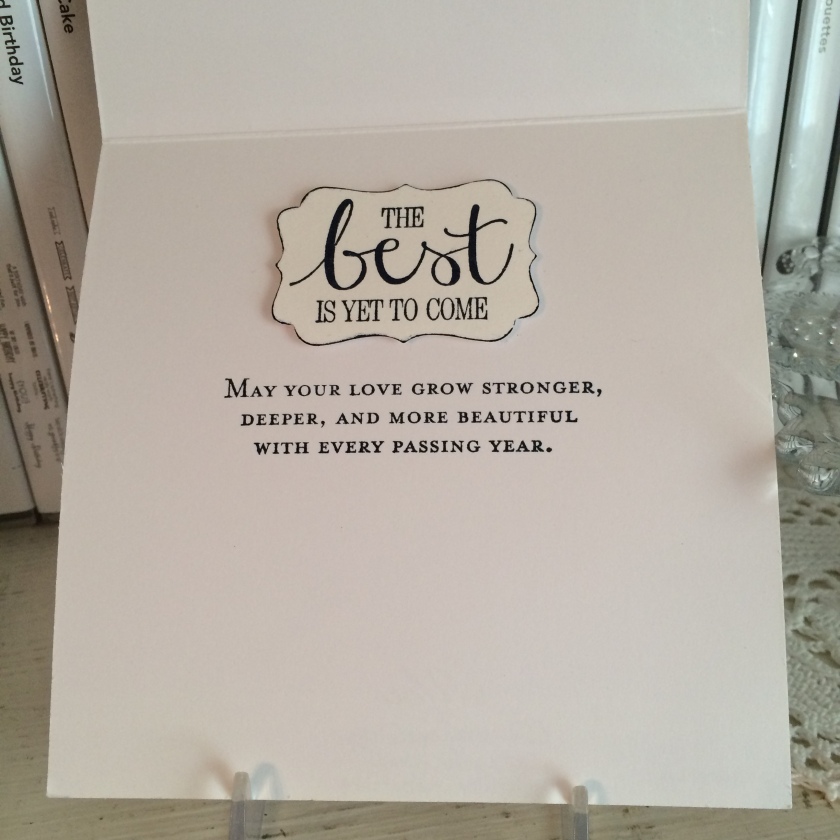
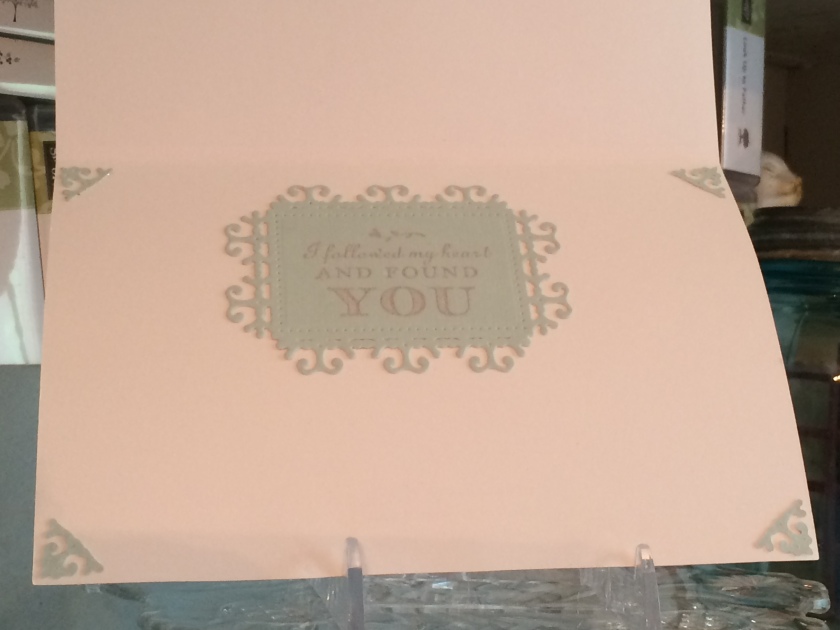
When I considered sentiments for the insides of the cards and looked through my current stamp sets, I found four that will work nicely for wedding or anniversary, general celebrations, or celebrating a special person or a special day that may or may not be love relate. Though they’re not stamped on the cards yet, I plan on using “Be strong, be happy, be you” from Rooted in Nature; “Wishing you the best on your special day” from the Perennial Birthday set; “Hoping you experience love and joy today, tomorrow, and always” from the Last a Lifetime set in the Mini catalog; and “Here’s to always finding joy in one another’s laughter, warmth in one another’s embrace, and love in one another’s lives” from Path of Petals. I think the “celebrate today” cards could also be used as graduation, retirement or promotion, even the birth of a baby or baby shower, and more occasions as well, if you didn’t feel the need to use the standard icons of the event. They would work fine as blank cards too—celebrating life or spring or no reason whatsoever!

Free with your purchase, the kit is a good investment. Quick to make up and easy to have a few cards on hand or to give as gifts, it’s one that will appeal to many (if for convenience’s sake if nothing else!), and the cards are lovely to boot. They’re also very easy to adapt to other styles or make into alternate designs. The envelopes are all lined with either Balmy Blue or Petal Pink and make a nice “wow” moment when they’re opened as well.

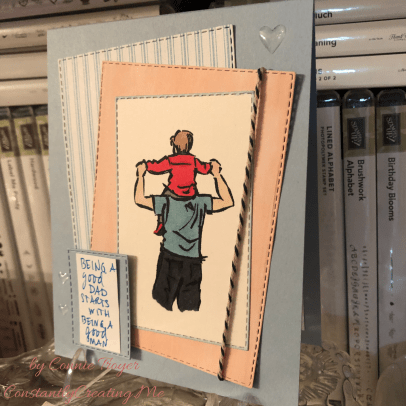
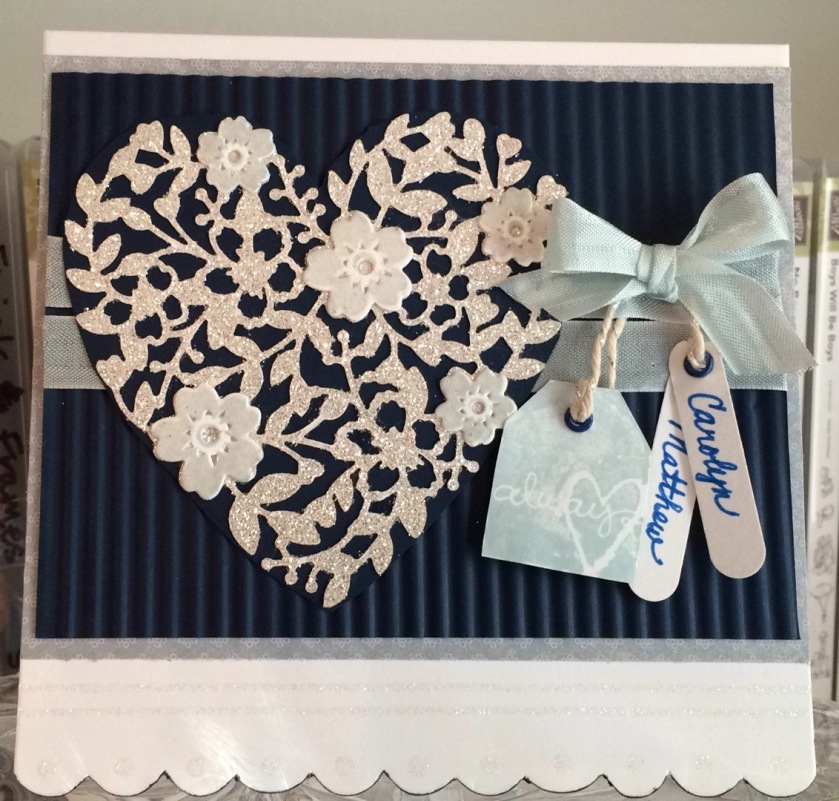
I’ll leave you with a close-up of my favorite card in the stack. 🙂 Please be sure to scroll down and “hop” through the rest of our list of participants so you can see the special birthday cards they created. We have a fantastic, creative team! If you are needing Stampin’ Up supplies, catalogs, or a consultant, I’m happy to help you out with any. You can use host code WAA2PGYR until February 16 when you check out. Thanks again for stopping by!

NextPrevious

  1. Jaimie Babarczy – https://wp.me/p79UhD-3B4
  2. Connie Troyer – You are here!
  3. Akiko Sudano – https://wp.me/paOv8E-Qx
  4. Mary Deatherage – https://wp.me/p5snyt-btg
  5. Karen Ksenzakovic – https://wp.me/paaNf4-1DA
  6. Leslie Larkin – https://leslielarkin.com/birthday-with-the-peaceful-moments-bundle/
  7. Sue Prather – https://wp.me/p5yitZ-1KD
  8. Julie Johnston – https://wp.me/p8SzmQ-2hu
  9. Karen Finkle – https://karenscardkorner.blogspot.com/2020/02/stampin-up-young-at-heart-for-amys.html
  10. Amy Koenders – https://wp.me/p2SFwf-iuS

“A Good Man” Stamp Set with Seaside Spray In-Color for Stamp with Amy K’s Tuesday Blog Hop

A masculine card for use during Father’s Day (or any day!) for Stamp with Amy K’s Tuesday blog hop.

img_9128

Hello again and welcome back to my blog—or thanks for stopping by if you’re a new visitor! The theme for Stamp with Amy K’s current Tuesday blog hop is “masculine,” so I decided to create two “Father’s Day” type of cards that can be used at any time for the guys in our lives. Since they are going to my local gift shop for sale, I needed to create something that didn’t explicitly say “Happy Father’s Day” (best for a longer shelf life!).

I’ve used all current or upcoming products that are available on June 4, when Stampin’ Up customers can order from the new catalog. I was able to preorder some things because of my demonstrator status. So I’m using stamps from the new cling set “A Good Man” and one of our brand-new In-Colors, Seaside Spray (only available for purchase June 4, 2019 through May/June of 2021).

Seaside Spray is a gorgeous color that reminds me of a smoky blue. It’s one of the shades in my valances, actually, so I have a feeling I’ll be using this color for years to come even after it retires. 🙂 And “A Good Man” is one of those casual, contemporary sets that have a sketched look to the images, with some slight distressing on the sentiments.

I began each A2 card with a Seaside Spray card base, taking an 8.5×11 piece of cardstock and cutting it in half. I wanted to use two of the colorable images in the stamp set, one on each card, and quickly figured out which rectangles my chosen images would fit inside in my new Stitched Rectangles die set.

I stamped each colorable image in Memento Tuxedo Black ink and die-cut the first rectangles. Then I colored them with some of our Alcohol Blends: Dark Mango Melody, Dark Old Olive, Dark Smoky Slate, Dark and Light Basic Black, Ivory, Bronze, Dark and Light Shaded Spruce, Dark and Light Balmy Blue, and Dark and Light Real Red. (I need to get a dark blue yet, so I had to color all pants in various shades of black and gray.)

Seaside Spray isn’t one of the colors I own in the Blends yet either, so I used Light Balmy Blue for the sky and border, hoping it would look all right. Turns out it does sometimes…but not if there’s a lot of concentration. I filled in the background of one of the images but left the other white. I wasn’t sure which way to go. Tell me which one you like best. 🙂

Next I die-cut other various-sized rectangles from the Come Sail Away and Perennial Essence Designer Series Paper packs and and staggered them with the images and sentiment block.

I also carefully edged around the border of one of the die-cut, colored images with my Balmy Blue Blend. I wanted to do something in the corners the way I would dye ink, but I didn’t trust myself enough to try it with the Blend. I’ve had to redo enough this evening. I’m actually pretty pleased with how the edging turned out. It was easy and looks clean and simple. I liked it so well that I did it on the second card too, with a Night of Navy Stampin’ Write Marker (but it was much easier to accomplish with the Blend, at least tonight!).

After I placed the sentiment block and glued the rectangles for the first card, I added three Heart Epoxy Droplets to two corners to finish the card.

And here is where I have to confess something. Two things, really. I lost a stamp before I finished my cards or this blog post. Specifically, I lost the main sentiment for the front of the cards. I have torn this room apart, searching through my trash can, cleaning off my desk and the cart next to me, checking my clothes…. It still hasn’t turned up. (Please tell me I’m not the only one this has happened to!) I can attest that the new cling stickers are really sticky, because I had the stamp rubber-side down in the case with the sticker facing up so I could quickly grab it and stamp it after I was done with the inside pieces. I’m certain it’s stuck to *something*. 🤦‍♀️ So... Sigh. I handwrote the same sentiment in a similar kind of font and lightly stuck it to the card—for this blog’s purposes only—where the real sentiment will be stamped in Night of Navy ink on Seaside Spray cardstock. When I find it. Humor me, please. (If I can’t find the stamp eventually, I may just have to repurchase this set because that pair of sentiments is essential!)

This card has now also convinced me that I need to get the Subtle 3D embossing folder. The background still needs something. I thought of stamping too late, after I adhered the rectangles. I’ll pretend I’m going for “clean and simple.”

The first card.
Another angle, showing the hearts a little better.

And now for my second confession. My roll of Night of Navy/Sahara Sand Baker’s Twine has gone AWOL as well. (I’m betting the cat did it. She’s been known to do so.) So I’m using most of the piece of twine that I snitched at OnStage for my Come Sail Away card I finished later at home. I also cut card #2’s heavy-striped piece of Night of Navy/Whisper White DSP the wrong size…and that was after I spilled ginger ale on four newly opened papers and cut out the wet sections. 🙄🤦‍♀️ Trust me, if I can make cards I’m proud of with all this chaos, anybody can!

So this is what I refigured for the second card, after some challenges (like the fact that I had to use the Color Lifter too, even before I cut the striped piece incorrectly). I used Linen Thread at the bottom of this one. I felt I needed to separate the Balmy Blue Blends background from the Seaside Spray cardstock because, for me, the color difference was too much to have them next to each other. My first thought was to have the striped paper cover the entire card front, but obviously that went awry. I decided that the mistake wasn’t so terrible as to have to redo that too (and I sort of hated to cover up all that beautiful new In-Color anyway), so I just went with it. I hate wasting paper. (My apologies again for the handwritten sentiment. It will look so much better with the real one….)

The gift shop card.

The insides of both cards are identical, and they went so much smoother than the rest. I was even watching a TV show while I stamped. (That does it—I should always watch TV while crafting. But not in the dim light, because I think that’s when I lost my stamp.)

So that’s it for me tonight. It’s time for bed. Thanks again for stopping by my blog! So sorry about all the mishaps. Some nights just go like that.

If you’re interested in receiving a catalog, I’d love to send you one. Just drop me an email with your info using my Contact Me form.

If you want to continue the hop to see what the rest of my fabulous team members made, click the Next button to see what our fearless leader, Amy Koenders, has made, and if you’d like to go backward instead, click the Previous button to visit Sue Prather’s blog.

  1. Karen Ksenzakovic – https://wp.me/paaNf4-Bn
  2. Terry Lynn Bright – https://wp.me/p8fxPh-80
  3. Jaimie Babarczy – https://wp.me/p79UhD-2Pa
  4. Mary Deatherage – https://wp.me/p5snyt-88U
  5. Karen Finkle – https://karenscardkorner.blogspot.com/2019/05/stampin-up-wood-textures-dsp-for-amys.html
  6. Akiko Sudano – https://stampininthemeadows.com/?p=462
  7. Shirley Gentry – https://stampinwithshirleyg.com/?p=5240
  8. Sue Prather – https://stampwithsueprather.com/?p=4744
  9. Connie Troyer – https://wp.me/p8xvI6-nm
  10. Amy Koenders – https://wp.me/p2SFwf-frW

Cards from the Designer Tin of Cards Project Kit

Some cards from the Designer Tin of Cards Project Kit – quick and easy cards with a bit of variation.

Hello again. 🙂 I’ve had interest in a blog post about one of my birthday cards, so I thought I’d do up a quick blog post about it and a couple of others I made from the same kit.

The kit in question is the now-retired Designer Tin of Cards Project Kit from Stampin’ Up. When I was on vacation this past summer, I took an evening and mainly made up the cards the way the kit suggested, with little variations to the cards here and there. I didn’t add the sentiments at the time because I wasn’t sure what I would need them for and I didn’t have all my options in front of me anyway. So little by little I’ve been picking out of the batch and finishing them to send as needed, with some still waiting.

All my blue-and-white-and-gold ones have gone to the local gift shop for sale, and they had different sentiments. I used one of the masculine looks for my dad’s birthday. I used the banners/garlands base for another relative’s birthday and added some llama and cactus paper elements from a UK magazine I had with me. (I still have two of those bases to create with, actually.) I sent at least one of the coral hibiscus cards to the gift shop, and one went for a friend’s birthday. I used the “Celebrate Your Day” and “Sending Love” sentiments from the coordinating stamp set. I still have two coral and one masculine card to sentiment yet.

I didn’t used to be very fond of the kit idea in general because they’re usually too simple for my preferred style of details. But as I get busier, I have seen how useful they can be for when I want to send a handmade card but haven’t had extra time. Also, now that I’m constantly making cards for the gift shop, it’s been nice to fall back on ones that are faster and easier to make without taxing my design skills. I’m beginning to let go of the need to have everything perfectly perfect and just the way I like it. I simply don’t have enough time to keep up with all I’d like to do in this life. They need cards, so I must make them and not fuss around. Besides, some people really prefer the simpler, “to the point” cards rather than all the detail and fluff I like, so this way I hope to reach a bigger audience in interest. 🙂 For ones I send personally, I like to create cards with the recipient in mind. But for the shop, I don’t know who is buying them or who they are for. So the kits are beginning to work for me there. (And if any of the kits make it to the clearance rack, they’re even cheaper, which I also like.)

The kit coordinates with the Designer Tin of Cards stamp set, which I used for a few of the cards but not all. It was supposed to be used to make a filing system of cards on tabs, with the tin to hold everything, but I chose to use the sentiments rather than the tabs.

I’ve added in some of the finished cards as examples for you to see what the kit was like. Evidently I didn’t take all the pictures I should have. 🤦‍♀️ But if I find other pics, I’ll update the post with them.

The Designer Tin of Cards stamp set.
Sentiment from the “Birthday Wit” stamp set, with Pacific Point ink, gold sequins, and gold washi tape.
Sentiment from Blended Seasons stamp set, with Night of Navy ink.
Unbranded happy birthday die with blue-and-white card base, vellum, gold-edged tag, gold sequins, gold washi, white twine, and a blue flowered die-cut all from the kit. I stamped the flower on the envelope with the coordinating Floral Phrases stamp set in Night of Navy ink.
Blue flower die-cut and gold washi tape from the kit.
The only additions to the kit here were the Martha Stewart cake sticker and the gold-foil sentiment from a Spellbinders die. The kit even included paper clips!
Ink is Night of Navy. Stamp is from MSE.
In this gift-shop pic, one of the other blue-and-white ones can be seen with the sentiment “Best Wishes” in gold foil. The die is from a UK magazine. (Two other “kit cards” are also in the picture.)

Thanks for reading! If you have any questions about how I created something, just leave me a comment. 🙂 And stay tuned for another blog post about a “love” card for a blog hop. 🙂

If you need any papercrafting supplies, I’d be happy to become your Stampin’ Up Demonstrator! My direct store link is in my blog sidebar.

May your day be a happy one!

Personalized Wedding Card for Carolyn and Matthew

Throwback to a custom wedding card made last year for a couple I’ve never met.

In late 2015 I started accepting orders for custom-made cards. This fact still kind of boggles my mind. I never figured I’d be a cardmaker at all. I’m a scrapbooker–since the mid-nineties. Cards were confusing. Such a small canvas on which to put so much stuff! Give me a 12×12 page any day, thank you. But somehow with the purchase of my friend’s used Cricut, cards suddenly made sense, like that proverbial light bulb over the head. Someday maybe I’ll show those first three cards I made as I attempted to figure out the chirping machine.

So fast-forward a couple of years and suddenly I’m at the point of taking custom card orders…? Um, okay. If you say so. Indeed, it seems that’s what I mostly do now. Instead of creating cards for fun, for friends, for a local church group, for Hospice, etc., like I imagined I might do, family and friends and a particular lady in North Carolina have kept me very busy making cards for them ever since August 2015. And I’m grateful. (Though still boggling.) Here is one of the examples I made for a relative, so she could give it to a couple with a wedding gift. It is a twist on a version I made for my NC lady the year before that (why recreate the wheel if you don’t have to?), but in this version, I personalized it with the recipient couple’s names.

I used a premade, glittered card base from DCWV (5.5×5.5 size), added some light blue/grey patterned paper on top of it as a mat, and then ran some dark blue Recollections paper through my Fiskars handheld (hand-cranked) paper crimper tool. Their wedding color was dark blue, and I thought it would pair well with the Soft Sky color I’d used in the earlier NC version, which was still in my head.

On top of the now-corrugated dark blue paper, I placed a die-cut I’d made from a local friend’s Bloomin’ Heart Thinlits Dies from Stampin’ Up (she and I share supplies so we don’t have to buy as much individually and then have an excuse to get together to craft!). I used Stampin’ Up’s Silver Glimmer Paper for the heart – and found out the hard way (i.e., remembered) that it is best to cut on the back side of that glittered paper rather than trying to get the die to cut through the glitter on the front. (Let’s just say “Lesson learned”!)

2016-08-25 16.19.30

I decided I didn’t like the look of it by itself on the corrugated paper, not to mention that it is a delicate thing and would be hard to glue on top of the corrugation, so I glued the heart die-cut to another piece of the dark blue Recollections paper (that I did not run through the crimper). I then stamped out the little matching flowers of the corresponding Bloomin’ Love photopolymer stamp set in Soft Sky ink, die-cut them with the matching thinlit, and glued them on top in the appropriate places. I actually found it difficult to die-cut those without one edge or the other slipping and not staying centered where I put it. I have a number of rejects I didn’t deem “good enough” for the card. Must need more practice.

Before I glued the heart die-cut down, I laid it out to see where I wanted it, marked it, removed it, and then wrapped some Soft Sky Seam Binding ribbon twice around the corrugated paper and tried to tie a bow off to where the side of the heart would be. This step was trickier than I thought it would be, but I do like the effect. And I used up some of my seam binding ribbon, which pleased me immensely. I think it’s pretty as a whole, but I struggle with using it because it is so delicate. I feel like using the word “fragile,” actually. It catches on things easily, gets holes easily, and is almost see-through. I feel like glue or strip tape can be seen underneath it as well, so I have a hard time finding ways to use it that aren’t simply bows. So this worked. (And after I use up my seam binding stash, I will never buy any again.) I think I actually made the bow separately from the ribbon wrap because I couldn’t get it to lay right. I believe I attached the bow with Zots after gluing down the heart.

Then came the fiddly stuff. I stamped the tag that says “Always” from the retired SU Too Terrific Tags set in Soft Sky, cut it out (I don’t own the matching punch), and set it aside. Next I got out my retired Word Window punch and took it to some white cardstock. I then used some very retired SU Brilliant Blue eyelets from way back when, with my Crop-a-Dile at the tops of the “Always” tag and oval windows. I hand-wrote the couple’s names (more than once) and strung the three tags from the top ribbon with some SU Silver Baker’s Twine. I actually double-strung the “Always” tag to keep it the direction I wanted. And then because it was still not cooperating, I stuck a pop-up dot to the back of it and told it to stay put. The names still dangle sweetly as I imagined.

2016-08-25 16.20.36

The inside of the card was simpler. “The best is yet to come” sentiment came from my retired SU “Best Thoughts” Hostess stamp set, which I stamped on white cardstock in SU Night of Navy ink and punched out with my retired SU Decorative Label punch. I edged around the punch with my matching Night of Navy marker to highlight the edges since it was white on white. Then I stamped the “May your love” sentiment from the current SU Floral Phrases stamp set. (Yes, I do have some current items! 🙂 )

All in all, I was pleased with the way this “version 2” card came out. Just for fun, here’s “version 1” that went to NC, in Soft Sky, kraft, white, and Crumb Cake. Version 1 also uses some distressed, stamped-on canvas.

2016-05-14 15.22.02

2016-05-14 15.23.41

Thanks for stopping by! Hope I’ve given some inspiration for your own wedding cards. 🙂

Pat's Blog Site

One place to fit it all!

Stamp Dabbles

Donna Leonard | Independent Stampin’ Up! Demonstrator | Huntsville, AL

Niya Scrap

Démonstratrice indépendante Stampin' Up!®

From Pole to Pole

Adventures in the Land of the Pierogi

Stampin' in the Meadows

Akiko Sudano - Independent Stampin' Up! Demonstrator Downingtown, PA

Creative Stamping Designs

Karen Ksenzakovic, Independent Stampin' Up! Demonstrator in Somerville, NJ Let's make some cards!!

Stamp it up with Jaimie

Helping you find a stress free creative outlet through paper crafting.

Stamp With Amy K

Amy Koenders, Independent Stampin' Up! Demonstrator in Mendham, New Jersey...Let's make some cards!

The Daily Post

The Art and Craft of Blogging

WordPress.com News

The latest news on WordPress.com and the WordPress community.

%d bloggers like this: